This is my first stick ever, and the first time I've ever modded one, and it just so happens that I wanted something complicated. Per my thread in the Juri forums, I wanted a better physical layout to make playing with fireball stores easier. Of course, the FightstickPro isn't the easiest stick to mod, especially because I had to drill into the metal top plate. (I have zero experience drilling into metal. Drywall, sure.)
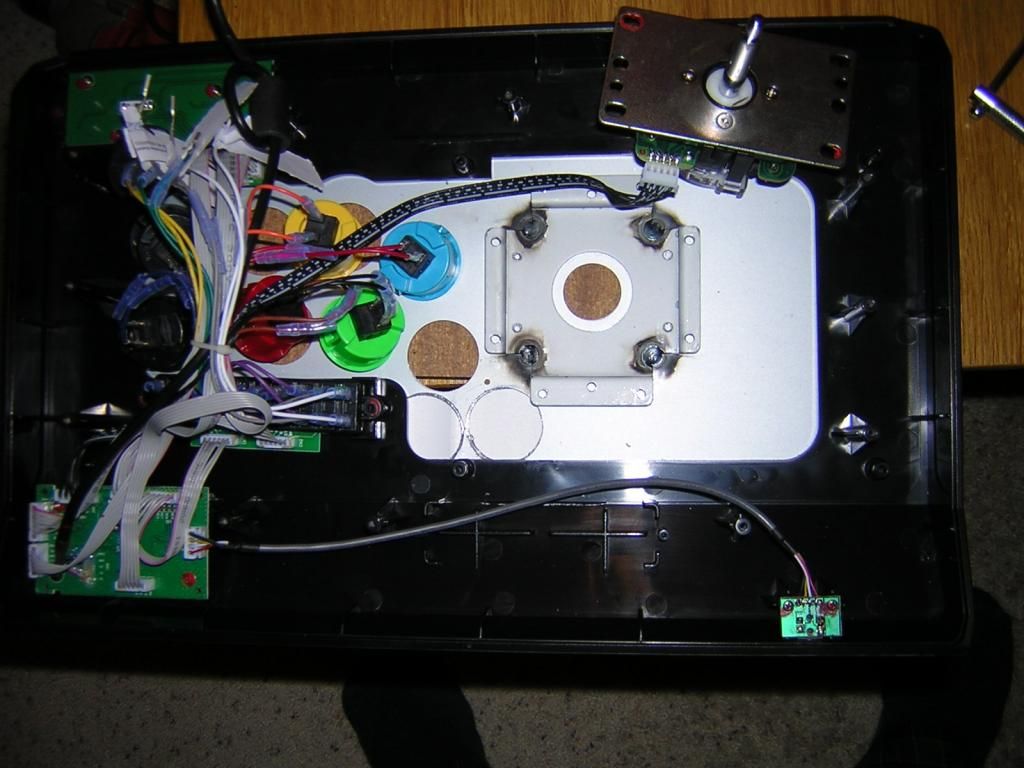
After disassembling the stick, I marked out where I wanted the new buttons. Didn't have much choice, but as long as they lay under my thumbs it's all good. This pic shows how the black plastic casing gets in the way, but at least the electrical parts weren't too close.
![blackplasticproblem_zps5fa79246.jpg]()
Finding a hole saw in metric was an ordeal. Finally found them at Eastside Saw (Seattle/Bellevue) so I didn't have to mail-order them and wait. (For those of us who don't know what a hole saw is, it's the orange piece in this pic. I didn't know either when I started. Thank god for Google.)
![HoleSawCuts_zps51a790eb.jpg]()
Underneath the drill is the metal rasp I used to smooth the burrs on the new holes. The black plastic bit was tougher because it was only a small piece. If it was large enough so the drill bit could "anchor" the hole saw while chewing on it it would've been much easier. Still, plastic is soft so the hole saw eventually chewed through it. (I unscrewed the nearby electrical pieces while doing so, of course.) Then the re-assembly began:
![InteriorDone_zpsf99b473a.jpg]()
I just barely missed the joystick mount, as planned. (Lucky me. I'm no professional!) I chewed a little too much plastic, but that's fine. Gives me room when I want to remove the button again. Also, I forgot that the bottom of the whole assembly has a lip on it that covers the bottom half of the yellow & grey buttons, so I had to spin them in place so the electrical wire coming into the buttons wouldn't be squeezed. Moving the electrical wires around involved some long-nosed pliers to tighten the quick-disconnect terminals, or a tiny flathead screwdriver to open them up a bit. (I had a problem with a wire just falling off the button due to gravity. Solved.)
Also pictured: octagon restrictor gate on the joystick.
Here's the finished product:
![finishedLowView_zps96f1d426.jpg]()
The artwork took a beating. The screws that hold the top plate to the black casing were underneath the art, and I peeled off the art without much thought to its reuse. Unfortunately, I couldn't get the adhesive off of the metal, so I replaced it, slightly off-center. I also decided to simply screw through it rather than try to hide the screws beneath it again. Someday I intended to change the artwork with something custom.
If anyone has questions about modding the Fightstick Pro, ask me. I became an accidental expert, of sorts.
-Ron
After disassembling the stick, I marked out where I wanted the new buttons. Didn't have much choice, but as long as they lay under my thumbs it's all good. This pic shows how the black plastic casing gets in the way, but at least the electrical parts weren't too close.
Finding a hole saw in metric was an ordeal. Finally found them at Eastside Saw (Seattle/Bellevue) so I didn't have to mail-order them and wait. (For those of us who don't know what a hole saw is, it's the orange piece in this pic. I didn't know either when I started. Thank god for Google.)
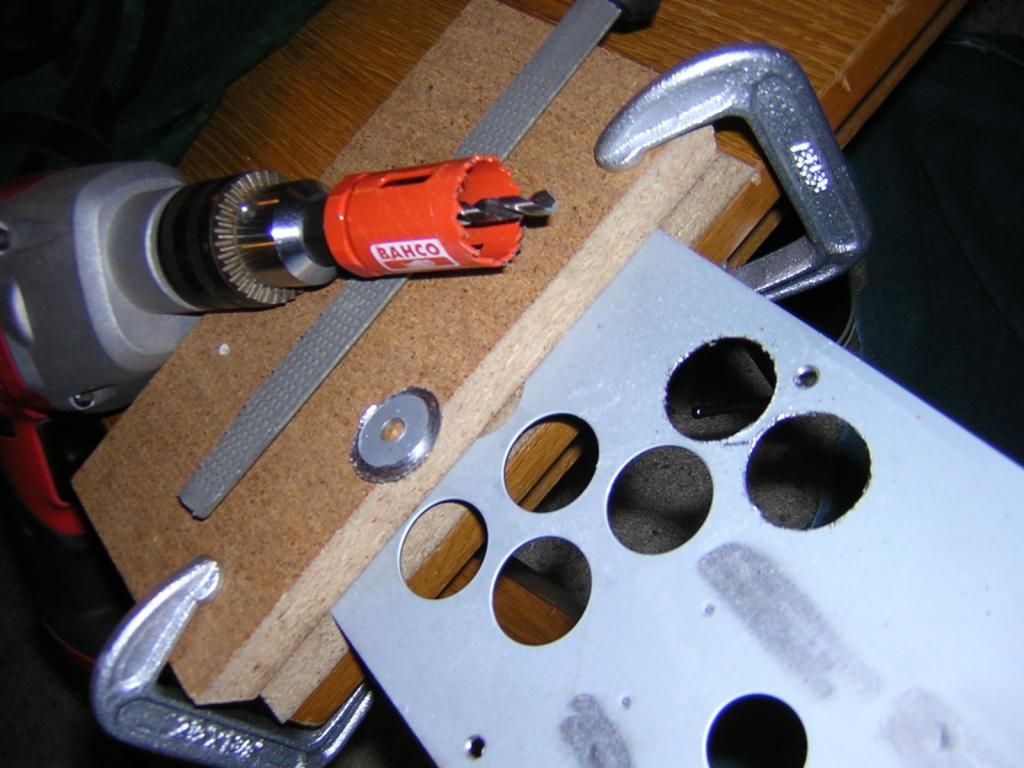
Underneath the drill is the metal rasp I used to smooth the burrs on the new holes. The black plastic bit was tougher because it was only a small piece. If it was large enough so the drill bit could "anchor" the hole saw while chewing on it it would've been much easier. Still, plastic is soft so the hole saw eventually chewed through it. (I unscrewed the nearby electrical pieces while doing so, of course.) Then the re-assembly began:
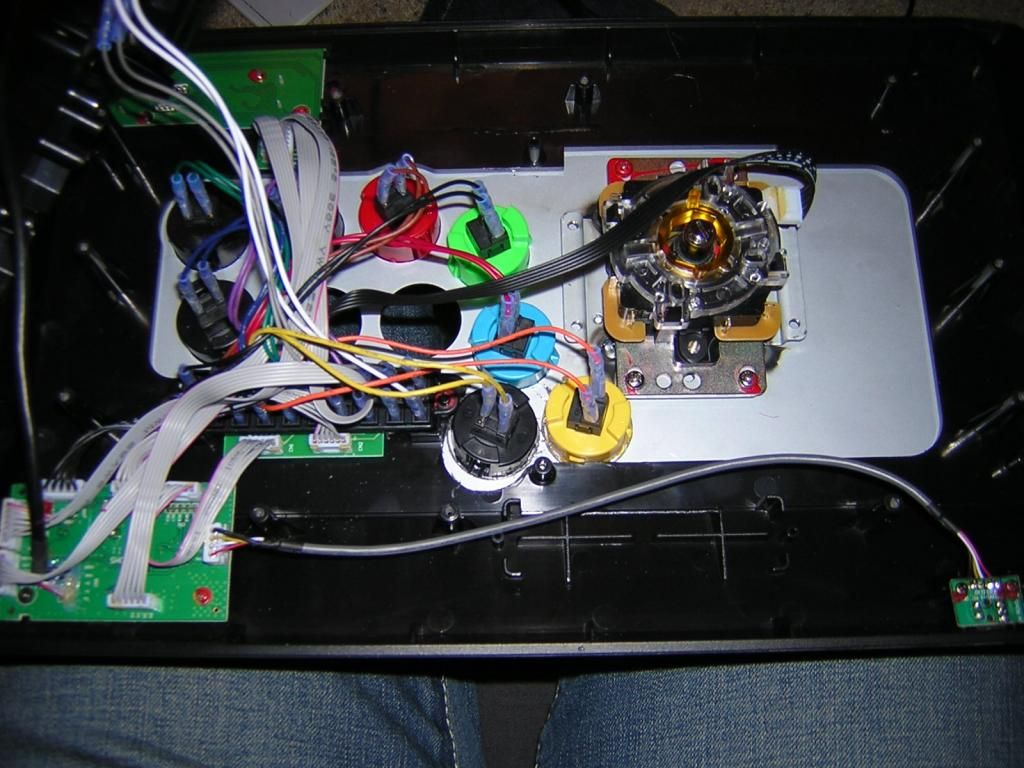
I just barely missed the joystick mount, as planned. (Lucky me. I'm no professional!) I chewed a little too much plastic, but that's fine. Gives me room when I want to remove the button again. Also, I forgot that the bottom of the whole assembly has a lip on it that covers the bottom half of the yellow & grey buttons, so I had to spin them in place so the electrical wire coming into the buttons wouldn't be squeezed. Moving the electrical wires around involved some long-nosed pliers to tighten the quick-disconnect terminals, or a tiny flathead screwdriver to open them up a bit. (I had a problem with a wire just falling off the button due to gravity. Solved.)
Also pictured: octagon restrictor gate on the joystick.
Here's the finished product:
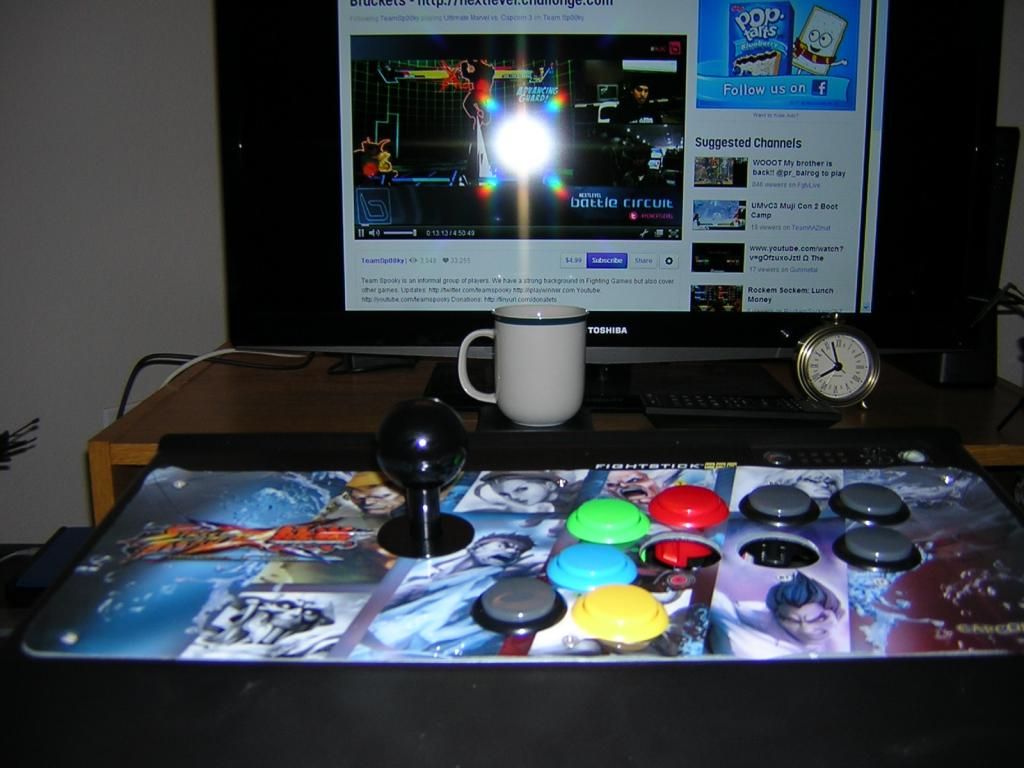
The artwork took a beating. The screws that hold the top plate to the black casing were underneath the art, and I peeled off the art without much thought to its reuse. Unfortunately, I couldn't get the adhesive off of the metal, so I replaced it, slightly off-center. I also decided to simply screw through it rather than try to hide the screws beneath it again. Someday I intended to change the artwork with something custom.
If anyone has questions about modding the Fightstick Pro, ask me. I became an accidental expert, of sorts.
-Ron