While there is plenty of info out there on Mayflash modding, I did a few unique things with mine, that I thought worth sharing. Plus I'm proud of myself for working through countless hurdles and wanted to show it off. A bit of a learning experience for me, so forgive me if some of my realizations and insights are a bit noobish.
The idea was born when I recently picked up a sega genesis used, from the local retro vg store. Add to that an Everdrive MD, and I quickly became dissatisfied with inferior controls, since I am accustomed to Sanwa everything. And as we all know, Chthulhu and other current offerings on the market don't work with the Sega Genesis.
I first purchased an official Sega Fight Stick (model MK-1627), with hopes that it would palatable. Pure garbage.
I then got a Tototek PS2-to-Genesis adapter, with hopes it would work with my Chuthulhu/Imp dual mod sticks. It did not. I then tested a PS2 dualshock controller with the Tototek, and it worked. I did a bit of research on the Mayflash, and saw some tuts on modding them, and thought I would give that a shot.
When I got the Mayflash, I thought I would give it a try, and if it worked with the Tototek, maybe just keep it stock. It didn't. So, the mod was on.
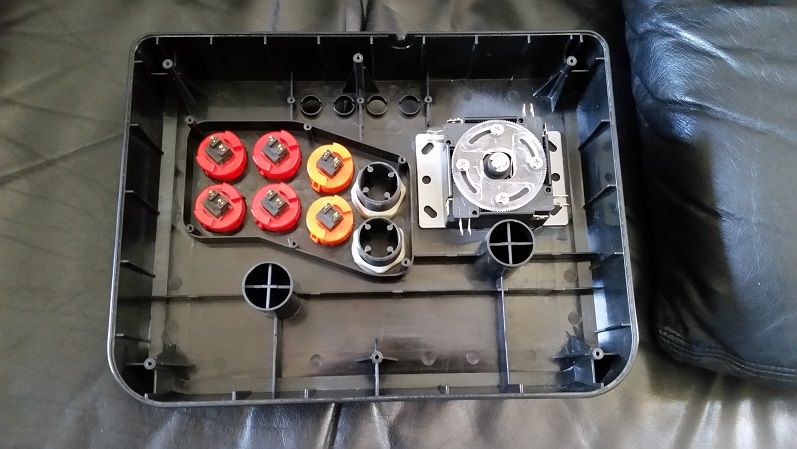
As you can see, I deleted the stock joystick housing, and sanded down the inside of the case until it was relatively smooth. A $20 dremel wannabe rotary tool from Harbor Freight made quick work of the deletions and reaming out the stock holes to accept Sanwa (30mm) buttons. Not wanting bolts sticking through the face of the case, and unable to make the JLW that I had laying around work with the stock mounting, creating a flat mounting surface and healthy quantities of super glue to secure the JLW was the only option.
![1%20case%20mods%20complete.jpg]()
![2%20ready%20to%20start%20working%20on%20the%20engine.jpg]()
I first tried to use the PS2 dualshock PCB. I tried the solderless mod, and couldn't get it to work to save my life. The particular model of PS2 DS that I had was not represented by any information (with pinouts) that I could find online. After much frustration with that, the light bulb finally went on: "Why am I not using the PCB out of the official Sega Genesis fight stick?" That was the game changer.
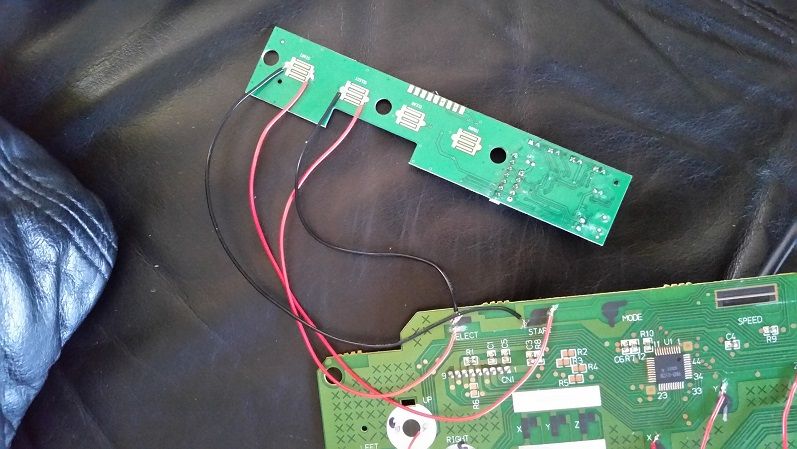
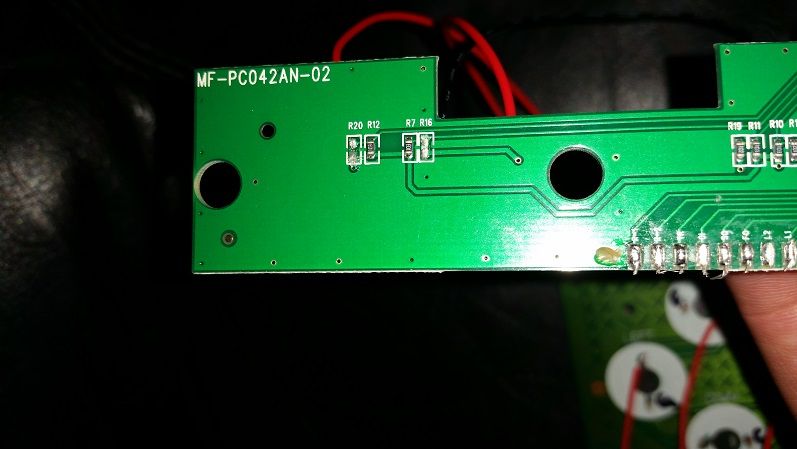
Once figuring out the circuitry and exposing the necessary traces, soldering and wiring went pretty quickly. One thing that took a little extra attention was getting start and select to work. The stock Mayflash "brains PCB" has the contact points for start and select. So, I had to make that PCB work in tandem with the Sega PCB. A bit of testing and troubleshooting lead me to realize that the circuits from the brains on the brains PCB had to be broken. De-soldering a micro resistor in each button's circuit (R16 and R20) fixed that up nicely.
![3%20brains%20pcb%20re-purposed.jpg]()
![4%20desolder%20these.jpg]()
![5%20ready%20to%20start%20connecting%20to%20controls.jpg]()
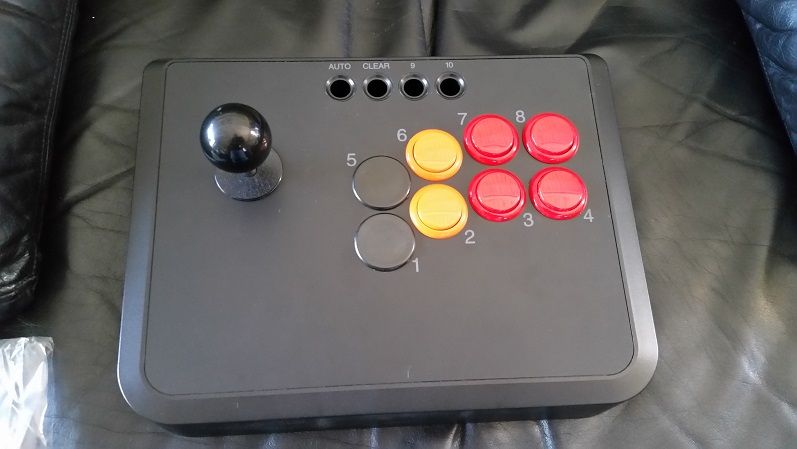
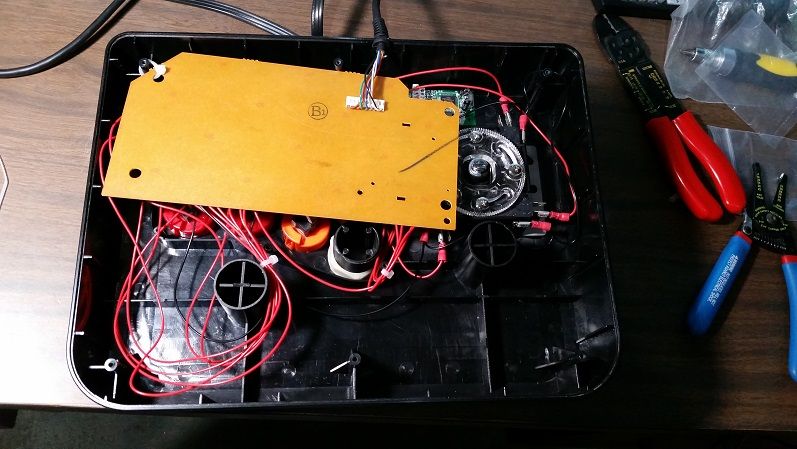
Real estate was a bit of a challenge. The Sega PCB is pretty big, as you can see. The cord's ability to interface with the Mayflash case also limited the PCB's placement within the case. At the end of the day, the "brains PCB" secured back into its original place, and the terminals on the button microswitches had to be bent to allow the Sega PCB to sit cleanly within the case.
![6%20barely%20fitting.jpg]()
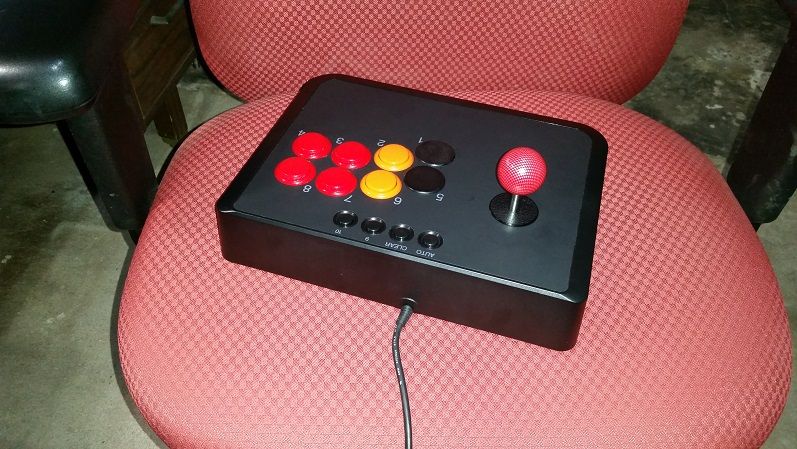
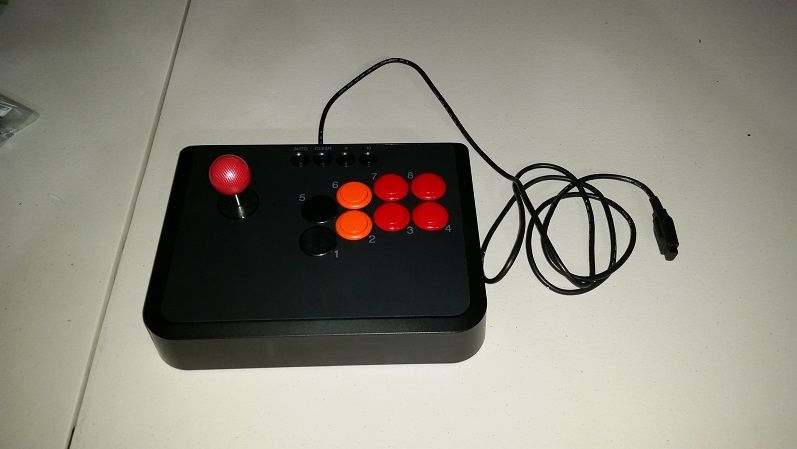
The stick works perfectly, and I'm stoked that the engine is stock and official Sega hardware, and not requiring an adapter or emulating.
![8%2020161015_200839.jpg]()
![7%2020161015_201941.jpg]()
The idea was born when I recently picked up a sega genesis used, from the local retro vg store. Add to that an Everdrive MD, and I quickly became dissatisfied with inferior controls, since I am accustomed to Sanwa everything. And as we all know, Chthulhu and other current offerings on the market don't work with the Sega Genesis.
I first purchased an official Sega Fight Stick (model MK-1627), with hopes that it would palatable. Pure garbage.
I then got a Tototek PS2-to-Genesis adapter, with hopes it would work with my Chuthulhu/Imp dual mod sticks. It did not. I then tested a PS2 dualshock controller with the Tototek, and it worked. I did a bit of research on the Mayflash, and saw some tuts on modding them, and thought I would give that a shot.
When I got the Mayflash, I thought I would give it a try, and if it worked with the Tototek, maybe just keep it stock. It didn't. So, the mod was on.
As you can see, I deleted the stock joystick housing, and sanded down the inside of the case until it was relatively smooth. A $20 dremel wannabe rotary tool from Harbor Freight made quick work of the deletions and reaming out the stock holes to accept Sanwa (30mm) buttons. Not wanting bolts sticking through the face of the case, and unable to make the JLW that I had laying around work with the stock mounting, creating a flat mounting surface and healthy quantities of super glue to secure the JLW was the only option.
I first tried to use the PS2 dualshock PCB. I tried the solderless mod, and couldn't get it to work to save my life. The particular model of PS2 DS that I had was not represented by any information (with pinouts) that I could find online. After much frustration with that, the light bulb finally went on: "Why am I not using the PCB out of the official Sega Genesis fight stick?" That was the game changer.
Once figuring out the circuitry and exposing the necessary traces, soldering and wiring went pretty quickly. One thing that took a little extra attention was getting start and select to work. The stock Mayflash "brains PCB" has the contact points for start and select. So, I had to make that PCB work in tandem with the Sega PCB. A bit of testing and troubleshooting lead me to realize that the circuits from the brains on the brains PCB had to be broken. De-soldering a micro resistor in each button's circuit (R16 and R20) fixed that up nicely.
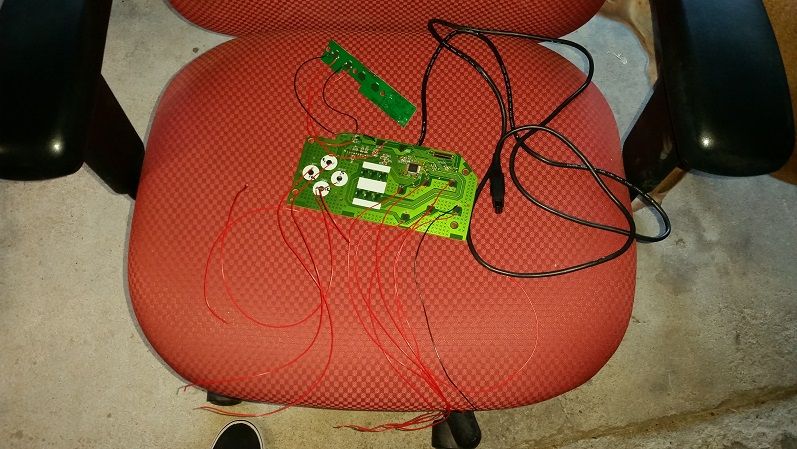
Real estate was a bit of a challenge. The Sega PCB is pretty big, as you can see. The cord's ability to interface with the Mayflash case also limited the PCB's placement within the case. At the end of the day, the "brains PCB" secured back into its original place, and the terminals on the button microswitches had to be bent to allow the Sega PCB to sit cleanly within the case.
The stick works perfectly, and I'm stoked that the engine is stock and official Sega hardware, and not requiring an adapter or emulating.