Quantcast
Channel: Tech Talk — shoryuken
Viewing all 8072 articles
Browse latest View live

The "Stickless Arcade Stick" Thread.

$
0
0
It seems wrong to discuss competing/custom products in the Hitbox thread.

This thread is dedicated to the use/discussion/learning of these controllers outside the realm of the Hitbox.

I've got a custom build on its way to me now. It's a 6 button instead of 8, but the left hand layout is nearly identical.

How have y'all been liking these? What do you think about their impact on The Scene?

What first interested me in them was precision. You won't end up trying for a dragon punch and getting a fireball because of a slight error on your part as long as you know how to operate the controller. Now, you could say the same about knowing how to use a joystick - you should get the DP if you go for it. That's fair, but you're still dealing with Operator Error even at the highest levels of execution. The "SAS" (I don't know what the preferred nomenclature is) seems like it will nearly eliminate this problem once you learn it well.

Thoughts?

You know you spend too much time Modding

$
0
0
So back long ago when I first created an account on SRK there was this thread.
http://forums.shoryuken.com/discussion/126889/you-know-your-modding-obsession-has-gotten-out-of-control-when

It was a great thread where we shared various antidotes and shit
I an bring it back, but instead of Necro a dead thread
kqZ8yeU.jpg
I am going to start a fresh new thread

So okay I will start:
  • First thing you do with new electronics is void the warranty
  • When you got enough spare parts to build another stick or three
  • When your boss sends you home for your soldering iron and it isn't apart of your job (for reference I used to work in a grocery store)
  • When you look at some of the Indestructible or Hack-a-day articles and say "with confidence" I did that when I was eight years old.
  • When most of your friends retro game consoles has been repaired or modded by you
  • You know what electronics are Dishwasher safe - LINK

[FIXED] Hori Real Arcade Pro V XBONE PC issues, haaaaaalp!

$
0
0
Got a brandnew XBONE stick in the mail today to use with PC since i dont have an XBONE. My older hori sticks all work with windows 7 x64 fine.
After installing the official m$ Xbone controller driver the status of the stick changes from "unknown hw" to "xbox gaming device". However the stick itself nor the buttons are recognised in either ultra SF4, xpadder or any emulator i tried.
There is no hori driver as of now. Did anyone manage to get this stick to work on windows? Is there any hack, inf, or any solution available anywhere? Thx.

xbone.jpg

Undamned's USB Decoders (USB to JAMMA, etc.) !

$
0
0
DSC08853_CROP_RESIZE_zpsd386d24c.jpg

Intro:

Well, folks, it's been a long time coming, but I'm really close to finally getting these things out there and into your hands!

Description:

This is the opposite of boards like Toodles' Cthulhu or the PS360 which take the button/joystick wire signals and turn them into USB. This takes input from your USB 360 or PS3 controller and turns that into button/joystick wire signals. You could use this to control any number of projects from Superguns to robotics, to anything you can imagine that you'd like to control with your digital 360 or PS3 joystick!

These are essentially the same circuit and firmware as that of the UD-CPS2 (ran at multiple major events including ST Games @ EVO, The Fall Classic, etc.).

Target price is $35 for the Screw Terminal version and $40 for the DB15 version.

Screw Terminal Version Features:

- Terminal Blocks for solder free wiring (signal layout intentionally similar to MC Cthulhu so you can mate them for fun things like TE stick on SNES)
- USB A Socket
- Alternate header for USB signals - for people who don't to use the on-board USB socket
- Indicator LED - bi-color, red/green
- Alternate header for LED signals - for people who don't to use the on-board LED
- Pull-Up Selection Jumper - allows for pulling button/joystick signals up to +5V or +3.3V, depending on the application
- Player Select Jumpers - tell the joystick to light up the appropriate controller LED (can be set for P1-P4)
- Custom button mapping - for 6-8 action buttons
- Firmware can be updated via USB for future features/improvements

History:

Here's what @Rufus did with a couple boards which were used at SoCal Regionals, early last year:

DSC08604_CS_zps68321334.jpg
(sweet 3D printed case by @Rufus not included)

SCR_2013__zpsdb03f7e7.jpg
(running on a supergun at SoCal Regionals 2013)

Future:

I will continue to improve the firmware features as I have time.

Let me know if you have any ideas or suggestions!

Resources:

User Manuals / Firmware - http://udgametech.blogspot.com/p/firmware.html

Ordering:

http://www.paradisearcadeshop.com (search for "undamned")
https://www.akishop.jp (search for "usb decoder")

-ud

NES Controller Hack for the Sega Genesis

$
0
0
I saw Videos on YouTube about Hacking NES Controllers for the Master System/Atari 2600/7800

But the Genesis is hard to do with the Multiplexer Chip, I ask here..I knowpeople here for Mod fornewer systems,

I know it work only for 3 Button Games

SegaJoypadPinout_zpskpu3auvi.jpgGenesisJoystickPinOuts_zpsq3wup4l9.gif

Cerberus: Unleash the hellhound in your arcade stick

$
0
0
Cerberus-300x194.png
Picture-004-300x225.jpg
Cheesy title.. I know >: )

The Cerberus is, ultimately, a revamp of my TEasy Strike/TEasy Mod. It's goal is to provide the user with solderless modding options for their MadCatz Xbox 360 T.E. arcade sticks to allow them access to PlayStation 3 consoles for "dual" functionality in a single stick.

However, it may overall result in the same basic principle to give the user a dual mod with next to no effort, it's method for accomplishing that is far different. The TEasy Strike/Mod used spring loaded pins to access the original signals, the Cerberus does not. Instead, it utilizes undermounted sockets that interface with the original board. This method allows for a more solid installation, and also is actually easier for the user to do since there is little alignment required. The top right of the board has an alignment hole to see the top right most mounting screw through to give you one alignment point, as well as the board being thinner than the original Xbox 360 PCB so that the user can actually see the connection's alignment while it's happening.
Picture-008-300x225.jpg
The Cerberus board mounted to the original Xbox360 enabled PCB.
Picture-009-300x225.jpg
Alignment hole to view the mounting screw.
Also pictured are solderable points for Ground and VCC for usage with other modifications such as LEDs and optical joysticks.
Picture-010-300x225.jpg
User’s view when installing, you can actually see the connection for instant feedback on alignment.
As you can probably tell, the USB cable connection points look different this time as well. They are in fact IDC terminals (Insulation Displacement Connection), which make it so that you only have to remove the outer sheath of the USB cable. The 4 wires (VCC, D+, D-, GND) do not have to be stripped. Simply inserted into the terminals and closed tightly with your fingers, you don’t even need a flat head screwdriver like the TEasy did to punch the terminals down. They’re smaller, sleeker, and do a bang up job for ease of installation. Although they are easier to use, it’s good to note that extra care should be taken to ensure they are down all the way, which I will show an example of in the Installation section.
Picture-006-300x225.jpg
IDC Terminal front view. Note that “USB IN” is only labeled on the prototype, you will see “X360 IN” for this particular pair in the final version.
Now, the name Cerberus is not just picked because it sounds cool (although I do really like it). The PCB does in fact have 3 accessible faces for the user.
  1. Bottom Face – Accesses the original Xbox 360 PCB
  2. Top Face – Accesses the JST connector harnesses that go to the rest of the arcade stick.
  3. Inner Face – This is a special advanced face that the user can access by soldering directly to.
The third (inner) face, has been specially planned out for advanced users. You may notice that all of the components are centered into a small area of the board. The reason is shown below:
Picture-005-300x225.jpg
Third face shown, the silk screen outline denotes cut lines. The gold pads are solderable for advanced usage.
The top/bottom board components that allow the PC/PS3 controller circuit to function are smashed into a tiny area to give the more savvy user the ability to literally cut the board down to the size of a quarter. This allows the user to install this board into not just it’s standard function of MadCatz Xbox 360 T.E arcade sticks, but into virtually anything.
Picture-002-300x225.jpg
Bottom side for easy soldering, the cut away section to the left.
Picture-003-300x225.jpg
Top side, denotes what’s left after cutting, the heart of this board.
*It should be noted that although the advanced operation is available, once you begin cutting the Cerberus PCB you void any and all warranty/support. This is for advanced users with the abilities required to perform such modifications.

*Also note that if you are using the cut down board and wish to use the Player LED signals. They are controlled via open collector configuration for usage with Common Anode LEDs. There are 4 0402 resistor positions (R2, R3, R4, R5) that you may wish to use. The original components are 0 (zero) Ohm resistors, so jumpers. Do NOT connect LEDs directly to these signals as you could cause irreparable damage to your setup.

Picture-032-300x225.jpg
Install FAQ Section:
Spoiler:
First make sure the pins are lined up nicely and try again. You can see where the pins are rubbing into the plastic of the connector on the Cerberus and adjust by that. Then if that doesn't work try out what mistcore has done below:
Klbti.jpg
This was my solution to installing the Cerberus successfully.
The JLF connector was rubbing up against that white guide, so I snipped the side of the guide.

Features

The Cerberus‘ list of current features are as follows:
  • PC/PS3 Functionality
  • Player indications for PS3 (Player numbers will appear on the guide ring of your arcade stick after a standard instllation)
  • LS/RS control by switching the control panel of the arcade stick
  • Auto-detection on supported systems
  • Forced passthrough mode for Xbox360 mode. Hold 1P (x) while plugging into allow this.
  • Forced PC/PS3 mode for debug/forced mode on PC. Hold 1K (a) while plugging in. (FW 1.01)
  • S+S=H ability on both PS3/360. Pressing a dedicated Home button will disable this. (FW 1.01)
  • Updatability through a USB bootloader for any firmware upgrades/bug fixes in the future. Hold START while plugging into your PC to access this mode.
Upgrading your firmware

TODO – Firmware update section

For those who know how you can upgrade the board via Atmel's FLIP DFU. The chip is an Atmega32U4

Firmware Downloads:

v1.01
  • Added code for S+S=H with a ~1/3s delay, dedicated home will disable the function. Will show up on new plugins with 1.01 as the version.
  • Also gave it a forced PC/PS3 mode, use LK to do so.
Arcade Stick Compatibility

Due to the measurement based install of the Cerberus. It will only fit SSF4 T.E. arcade sticks and newer. This means round 1/2 and SE sticks are not compatible. Obviously the cut down board does not follow this rule.
For quick reference if your stick is compatible, look on the PCB. If there is a KGND signal on the top row, it is compatible. The ONLY exception to this rule is BrawlSticks which are not compatible.
Quck Reference List of some compatible sticks, variants of these exist and more than these are compatible: *For the Fightstick PRO and the Soul Calibur V sticks, an extra step or two is required. Please see the installation section for details.

When you purchase a Cerberus, you will receive the following:
1 x Cerberus PCB with reference sheet for installation.

Assembled Cerberus ($40.00) :

Picture-037-300x225.jpg

Advanced Cerberus (Advanced Users, Special Request ONLY, $30.00):

Easy print reference for the bottom of the board

Picture-004-300x225.jpg

Picture-006-300x225.jpg

Unfortunately I pulled a stupid and when I went to process the board files, I used the wrong file to do so. Luckily the only thing that is botched is the bottom designators, the silk screen still remains. This will only affect advanced users, since the top silk screen/labels are all picture perfect and have been improved upon since last build.
I will make a downloadable/printable image that has these designators for easy reference, they just won’t be ON the board this time, sorry guys.

One possible extra use for the advanced version is a cheap fix for a 360 TE that has a busted PCB. Just remove it and swap it with the half assembled one, and voila you have a working stick again. With a little fiddling you can get this to work with round 1/2′s for a fix also since it’s no longer reliant on attaching to another PCB.

Head over to the Cerberus page of my website for the latest updates/downloads/install notes.

Diodes basics 101

$
0
0
Disclaimers:
It is the end user's responsibility to see to and to carry out proper implementation their own repairs and modifications. Ultimately the end users hold responsibility for how they implement their own repairs.
This guide assumes you are familiar with basic understanding of electricity and than you can build a simple electronic circuit. I am only going to cover the basics and what fits in the preview of Tech Talk.

What is a Diode?
The ideal diode is to control the direction of current-flow. Current passing through a diode can only go in one direction, called the forward direction. Current trying to flow the reverse direction is blocked. They’re like the one-way valve of electronics. –Sparkfun
That a Diode has low (ideally zero) resistance to the flow of current in one direction, and high (ideally infinite) resistance in the other. –Wikipedia
A Diode can be made from a vast selection of materials, the actual semiconductor as well as the outer case.

What type or diodes are out there?
Regular/Signal Diodes
Zener Diode - useful in creating a reference voltage or voltage stabilization
Diode Rectifier – often used for reverse voltage protection
Bridge rectifier (also known as a diode bridge) – often used to converts AC to DC, can be purchase as a single component or made from 4 or more diodes.
Schottky Diode - known for their low forward voltage drop and a very fast switching action
Light Emitting Diode or LED – used for low voltage light. Some LEDs produce infrared or ultraviolet light instead of visible light.
Photodiode – a Diode that converts light into electrical current. Traditional solar cells are an example of a photodiode. So are Diode light sensors.
Thermal Diode – use to electronically monitor temperature

Why we [at Tech Talk] should care about Diodes?
Other than the obvious LEDs for lighting, diodes are often also used for pad hacks, rectifiers on power supplies and other applications when we want to electrically isolate something.

How to “wire up” a diode?
Every diode has two (2) terminals and they are polarized. The two terminals are the anode (+) and cathode (-). Current flows from the anode end to the cathode, but not the other direction.

o9jYU79.png
As you see in the image above their is the symbol for diodes use in circuit diagrams as well as two illustrated examples of a diode.
The stripe on a diode identify the cathode end of the Diode.

Pad Hacks
Some PCBs for Dual-Mods require diodes to be installed. The Diode is soldered to the signal line/pad/terminal of the PCB with the other end going with that button signal line to the rest of your Dual mod.
The anode (-) end of the diode is to be soldered to the PCB and the cathode end going towards your buttons.

For your particular board please address your boards relevant guide/thread.
Thirdparty PS4 Padhack options - http://forums.shoryuken.com/discussion/194825/third-party-ps4-padhack-options/p1

For those who don't know what diode to use, almost any normal diode would do. You can get away with using a Zener, Schottky or rectifier diode.
Don't worry about the amperage for the diode as the PCB should operate in lower range that the maximum amperage for most diodes.
I recommend a simple signal diode, examples are Digikey, part # : 568-1360-2-ND or Mouser Part #: 771-1N4148-T/R

Diodes can also be used in conjunction with other components to make a PCB that not common ground to be compatible.

LED Lights
The two terminals of a LED still have the same designations as other diodes, a anode and cathode end but there markings are different.
hs0SAIb.png

Almost always the Longer leg of the LED is the Anode and the shorter leg the Cathode terminal. The LED it self will also have a flat side indicating the cathode side.
SMD LEDs will have a mark with resemblance to the symbol for diode denoting the cathode end.
You also always want to include a resistor with your LED wired to the cathode end of the LED. This will prevent the LED from burning out

You can follow Ohms Law (V = IR) to find the resistance needed. So we follow the formula R = (Vs - Vf) / If R = Resistance in Ohms
Vs = Supply Voltage (ex. 3.3V)
Vf = Forward Voltage or Voltage Drop
If = LED Current Rating (ex. 20mA or 0.02A)

Or you can use a Online LED Calc http://bfy.tw/1qXp

Forward or drop voltage should be included in your LEDs data sheet or packaging. Some will give both a min and max values, use the average between these two.
Typically the forwards voltage goes by light temperature or color

The Supply voltage is the voltage your supplying from your board or batteries.

You can cheat with this guide if you do not know or ca not find the forward voltage but this is not 100% accurate and is a generalization of what require for each color.
As LEDs from different manufacturers will have different specs with different forward voltages.
NM9w7H5.png

There also guides online to how to find your Forward voltage for a LED.

Once you find your resistance value needed know that you can go with a higher Ohm resistor with the only side effect being how bright the light is.
You never want to go with a lower Ohm resistor. So for example if you came up on the math needing a 43 ohm resistor but can't find a 43 ohm resistor you can use the next closest rounded up like a 50 ohm resistor.

I come back and edit the guide later, if you see something wrong PM me so I can make any changes.

MadCatZ PS3 TE FightStick: PC - Xp- vista- win7 32-64bit (read 1st post)

$
0
0
guide for users having trouble with The PS3 TE/SE and there PC's

tips
also if you run into problems try disconnecting other usb devices and try plug the stick in to the actual usb port.

if using a hub try plugging it in directly onto your computer

Note:
please play around with your usb connections do not plug the TE into any sort of hub.

having discovered not all chipsets support the ps3 TE/Se this is what you can do if your PS3 TE/SE does not work.

the PS3 TE is only compatible with UHCI (Universal Host Controller Interface), which is an Intel originated proprietary standard and far from universal. Any knowledgeable and experienced engineer developing a USB device knows and fully understands the differences between the various USB standards:

UHCI - USB 1.1 Proprietary Intel Standard
OHCI - USB 1.1 Open Standard
EHCI - USB 2.0 Open Standard

inorder to use you have to have a UHCI (Universal Host Controller Interface), i can personally recommend via chipsets as this was my solution and all that has bought pci cards with the via chipset have reported that it works.

ok guys,


i bought 2 pci cards because my nvidia chipset on my motherboard , was not registering button presses, or joystick movement, however it sees the stick.

pci card 1, belkin 4 5 port pci, nec chip on the board (presumming its a nec chipset), same as before sees the stick does not register.
21h3jb94BKL._SL500_AA200_.jpg


Pci card 2, cheap brand (maxvalue), via chip on the board (presumming its a via chipset), sees the stick and yes the buttons work ok.
41yR9j5gMXL._SS500_.jpg


so i have got it working at last and yes the problem lays within what chipset you are trying to plug the stick into, nvidia is not working from what users have posted before, i can say that the belkin nec chip PCI usb card is also not working, and possibly ati chipsets also.

this is the pci card that is working for me
http://www.amazon.co.uk/Max-Value-Port-Card-Only/dp/B000TV7GFC/ref=cm_cr_pr_product_top
and it is cheap

unlucky for me i boght a more exspensive brand and it didnt work
http://www.amazon.co.uk/Belkin-USB-Hi-Speed-5-Port-Card/dp/B000K7UN82/ref=cm_cr_pr_product_top

please also note, that the stick while working does not like a USB hub i have and needs to be plugged into the socket directly,as it dont register inputs through the hub i have.


[

teworking.jpg


Good luck guys
updated to cut alot of the confusion here is the solution

also works with SFIV for pc, no need to configure keys everything is mapped just fine.

tip for all look at the via chipset, make sure this chip is on what ever usb device you purchase


VIA-VT6212L.jpg

The Razer Arcade Stick Thread!

$
0
0
Recently announced Razer Arcade stick looks sleek but it seems to be only on the xbox. Also it doesn't look like it uses quick disconnects that we're used to, But a different kind that has both connectors in 1.
more info at their site, Don't forget to sign up for their beta Program!
Link: http://www.razerzone.com/bredtofight

EDIT:
List of suggestions:
Mandatory
Different Quick Connects for the buttons and stick
Common Ground PCB
Move the insides to the Bottom of the Stick
Move The Latch that Opens the stick
Make the height inside the stick taller so it can have parts that aren't japanese

Minor
Button Layout
Include Button Plugs

First wave of third party Xbox One padhack options

$
0
0
New options for adding XBox One to an arcade stick have emerged this month. There are 3 new xb1 third party controllers that were released this month. Two are made by PowerA: Xbox1 Spectra ($50) and Xbo1 mini ($40). One is made by PDP: Xbox1 Rockcandy ($40)
[update 2/3/2015] Added Horipad for xb1 to the list.

I will separate the info of each controller into the next three posts. I'll leave the first post as a summery and info for the trigger inversion.

20141029_215207.jpg


Rockcandy Pros
-Cheapest pad other than the mini.
- Comes with long white micro usb cable that has a breakaway end.
- Comes with 3 day Xbox Live Gold
- Comes with $10 PDP reward card...what that means IDK yet.
- Has an onboard micro usb jack.
Rockcandy Cons
- Triggers need inverting
- Size is in between the other two
- Much like the MS pad it has two pcbs that connect together. Better to remove the top pcb as you'll want to solder to the TP on the bottom.

Mini Pros
- Cheapest pad other than the rockcandy.
- Contact spots are easily read on front. Has alt TP on back, but labels aren't obvious
- Smallest pcb
- Can get cool colored usb cables
Mini Cons
- Triggers need inverting

Spectra Pros
- Can be hacked to also add led effects to clear buttons. Not as advanced as using a separate led controller board, but its better then nothing.
- Contact spots are labeled on front and for alt TP on the back
- Dpad pcb can be easily removed.
Spectra Cons
- Retail price is more expensive than the other two pads.
- Both sets of triggers and shoulder buttons need to be inverted. Not really that big an issue if using hex inverters though.
- Largest size pcb out of the three.

Horipad Pros
- No trigger inverting.
- Easy solder points.
- Pricing matches others.
- Has IR leds.
Horipad Cons
- Shape is kind of weird?
- Most likely have to order online.

The winner is the Horipad if you can get a hold of one as not having to do a trigger inverting is going to be more useful for most people. Otherwise its a toss up between the mini and rockcandy. Pretty much the rockcandy has a better deal if you buy it new as you get the extra lil freebies plus the onboard micro usb jack is nice too. The mini might be easier for people to solder to though.


Trigger inversion:
Since the triggers on all three pads are active high we will need to add a hex inverter to make them active low. We can reuse the same method that was used on the madcatz 360 pads that also had active high triggers. Note that in Toodle's schematic he used the A/Y pair 1 and 2. I will be using pair 1 and 6 to make wire routing easier.
schematicg.jpg%7Eoriginal.jpg

I'm using the 74HCT04N chip. Pins are labeled.
20141029_211653.jpg
I'll be using the dead-bug setup. Since its on its back all the pins will be flipped. It is important to remember this.
20141029_211723.jpg
Here is an example of the 10k ohm resistors soldered to the pins.
20141029_212112.jpg
Her is an example of 10k ohm SMD resistors soldered instead.
20141029_212524.jpg
Example of how it would be wired up to a Rockcandy pad. 1A would be wired to the sticks RT button and 6A would be wired to the sticks LT button.
20141029_220059.jpg

Buying a new laptop. What specs should i look for?

$
0
0
I'm mostly going to use it for heavy web browsing, stream to twitch with a external capture device, and minimal video editing. Basically, capture, trim and upload it to YouTube. No special effects are anything technical.

Photos of Cosplayers & Arcade Sticks/Arcade Machines (DONT IMAGE QUOTE & BE NICE)

$
0
0
I love arcade sticks and arcade cabinets. <3
I also love cosplayers. <3

Combining two of my favorite things for photos is something I get to do often at conventions.

Hope you find them as cool as I do! If you have any photos of cosplayers with custom sticks, feel free to post them! :-)


RULES:
1 - Don't image quote
2 - Please be nice. These are all people I've met in person and were nice enough to let me take photos of them with sticks/cabs.


HarleyQuinn-01.jpg
HarleyQuinn-02.jpg
KenRyu-01.jpg
KenRyu-02.jpg
Madoka-01.jpg
Madoka-02.jpg
Madoka-03.jpg
Morrigan-01.jpg
Ryuko-01.jpg
Sakura-01.jpg
Sakura-02.jpg
SakuraKen-01.jpg
SakuraKen-02.jpg
Yoko-01.jpg
Yoko-02.jpg


Hit Box - We so S Tier1!!

$
0
0
Welcome to the Hit Box community! Please read this first post for up-to-date Hit Box information!

[media=youtube]dGU1d-cmtuQ[/media]
http://www.hitboxarcade.com
http://www.youtube.com/hitboxes

Visit our Super Street Fighter IV Hit Box Thread

FAQ
Spoiler:
1. What is the Hit Box?

The Hit Box all-button controller, AKA the "Stickless Stick," is a game controller specifically designed for fighting games. We replaced the joystick with directional buttons that are controlled by your fingers.

2. Why buttons?

By using 4 directional buttons controlled by 4 fingers, you gain:

- Increased input speed
- Consistent inputs yield fewer mistakes
- Exclusive control over your movement
- No travel time inputting directions
- Button techniques apply to movement and special inputs (plinking, piano, double tap, slide)
- Game-specific features such as SSFIV input shortcuts (such as walking dragon punches)
- No unintentional inputs such as accidental jumps
- No arm/wrist motion
- Stays put in your lap


3. Are those smaller buttons than normal?

Yes. We use 24mm Sanwa pushbuttons with exception to the 'Up' button, which is 30mm. They are highly sensitive buttons and work perfectly. 24 mm buttons are able to be brought closer together and fit the natural curve of the human hand. When the button spread is closer together, players find all buttons directly at their finger tips with no hand-hovering.

4. Can I still execute throws and focus attacks on this smaller layout?

Yes.

5. What about plinking and double tapping my combo links?

Of course.

6. Why have a shared jump button for your thumbs?

It is larger than the other buttons so both thumbs can access "Up" depending on player preference. By utilizing this, you can perform advanced "joystick" motions easily. Tri-jumps and Tiger Knee inputs are much faster and more accurate. It also makes many Just-Frame inputs incredibly easy.

8. Who is this for? Do I need keyboard experience?

While it appears to share the most common ground with a keyboard, Hit Box is a balance between Joystick, Pad, and Keyboard together. You dont need background in any controller to appreciate the Hit Box: Anyone can use it!

9. Can I still do everything I can do on my joystick?

Everything and more.

10. What about Hadokens and Dragon Punches and SPDs?

Yes. Quickly and accurately.

11. What about "______'s ________ combo"?

Yes.

12. Is there a learning curve?

The learning curve is creating fast, new memory in your fingers. It doesn't take long. This also gets rid of old bad habits too!

13. Are these for advanced players only?

No! The benefits of these boxes can be appreciated by everyone from the beginning player to the most advanced tournament player. The whole purpose of the Hit Box is to aide your fundamentals and build your foundation so that you can focus on what actually matters in a match: your opponent.

14. What happens when you hold the Left and Right buttons together?

Left + Right = Neutral. Your character will stand still. No charging or blocking occurs.

15. Can I hold Left and Right to block cross ups?

No. Left + Right = Neutral; you will get hit in the face.

18. Can I walk forward and charge a sonic boom?

No.

19. Can I hold Back and perform shoryuken motions?

No. Left + Right = Neutral.

20. Is "Left + Right = Neutral" useless?

No! Left + Right is the basis for many advanced techniques that will make your life easier! You get access to 3-frame dashes, 1-button FADCs, rapid dragon punches, new option selects, safe and easy Korean backdash cancelling, and much more! Left + Right will help your execution significantly. Check out all of the tech in our video section!

Combo Videos
How to Hit Box Tutorials

Interactive Learning Tools
Product Info
Spoiler:
HIT BOX - PS3/PC
$169.99
Shipping:
$20.00 in United States
40.00 USD Canada/Mexico
60.00 USD International
  • Sturdy Metal Case (16" x 7" x 2")
  • Compatible with PlayStation 3 and PC
  • Professional Powder Coat of Black Paint
  • Artwork Underneath Plexiglass
  • Easy Button Replacement / Modification with Quick Disconnects
  • Proven, Patented, Ergonomic Hit Box Layout
  • Toodles Cthulu PS3/PC Board (SOCD Firmware Controlled)
  • 15' USB Cable with Velcro strap
  • Authentic Sanwa Buttons (24mm & 30mm)
  • Cases Made in USA
  • Plexiglass / Artwork Made in USA
  • Hit Boxes Assembled in USA
HIT BOX - MULTI CONSOLE
$225.00 USD
Shipping:
$20.00 in United States
40.00 USD Canada/Mexico
60.00 USD International
  • Compatible with: PlayStation 3, Xbox 360, PC
  • Sturdy Metal Case (16" x 7" x 2")
  • Professional Powder Coat of Black Paint
  • Artwork Underneath Plexiglass
  • Easy Button Replacement / Modification with Quick Disconnects
  • Proven, Patented, Ergonomic Hit Box Layout
  • Akishop Customs PS360+ PCB (SOCD Firmware Controlled)
  • 15' USB Cable with Velcro Strap
  • Authentic Sanwa Buttons (24mm & 30mm)
  • Rubber Feet for Support and Stability
  • Cases Made in USA
  • Plexiglass / Artwork Made in USA
  • Hit Boxes Assembled in USA
http://www.hitboxarcade.com

N_Close_2_1024x1024.jpg?28

PS360+ Multi-Console Edition Hit Box
Spoiler:
N3_1024x1024.jpg?28
Spoiler:
R1_1024x1024.jpg?28
Spoiler:
R2_1024x1024.jpg?28
Spoiler:
R3_1024x1024.jpg?28
Spoiler:
B1_1024x1024.jpg?28

Cthulhu PS3/PC Edition
Spoiler:
N8_1024x1024.jpg?28
Spoiler:
W3_1024x1024.jpg?28
Spoiler:
W5_1024x1024.jpg?28
Spoiler:
W6_1024x1024.jpg?28
Spoiler:
B3_1024x1024.jpg?28

Will a PC read the ps360+ output as a Xbox Controller for non-fighting pc games?

$
0
0
When i plug it into the pc, will the pc auto detected it as a 360 controller, or will I have to toggle the 360 controller output? I ask because there are certain sidescroller games that are Xbox Controller Compatible like Shantae and Bloodrayne that work great with my Razer Atrox Xbox One stick. But my Qanba Q1 ps3/PC arcade stick is unrecognizable. So I need to know if the PS360+ will work with these games. Please and thank you.

Mad Catz Arcade FightStick Tournament Edition Parts & Accessories

$
0
0
Hi everyone. MarkMan from Mad Catz here!

If you didn't know, Mad Catz has a bunch of unique solutions for modding and customizing your Tournament Edition FightSticks! Today, we just announced our side panel availability in both the original TE style and the TE 'S' style.

8382119086_3200255b2e_o.jpg

8381036989_b67ffcbb56_o.jpg

Check out our parts store here: http://store.gameshark.com/listCategoriesAndProducts.asp?idCategory=328

If you have any questions, let me know!

Arcade Sticks with detachable Cable?

$
0
0
How many are there?

AFAIK there is the Razer Atrox Xbox One and the Mad Catz TE2. Are there any else?

I'm asking because the cable of my Mayflash v2 broke. Cramming it inside the little side compartment wasn't the healthiest for it and now I gotta replace it. I know it's easy if you know how to solder but I dont have any experience with that and I think my next stick should have detachable cables.

Thanks!

auto detect

$
0
0
Has anyone figured out how to do this on the TE2? I haven't been on here in a while.

SRK Tech Talk T-Shirts Interest Check (2015)

$
0
0
Since I still have the files for them, I've been thinking of doing a re-issue of the "new" SRK Tech Talk t-shirts that we did last year.

This time though, I'm thinking of not doing them in the same red or grey shirt options that we did last year so that we have more color options (that, and so OGs who got their red or grey shirts last year can feel special).
Looks like we can do multiple color choices so people can have their choice of color (including red, for you @FrankCastleAZ ). Now the only question if whether to continue with the yellow/gold logo, or revert to plain old white.

Current color selection can be seen in the link below.
http://imgur.com/a/6GmKs#0

I'll make a decision in about a week or two.
Shirts now available for order. New thread here.
http://forums.shoryuken.com/discussion/202525/srk-tech-talk-shirts-2015-edition#latest

building a pc for sfv. monitor advice

$
0
0
i wan't a big screen with no input lag. any recommendations?

Definitive Eightarc/Qanba Arcade Sticks List with Info/Facts/Photos/Advantages/Disadvantages

$
0
0
Important information-

The list is incomplete, as it will forever need to be expanded and updated with new information as sticks are released. If you have any updated information and/or specifics, please feel free to post that info, or PM me the info and I'll incorporate it on the list below.

The list is also being updated each week with new information/photos/etc one stick at a time


IF YOU SEE SOMETHING THAT IS WRONG, OR HAVE INFORMATION WE ARE MISSING, PLEASE PROVIDE INFO WITH SOURCE. PLZTHX

There will be no tier list, and there will likely not be a "I SUGGEST YOU BUY ________ ARCADE STICK" info.

This is information for you to use to your advantage to make an independent decision based on what features you may or may not enjoy. PLEASE PLEASE PLEASE do not come in to this thread and just ask "Which one should I buy?".
Use knowledge below to grow, think, and learn.


and please don't image quote.


Original/Official SRKTT threads for companies Eightarc & Qanba-

WWW.EIGHTARC.COM PREMIUM TOURNAMENT JOYSTICK THREAD
http://forums.shoryuken.com/discussion/146584/www-eightarc-com-premium-tournament-joystick-thread/p1

THE OFFICIAL QANBA FIGHTSTICK THREAD (PAGE 60,"DEFENDER" QANBA FIGHTING STICK BACKPACK RELEASED NOW)
http://forums.shoryuken.com/discussion/90307/the-official-qanba-fightstick-thread-page-60-defender-qanba-fighting-stick-backpack-released-now/p1


If you have general arcade stick questions, please ask in the "Absolute Question and Answer Thread v.3 (ASK YOUR QUESTIONS HERE!)" thread
http://forums.shoryuken.com/discussion/194283/absolute-question-and-answer-thread-v-3-ask-your-questions-here

If you desire information on other arcade sticks that are not listed here please visit the "What Stick/Controller Should I Buy? Read the Guide on Pg 1 Before Posting." thread
http://forums.shoryuken.com/discussion/137321/what-stick-controller-should-i-buy-read-the-guide-on-pg-1-before-posting/p1


+ Is a positive feature
- Is a negative feature
= Is general information


Eightarc ISO Pearl/Onyx
-Eightarc ISO Pearl for XBox 360
-Eightarc ISO Pearl for Playstation 3
-Eightarc ISO Onyx for XBox 360
-Eightarc ISO Onyx for Playstation 3

PHOTOS: TOP/SIDES/BACK/BOTTOM/INTERIOR/PCB/PCB PINOUT/SCREWS/USB CABLE:
Spoiler:
EightarcOnyxPearl-01-360-TopOnyx.png
EightarcOnyxPearl-02-PS3-TopOnyx.png
EightarcOnyxPearl-02-PS3-TopPearl.png
EightarcOnyxPearl-04-PS3-Sides.png
EightarcOnyxPearl-05-PS3360-Back.png
EightarcOnyxPearl-06-PS3360-Bottom.png
EightarcOnyxPearl-08-PS3-Interior.png
EightarcOnyxPearl-09-PS3-PCBPlugged.png
EightarcOnyxPearl-10-PS3-PCBBare.png
EightarcOnyxPearl-11-PS3-PCBBareBottom.png
EightarcOnyxPearl-08-360-Interior.png
EightarcOnyxPearl-12-360-PCBPlugged.png
EightarcOnyxPearl-13-360-PCBBare.png
EightarcOnyxPearl-14-360-PCBBareBottom.png
EightarcOnyxPearl-15-PS3360-Screws.png
EightarcOnyxPearl-16-PS3360-USBCable.png

Case-
Qanba/Eightarc Wood Case #X (To Edit)
=Weight (Unknown)
=Width/Length/Height with Balltop (Unknown)
+Base made of MDF wood with a shiny polish

Metal Panels-
+Both top and bottom metal panels

Plexi/Art-
=Stock Plexi/Artwork combo sits on top of metal panel.
+Stock Artwork doesn't leave sticky residue when removed to be being pressed on stock plexi
-Stock Plexi can't be reused with new artwork due to artwork be being pressed on stock plexi
+Tek Innovations will likely have replacement plexi and artwork option in future

Bottom Padding/Feet-
+Has a felt padding good for lap
+4 Low profile rubber feet prevents surface slide

Joystick-
+Sanwa JLF-TP-8YT

Buttons-
+Sanwa OBSF-30
-Unknown Korean brand screw-in 24mm buttons are used for Start/Select/Home buttons and Mode/Turbo on PS3 versions.
-Can't use 24mm screw in buttons from Sanwa/Seimitsu for Start/Select/Home/Mode/Turbo as thickness of wood is too long

PCB-
=PS3 PCB "Qanba Joystick PS3-PC-80" (Unsure of official PCB name)
=360 PCB "Qanba Joystick XBOX360" - Attached PCB "20091020-09191 v1.0"
+Common ground but unsure if held high/low
=All wires to action buttons and to LED indicator from PCB are pin connectors

Wiring-
+Clean wiring using zip ties and a looped ground
=Looped ground is not only connected with all action buttons but also the 5 pin connector for joystick
+Quick disconnects with sleeves

USB Cable-
=Female USB A port on back of case
+Detachable male USB A to male USB A cable comes with stick and is common to replace

Side Note-
This is an arcade stick made by a large retail manufacturer who made wooden sticks with metal panels on the top and bottom. Almost every (quality) retail plastic stick has a metal panel on either the top or bottom but not always both, and almost every custom made wooden stick doesn't have a metal panel at all. This could be the most solid, sturdy retail built stick ever made. Perhaps only the Hori VLX models would rival the durability of this stick, and that has plastic sides. It's extremely unlikely any more wood base models will be produced by Eightarc/Qanba due to the issues of mass producing wooden sticks.


Qanba Q1

-Qanba Q1 Cut 360 White
-Qanba Q1 Cut PS3 Black
(Unsure of official titles)

PHOTOS: TOP/BOTTOM/INTERIOR/PCB/PCB PINOUT/CLAMPS/GATES/SCREWS:
Spoiler:
QanbaQ1-01-PS3-Top.png
QanbaQ1-01-360-Top.png
QanbaQ1-02-Bottom.png
QanbaQ1-03-BottomBase.png
QanbaQ1-11-Clamps.png
QanbaQ1-04-InteriorPS3.png
QanbaQ1-05-PS3-PCBPlugged.png
QanbaQ1-06-PS3-PCBBare.png
QanbaQ1-07-PS3-PCBBareBottom.png
QanbaQ1-04-Interior360.png
QanbaQ1-08-360-PCBPlugged.png
QanbaQ1-09-360-PCBBare.png
QanbaQ1-10-360-PCBBareBottom.png
QanbaQ1-12-Gates.png
QanbaQ1-13-Screws.png

Case-
=Qanba Q1 Case
=Weight (Unknown)
=Width/Length/Height with Balltop (Unknown)

Metal Panels-
+Top metal panel
-No bottom panel

Plexi/Art-
=Stock Plexi/Artwork combo sits on top of metal panel.
+Stock Artwork doesn't leave sticky residue when removed to be being pressed on stock plexi
-Stock Plexi can't be reused with new artwork due to artwork be being pressed on stock plexi
+Tek Innovations will likely have replacement plexi and artwork option in future

Bottom Padding/Feet-
+Has table clamps that can be removed
=No Feet
=Two vertical strips of rubber material intended for lap/table

Joystick-
-Qanba stock joystick (Need break down info with details and good/bad)
=Can easily replace stock joystick with Sanwa and Seimitsu joysticks (Need to verify all models work with mounting bracket)

Buttons-
-Qanba stock buttons (Need break down info with details and good/bad)
=Can easily replace stock buttons with Sanwa and Seimitsu buttons (Need to verify screw in buttons work properly)

PCB-
=PS3 PCB "Arcade Joystick 1008" "QB-1008A-A3"
=360 PCB "0103" "QB-3008"
+Common ground but unsure if held high/low
=All wires to action buttons and to LED indicator from PCB are pin connectors

Wiring-
=insertinfohere

USB Cable-
=Wired USB A Male stored in cord compartment
+Replacement USB cables can either be purchased from Eightarc/Qanba, made with standard 5pin connector (Model #EditMe), or soldered directly to PCB


EightarcPlaceholder.png

Eightarc Model X Y Z

SRKTT thread-

SRK Front Page article -

Case-
=insertinfohere

Metal Panels-
=insertinfohere

Plexi/Art-
=insertinfohere

Bottom Padding/Feet-
=insertinfohere

Joystick-
=insertinfohere

Buttons-
=insertinfohere

PCB-
=insertinfohere

Wiring-
=insertinfohere

USB Cable-
=insertinfohere


List of sticks to detail in this thread:

Eightarc Fusion Synthesis
Eightarc Fusion Ebony
Eightarc Fusion Ivory
Eightarc ISO Ebony PS3
Eightarc ISO Ebony 360
Eightarc ISO Ivory PS3
Eightarc ISO Ivory 360
Eightarc ISO Onyx 360
DONE
Eightarc ISO Onyx PS3
DONE
Eightarc ISO Pearl 360
DONE
Eightarc ISO Pearl PS3
DONE

Qanba Q1 360
DONE
Qanba Q1 Black PS3
DONE
Qanba Q1 White PS3 (Was this officially released?)
Qanba Q1 Sanwa Gotvg PS3
Qanba Q1 Arc Black PS3
Qanba Q1 Qingshui White (Blue) PS3
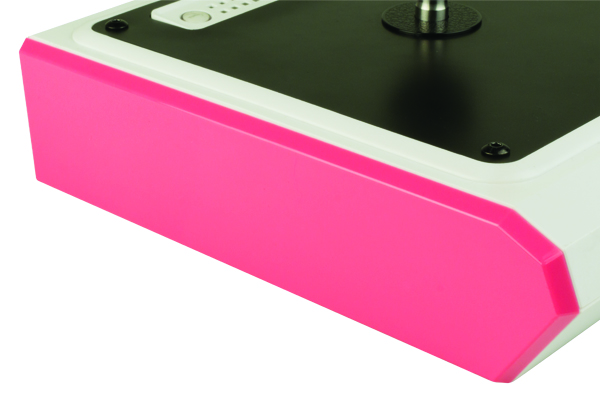
Qanba Q1 Sanwa White (Pink) PS3

Qanba Q2 Pro Standard Edition Straight Layout 360
Qanba Q2 Pro Standard Edition Straight Layout PS3
Qanba Q2 Pro Professional Edition Vewlix Layout 360
Qanba Q2 Pro Professional Edition Vewlix Layout PS3
Qanba Q2 Pro LED Black PS3
Qanba Q2 Pro LED Black 360 (Does this exist?)
Qanba Q2 Pro LED White PS3
Qanba Q2 Pro LED White 360 (Does this exist?)
Qanba Q2 Pro LED Silver PS3
Qanba Q2 Pro LED Silver 360 (Does this exist?)
Qanba Q2 Pro Gotvg PS3
Qanba Q2 Glow 360
Qanba Q2 Glow PS3
Qanba Q2 Glow EVO 2014 Edition PS3

Qanba Q3 360
Qanba Q3 PS3
Qanba Q3 PS3 Tekken 6 Art (Was this officially released?)
Qanba Q3 Empire Arcadia PS3
Qanba Q3 Wireless PS3

Qanba Q4 RAF Black
Qanba Q4 RAF White + Red
Qanba Q4 RAF Ice Red
Qanba Q4 RAF Ice Blue
Qanba Q4 RAF Ice Blue PC Street Fighter Art
Qanba Q4 RAF Ice Blue 6-Button MINSK
Qanba Q4 eLivePro|Kindevu
Qanba Q4 eLivePro|RF
Qanba Q4 eLivePro|D44BAS

Qanba N1 Black PS3
Qanba N1 Red PS3

QanBa 2 Ultimate Fightstick Black PS3
QanBa 2 Ultimate Fightstick White PS3
QanBa 2 Ultimate Fightstick Tekken 6 Art PS3
QanBa 2 Ultimate Fightstick WUJI PS3


My work is cut out for me WTF am I doing?
Any help is appreciated. Thanks.

Viewing all 8072 articles
Browse latest View live