The T.E.2 Crossbone is designed to give the same compatibility styling as the regular
Crossbone, giving you the ability to easily hack your xbox one compatible PCB into a cross compatible system. The main difference being that this one is designed specifically for the Madcatz TE2, which currently is the only arcade stick available for the Xbox One, and a damn fine one at that.
Why?
This is the main question, since the TE2 is designed to be as moddable as possible, yet electrically it's pretty unmoddable in the classic sense. You can't simply connect another PCB to it's inputs, as they are not exactly compliant with the standard you see in most setups. To put it simply, it's not "common ground," which means that all of the I/O being used in the mod do not have a return path to ground but instead have a return path to a common signal that is far harder to work with.
The exact reasoning/setup of the TE2 is hard to describe, so I won't go into detail here, but suffice it to say that simply connecting to the PCBs signals won't work straight up. You need a middle man to bridge that gap, and that's where the TE2 Crossbone comes in.
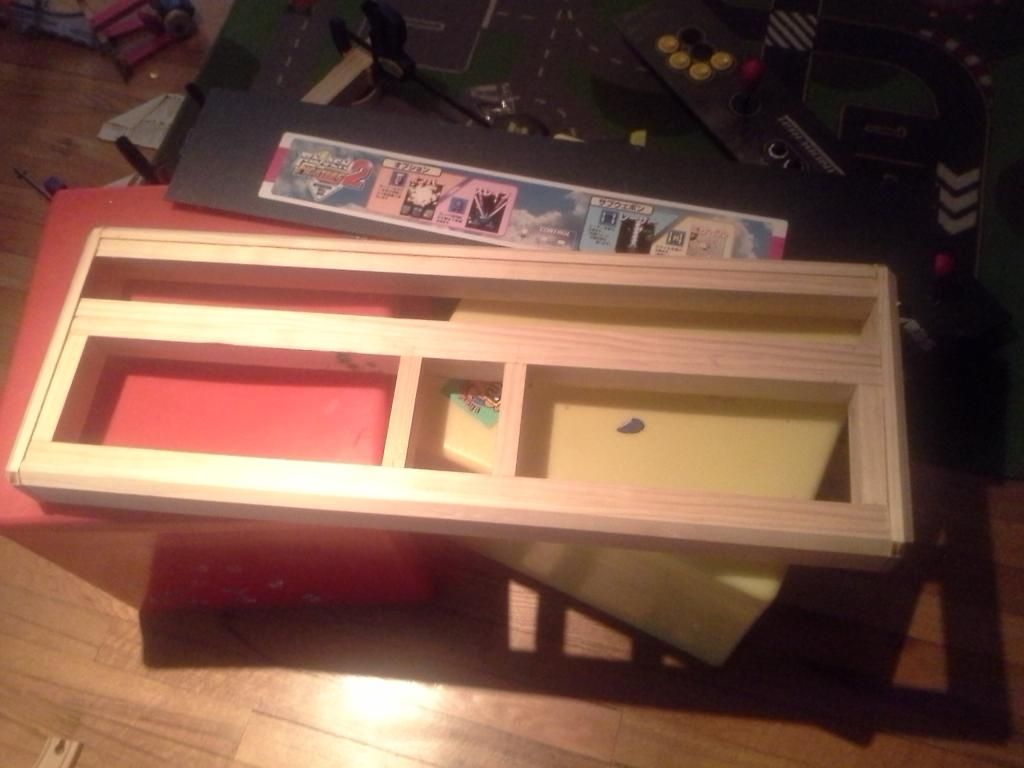
![IMG_0088-300x225.jpg]()
Top Side
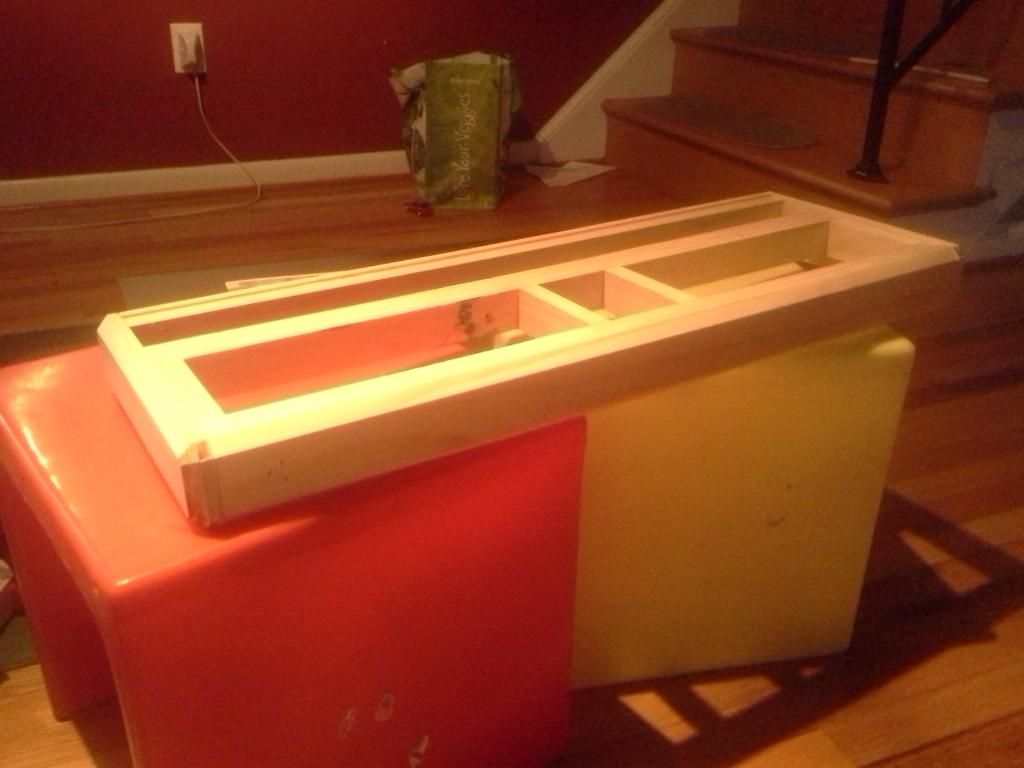
![IMG_0092-300x225.jpg]()
Bottom Side
The design is very simple. You remove the plastic enclosure surrounding the PCB and remove all of the ribbon cables, plug the TE2 Crossbone into the original PCB and then put the ribbon cables back into place. The original button harness goes to the spot labeled BUTTON HARNESS, and a double ended ribbon cable goes to a position labeled PCB HARNESS and gets plugged into the spot the harness originally went.
![IMG_0090-225x300.jpg]()
Button Harness position, the button wire harness goes here
![IMG_0091-225x300.jpg]()
PCB Harness position, the included ribbon cable gets plugged in here and the other end into the original harness position.
The board uses the "switch" input, located in the top right of the PCB to swap to the broken out points. You can put this to a physical switch, or in your dual system setup... any input you wish. The board will not swap or be able to use the secondary inputs without this so it's very important that you control/use this. This input simply needs to be grounded upon plug in to the system to swap over, it can be released afterward.
I tried to think of a way to automate the swap, but ultimately it removed a lot of control from the user and could cause unwanted states if drivers for PC are released.
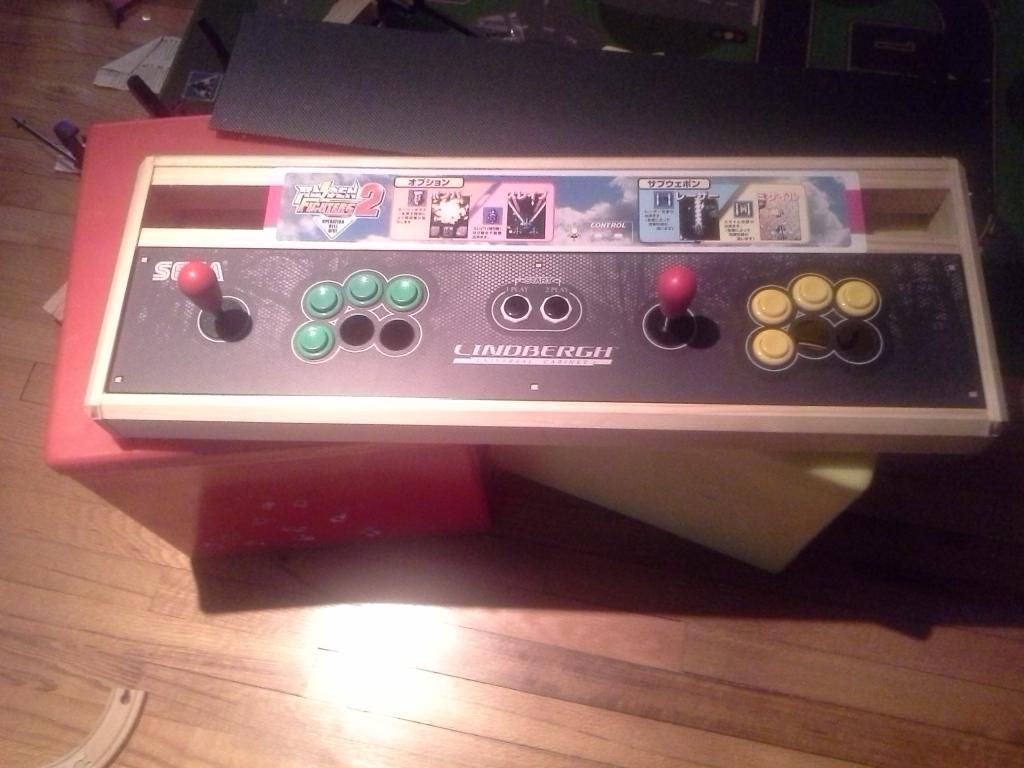
![IMG_0089-225x300.jpg]()
The board is equipped with a data signal switch ability, and allows you to utilize the original USB connection for a one cable setup.
USB OUT = Outbound USB connection (I.E. The cable)
XB1 IN = The Xbox One PCB's USB signals
SYS. 2 = The secondary system you wish to use (I.E. PS360+, Cerberus, Cthulu, etc.)
The system will default to Xbox One usage, and can swap to the secondary system via the "Switch" input, which is described a bit more above. The "Invert" solder jumper allows you to invert the primary system, making it so that SYS. 2 is on by default, and XB1 will be the swapped to system when "Switch" is utilized.
The signals are broken out into 3.5mm screw terminal/solder positions, and also a 20P header that matches the PS360+ for ribbon cable usage. However, due to the height limitations of the TE2 you should be aware that you need to actually run the cable/headers on the underside of the board. I'll show this in the installation section.
If you haven't quite gathered it, this mod DOES require soldering. While fairly easy, if you aren't comfortable with this you should consult your nearest modder/steady solder hand. I've tried to make the important solder points as large as possible for ease of use.
Installation (start to finish with a PS360+)
Step 1.
Remove the plastic casing of the PCB, and it helps to remove the cover on the START and SELECT area to give you more slack while you work.
Step 2.
Disconnect the USB wires from the Xbox One PCB, strip and tin them. At this point it's also a good idea to solder a couple of small wires to the D+ and D- signals on the PCB.
![IMG_0093-300x225.jpg]()
![IMG_0095-225x300.jpg]()
Step 3.
Align the TE2 Crossbone with the original PCB, and press down until it bottoms out. To effectively get pressure, you should press on the black shrouded headers, do NOT press towards the bottom area of the board since there's really no support and could cause damage from the bending.
![IMG_0097-225x300.jpg]()
![IMG_0098-225x300.jpg]()
Step 4.
Solder the USB cable's wires to the USB OUT signals. Then solder the Xbox One PCB's D- and D+ signals to the XB1 IN points.
![IMG_0099-225x300.jpg]()
![IMG_0100-225x300.jpg]()
Step 5.
In this installation I will use the 20P header, otherwise you could simply run the inputs however you choose but for demonstrative purposes this is best.
Install/solder the 20P headers to the underside of both PCBs, and connect the ribbon cables. It's OK if you need to uproot the TE2 Crossbone to do this, just put it down back in place afterward.
![IMG_0106-225x300.jpg]()
Step 6.
I use the RJ45 cable assembly add-ons that are sold with the PS360+ for ease of use. You only need positions 5 and 6, which are D- and D+ respectively. Run those to the SYS. 2 positions on the TE2 Crossbone.
![IMG_0107-225x300.jpg]()
![IMG_0108-225x300.jpg]()
Step 7.
Run the "Switch" input to your choice of button to use. I chose "Home" since the PS360+ does not use that as any sort of forced mode.
![IMG_0109-225x300.jpg]()
Step 8.
Finalize the install by putting the included ribbon cable in place. One end to the PCB Harness position, and one end to the original place the button harness went. It will lock into place once fully engaged.
![IMG_0103-225x300.jpg]()
Step 9.
Put everything else back into place.
![IMG_0110-225x300.jpg]()
Step 10.
Close it up. You'll find that the plastic housing for the PCB will no longer be able to be used, but you can manage the wires better than I can probably. Just make sure the closed top doesn't hit anything, and you're good to go.
![IMG_0111-300x225.jpg]() Testing
Testing
Step 1.
Plug it into your PC with nothing held down, you should get an error but still a description that "controller" or "fightstick" was there but not recognized. Alternatively you can test on your Xbox One immediately, but PC is always the best feedback, since it'll tell if you have power surges, etc. This will be very useful with PC drivers when they are released.
Step 2.
Unplug and replug with your "switch" input held down, the PC should read that the PS360+ is being used. Open up the controller properties and verify your inputs all register.


 and I'm just as happy with this.


