This post is in progress and will forever need updating.
IF YOU ARE ABLE TO HELP PROVIDE INFORMATION, PHOTOS, DETAILS, OR PERHAPS EVEN HELP DO RESEARCH USING THE LINKS AT THE BOTTOM OF THIS FIRST POST IN SPOILER TAGS AND REPORT BACK, IT IS MUCH APPRECIATED.
It's taken me a lot of time to gather this information up so far, put it in a neat format, find photos and resize etc. If you can volunteer to help for the good of all arcade stick lovers and SRK TT, please do.
First off, I've gotta shout out
@Superking for the original post back in July 2005 and for the work he did in keeping track of info and data on the Hori RAP sticks at least up until the middle of the PS2 gen and some of the PS3/360 gen.
Below you'll see the info he organized reworked in a new format with more info and photos.
Original thread (39 pages of topic from July 2005 to mostly April 2012)
http://forums.shoryuken.com/discussion/13083/hori-real-arcade-pro-faq-for-all-versions/p1
If you have general arcade stick questions, please ask in the "Absolute Question and Answer Thread v.3 (ASK YOUR QUESTIONS HERE!)" thread
http://forums.shoryuken.com/discussion/194283/absolute-question-and-answer-thread-v-3-ask-your-questions-here
If you desire information on other arcade sticks that are not listed here or want suggestions on what to buy, please visit the "What Stick/Controller Should I Buy? Read the Guide on Pg 1 Before Posting." thread
http://forums.shoryuken.com/discussion/137321/what-stick-controller-should-i-buy-read-the-guide-on-pg-1-before-posting/p1
There will be no tier list, and there will likely not be a "I SUGGEST YOU BUY ________ ARCADE STICK" info.
This is information for you to use to your advantage to make an independent decision based on what features you may or may not enjoy. PLEASE PLEASE PLEASE do not come in to this thread and just ask "Which one should I buy?".
Use knowledge below to grow, think, and learn.
Listed in order of console:
Playstation 1 / Playstation 2
![Hori-RAP1-Mirror-01.jpg]()
Hori RAP1
-Hori Real Arcade Pro (Mirror Finish)
SRKTT thread-
=Unknown
Case-
RAP Base
=Weight (2.6 kg or 5.7 lbs)
=Sizes - Width = 412mm, Depth = 243mm, Height (including lever) = 135mm
=One main plastic base. Does not have individual plastic pieces
+Same design/production base by major company for multiple consoles made swapping parts and getting 3rd party support easier
=Interior of case has plenty of space for mounting PCBs
=Must open from bottom (Which voids the warranty)
Metal Panels-
+Both top and bottom metal panels
Plexi/Art-
=No default plexi
=Mirror finish looks nice but is easily susceptible to scratches and fingerprints
=Plexi options available via Tek Innovations
=Nuts and bolts for top metal panel are difficult to remove and assemble
=Top loaders available via Tek Innovations allowing removal and assembly of top metal panel easier
Bottom Padding/Feet-
=No padding
=Four rubber feet
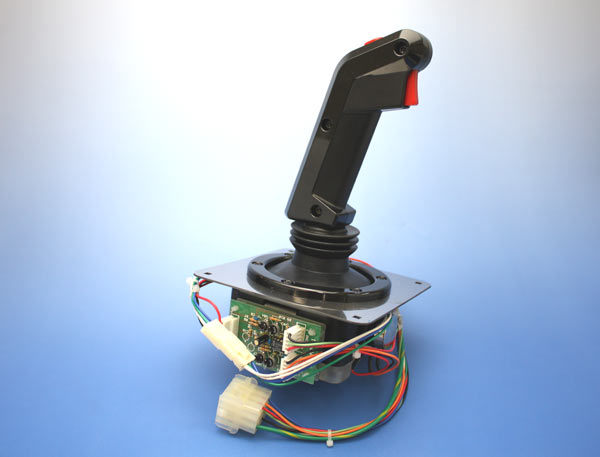
Joystick-
+Sanwa JLF-TP-8Y-SK
Buttons-
-Hori buttons
PCB-
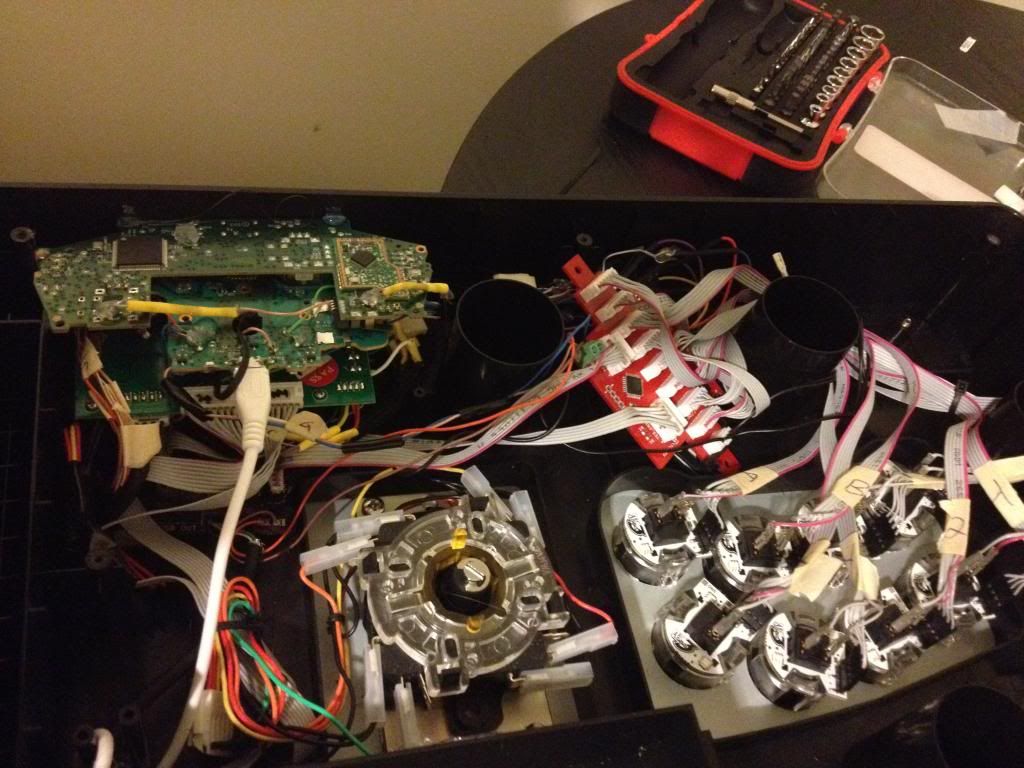
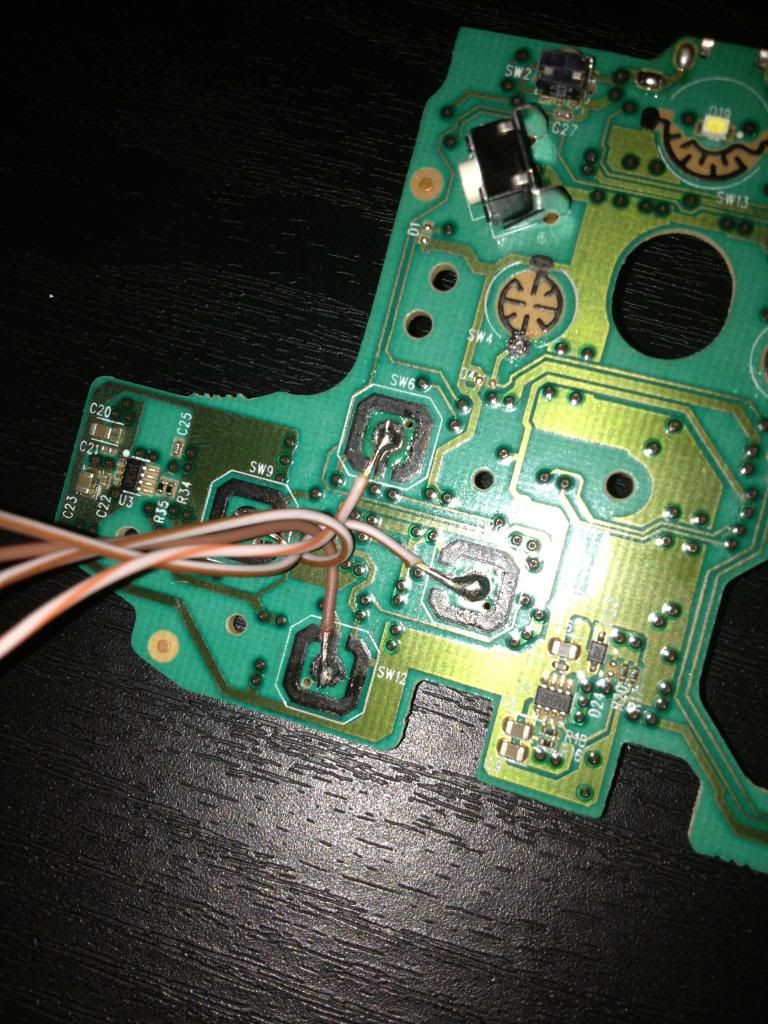
=NEED INFO/DETAILS
Wiring-
=NEED INFO/DETAILS
USB Cable-
=PS2/PS1 connector exits plastic base
=No cord compartment
Unanswered Questions Due to Insufficient Testing-
=TO EDIT
![Hori-CFJ-01.jpg]()
Hori RAP CFJ
=Hori Capcom Fighting Jam
SRKTT thread-
=Unknown
Case-
RAP Base
=Weight
=One main plastic base. Does not have individual plastic pieces
+Same design/production base by major company for multiple consoles made swapping parts and getting 3rd party support easier
=Interior of case has plenty of space for mounting PCBs
=Must open from bottom (Which voids the warranty)
Metal Panels-
+Both top and bottom metal panels
Plexi/Art-
=No default plexi
=Plexi options available via Tek Innovations
=Nuts and bolts for top metal panel are difficult to remove and assemble
=Top loaders available via Tek Innovations allowing removal and assembly of top metal panel easier
Bottom Padding/Feet-
=No padding
=Four rubber feet
Joystick-
+Sanwa JLF-TP-8Y-SK
Buttons-
-Hori buttons
PCB-
=NEED INFO/DETAILS
Wiring-
=NEED INFO/DETAILS
USB Cable-
=PS2/PS1 connector exits plastic base
=No cord compartment
Unanswered Questions Due to Insufficient Testing-
=TO EDIT
![Hori-RAP1-Orange-01.jpg]()
Hori RAP1
-Hori Real Arcade Pro Orange Amazon Exclusive
SRKTT thread-
=Unknown
Case-
RAP Base
=Weight
=One main plastic base. Does not have individual plastic pieces
+Same design/production base by major company for multiple consoles made swapping parts and getting 3rd party support easier
=Interior of case has plenty of space for mounting PCBs
=Must open from bottom (Which voids the warranty)
Metal Panels-
+Both top and bottom metal panels
Plexi/Art-
=No default plexi
=Plexi options available via Tek Innovations
=Nuts and bolts for top metal panel are difficult to remove and assemble
=Top loaders available via Tek Innovations allowing removal and assembly of top metal panel easier
Bottom Padding/Feet-
=No padding
=Four rubber feet
Joystick-
+Sanwa JLF-TP-8Y-SK
Buttons-
-Hori buttons
PCB-
=NEED INFO/DETAILS
Wiring-
=NEED INFO/DETAILS
USB Cable-
=PS2/PS1 connector exits plastic base
=No cord compartment
Unanswered Questions-
=What is the official title for this arcade stick from Hori?
=TO EDIT
![Hori-RAP1SA-01.jpg]()
Hori RAP1 SA
-Hori Real Arcade Pro Special Addition
-Special Addition also can be viewed as Hori's way of saying Sanwa (SA)
SRKTT thread-
=Unknown
Case-
RAP Base
=Weight
=One main plastic base. Does not have individual plastic pieces
+Same design/production base by major company for multiple consoles made swapping parts and getting 3rd party support easier
=Interior of case has plenty of space for mounting PCBs
=Must open from bottom (Which voids the warranty)
Metal Panels-
+Both top and bottom metal panels
Plexi/Art-
=No default plexi
=Plexi options available via Tek Innovations
=Nuts and bolts for top metal panel are difficult to remove and assemble
=Top loaders available via Tek Innovations allowing removal and assembly of top metal panel easier
Bottom Padding/Feet-
=No padding
=Four rubber feet
Joystick-
+Sanwa JLF-TP-8Y-SK
Buttons-
-Sanwa OBSF-30 and OBSF-24
PCB-
=NEED INFO/DETAILS
Wiring-
=NEED INFO/DETAILS
USB Cable-
=PS2/PS1 connector exits plastic base
=No cord compartment
Unanswered Questions Due to Insufficient Testing-
=TO EDIT
![Hori-RAP1SE-01.jpg]()
Hori RAP1 SE
-Hori Real Arcade Pro Special Edition
-Special Edition also can be viewed as Hori's way of saying Seimitsu (SE)
SRKTT thread-
=Unknown
Case-
RAP Base
=Weight
=One main plastic base. Does not have individual plastic pieces
+Same design/production base by major company for multiple consoles made swapping parts and getting 3rd party support easier
=Interior of case has plenty of space for mounting PCBs
=Must open from bottom (Which voids the warranty)
Metal Panels-
+Both top and bottom metal panels
Plexi/Art-
=No default plexi
=Plexi options available via Tek Innovations
=Nuts and bolts for top metal panel are difficult to remove and assemble
=Top loaders available via Tek Innovations allowing removal and assembly of top metal panel easier
Bottom Padding/Feet-
=No padding
=Four rubber feet
Joystick-
+Seimitsu LS-32-01
Buttons-
-Seimitsu PS-14-GX
PCB-
=NEED INFO/DETAILS
Wiring-
=NEED INFO/DETAILS
USB Cable-
=PS2/PS1 connector exits plastic base
=No cord compartment
Unanswered Questions Due to Insufficient Testing-
=TO EDIT
![Hori-AH1-01.jpg]()
Hori AH1
-Hori Arcana Heart Arcade Stick
(unsure of official title since it's difficult to find data on now)
SRKTT thread-
=Unknown
Case-
RAP Base
=Weight (___________)
=One main plastic base. Does not have individual plastic pieces
+Same design/production base by major company for multiple consoles made swapping parts and getting 3rd party support easier
=Interior of case has plenty of space for mounting PCBs
=Must open from bottom (Which voids the warranty)
Metal Panels-
+Both top and bottom metal panels
Plexi/Art-
=No default plexi
=Plexi options available via Tek Innovations
=Nuts and bolts for top metal panel are difficult to remove and assemble
=Top loaders available via Tek Innovations allowing removal and assembly of top metal panel easier
Bottom Padding/Feet-
=No padding
=Four rubber feet
Joystick-
+Sanwa JLF-TP-8Y-SK
Buttons-
-Hori buttons
PCB-
=NEED INFO/DETAILS
Wiring-
=NEED INFO/DETAILS
USB Cable-
=PS2/PS1 connector exits plastic base
=No cord compartment
Unanswered Questions Due to Insufficient Testing-
=TO EDIT
![Hori-AH2-01.jpg]()
Hori AH2
-Hori Arcana Heart 2 Arcade Stick
(unsure of official title since it's difficult to find data on now)
SRKTT thread-
=Unknown
Case-
RAP Base
=Weight (___________)
=One main plastic base. Does not have individual plastic pieces
+Same design/production base by major company for multiple consoles made swapping parts and getting 3rd party support easier
=Interior of case has plenty of space for mounting PCBs
=Must open from bottom (Which voids the warranty)
Metal Panels-
+Both top and bottom metal panels
Plexi/Art-
=No default plexi
=Plexi options available via Tek Innovations
=Nuts and bolts for top metal panel are difficult to remove and assemble
=Top loaders available via Tek Innovations allowing removal and assembly of top metal panel easier
Bottom Padding/Feet-
=No padding
=Four rubber feet
Joystick-
=NEED INFO/DETAILS
Buttons-
=NEED INFO/DETAILS
PCB-
=NEED INFO/DETAILS
Wiring-
=NEED INFO/DETAILS
USB Cable-
=PS2/PS1 connector exits plastic base
=No cord compartment
Unanswered Questions Due to Insufficient Testing-
=TO EDIT
![Hori-FUC-01.jpg]()
Hori FUC-LE
-Hori Real Arcade Pro Stick Fate/Unlimited Codes Limited Edition
(unsure of official title since it's difficult to find data on now)
SRKTT thread-
=Unknown
Case-
RAP Base
=Weight (___________)
=One main plastic base. Does not have individual plastic pieces
+Same design/production base by major company for multiple consoles made swapping parts and getting 3rd party support easier
=Interior of case has plenty of space for mounting PCBs
=Must open from bottom (Which voids the warranty)
Metal Panels-
+Both top and bottom metal panels
Plexi/Art-
=No default plexi
=Plexi options available via Tek Innovations
=Nuts and bolts for top metal panel are difficult to remove and assemble
=Top loaders available via Tek Innovations allowing removal and assembly of top metal panel easier
Bottom Padding/Feet-
=No padding
=Four rubber feet
Joystick-
=NEED INFO/DETAILS
Buttons-
=NEED INFO/DETAILS
PCB-
=NEED INFO/DETAILS
Wiring-
=NEED INFO/DETAILS
USB Cable-
=PS2/PS1 connector exits plastic base
=No cord compartment
Unanswered Questions Due to Insufficient Testing-
=TO EDIT
![Hori-RAP2-01.jpg]()
Hori RAP2
=Hori Real Arcade Pro 2
SRKTT thread-
=Unknown
Case-
RAP Base
=Weight (2.6 kg)
=Sizes - Width = 412mm, Depth = 243mm, Height (including lever) = 135mm
=One main plastic base. Does not have individual plastic pieces
+Same design/production base by major company for multiple consoles made swapping parts and getting 3rd party support easier
=Interior of case has plenty of space for mounting PCBs
=Must open from bottom (Which voids the warranty)
Metal Panels-
+Both top and bottom metal panels
Plexi/Art-
=No default plexi
=Plexi options available via Tek Innovations
=Nuts and bolts for top metal panel are difficult to remove and assemble
=Top loaders available via Tek Innovations allowing removal and assembly of top metal panel easier
Bottom Padding/Feet-
=No padding
=Four rubber feet
Joystick-
+Sanwa JLF-TP-8Y-SK
Buttons-
-Hori buttons
PCB-
=NEED INFO/DETAILS
Wiring-
=NEED INFO/DETAILS
USB Cable-
=PS2/PS1 connector exits plastic base
=No cord compartment
Unanswered Questions Due to Insufficient Testing-
=TO EDIT
![Hori-RAP2SA-01.jpg]()
Hori RAP2 SA
-Hori Real Arcade Pro 2 Special Addition
-Special Addition also can be viewed as Hori's way of saying Sanwa (SA)
SRKTT thread-
=Unknown
Case-
RAP Base
=Weight
=One main plastic base. Does not have individual plastic pieces
+Same design/production base by major company for multiple consoles made swapping parts and getting 3rd party support easier
=Interior of case has plenty of space for mounting PCBs
=Must open from bottom (Which voids the warranty)
Metal Panels-
+Both top and bottom metal panels
Plexi/Art-
=No default plexi
=Plexi options available via Tek Innovations
=Nuts and bolts for top metal panel are difficult to remove and assemble
=Top loaders available via Tek Innovations allowing removal and assembly of top metal panel easier
Bottom Padding/Feet-
=No padding
=Four rubber feet
Joystick-
+Sanwa JLF-TP-8Y-SK
Buttons-
-Sanwa OBSF-30 and OBSF-24
PCB-
=NEED INFO/DETAILS
Wiring-
=NEED INFO/DETAILS
USB Cable-
=PS2/PS1 connector exits plastic base
=No cord compartment
Unanswered Questions Due to Insufficient Testing-
=TO EDIT
![Hori-SCIII-01.jpg]()
HRAP SCIII
=Hori Real Arcade Pro Soul Calibur III
SRKTT thread-
=Unknown
Case-
RAP Base
=Weight
=One main plastic base. Does not have individual plastic pieces
+Same design/production base by major company for multiple consoles made swapping parts and getting 3rd party support easier
=Interior of case has plenty of space for mounting PCBs
=Must open from bottom (Which voids the warranty)
Metal Panels-
+Both top and bottom metal panels
Plexi/Art-
=No default plexi
=Plexi options available via Tek Innovations
=Nuts and bolts for top metal panel are difficult to remove and assemble
=Top loaders available via Tek Innovations allowing removal and assembly of top metal panel easier
Bottom Padding/Feet-
=No padding
=Four rubber feet
Joystick-
=NEED INFO/DETAILS
Buttons-
-Hori
PCB-
=NEED INFO/DETAILS
Wiring-
=NEED INFO/DETAILS
USB Cable-
=PS2/PS1 connector exits plastic base
=No cord compartment
Unanswered Questions Due to Insufficient Testing-
=TO EDIT
![Hori-Tekken5JP-01.jpg]()
HRAP Tekken 5 JP
=Hori Real Arcade Pro Tekken 5
SRKTT thread-
=Unknown
Case-
RAP Base
=Weight
=One main plastic base. Does not have individual plastic pieces
+Same design/production base by major company for multiple consoles made swapping parts and getting 3rd party support easier
=Interior of case has plenty of space for mounting PCBs
=Must open from bottom (Which voids the warranty)
Metal Panels-
+Both top and bottom metal panels
Plexi/Art-
=No default plexi
=Plexi options available via Tek Innovations
=Nuts and bolts for top metal panel are difficult to remove and assemble
=Top loaders available via Tek Innovations allowing removal and assembly of top metal panel easier
Bottom Padding/Feet-
=No padding
=Four rubber feet
Joystick-
+Sanwa JLF-TP-8Y-SK
Buttons-
-Hori
PCB-
=NEED INFO/DETAILS
Wiring-
=NEED INFO/DETAILS
USB Cable-
=PS2/PS1 connector exits plastic base
=No cord compartment
Unanswered Questions Due to Insufficient Testing-
=TO EDIT
![Hori-Tekken5US-01.jpg]()
HRAP Tekken 5 10th Anniversary
=Hori Real Arcade Pro Tekken 10th Anniversary
SRKTT thread-
=Unknown
Case-
RAP Base
=Weight
=One main plastic base. Does not have individual plastic pieces
+Same design/production base by major company for multiple consoles made swapping parts and getting 3rd party support easier
=Interior of case has plenty of space for mounting PCBs
=Must open from bottom (Which voids the warranty)
Metal Panels-
+Both top and bottom metal panels
Plexi/Art-
=No default plexi
=Plexi options available via Tek Innovations
=Nuts and bolts for top metal panel are difficult to remove and assemble
=Top loaders available via Tek Innovations allowing removal and assembly of top metal panel easier
Bottom Padding/Feet-
=No padding
=Four rubber feet
Joystick-
-Hori
Buttons-
-Hori
PCB-
=NEED INFO/DETAILS
Wiring-
=NEED INFO/DETAILS
USB Cable-
=PS2/PS1 connector exits plastic base
=No cord compartment
Unanswered Questions Due to Insufficient Testing-
=TO EDIT
Playstation 3
![Hori-RAP3-01.jpg]()
HRAP3
=Hori Real Arcade Pro 3
SRKTT thread-
=Unknown
Case-
RAP Base
=Weight
=One main plastic base. Does not have individual plastic pieces
+Same design/production base by major company for multiple consoles made swapping parts and getting 3rd party support easier
=Interior of case has plenty of space for mounting PCBs
=Must open from bottom (Which voids the warranty)
Metal Panels-
+Both top and bottom metal panels
Plexi/Art-
=No default plexi
=Plexi options available via Tek Innovations
=Nuts and bolts for top metal panel are difficult to remove and assemble
=Top loaders available via Tek Innovations allowing removal and assembly of top metal panel easier
Bottom Padding/Feet-
=No padding
=Four rubber feet
Joystick-
+Sanwa JLF-TP-8Y-SK
Buttons-
-Hori
PCB-
=NEED INFO/DETAILS
Wiring-
=NEED INFO/DETAILS
USB Cable-
=PS3 cable exits base on back
=No cord compartment
Unanswered Questions Due to Insufficient Testing-
=TO EDIT
![hrap3SE.jpg]()
Hori RAP 3 SE
=Hori Real Arcade Pro. 3 SE
SRKTT thread-
=Unknown
Case-
RAP Base
=Weight (2.6 kg)
=Sizes - Width = 412mm, Depth = 243mm, Height (including lever) = 135mm
=One main plastic base. Does not have individual plastic pieces
+Same design/production base by major company for multiple consoles made swapping parts and getting 3rd party support easier
=Interior of case has plenty of space for mounting PCBs
Metal Panels-
+Both top and bottom metal panels
+Easy Top Panel access through Hex key
+Universal Joystick mount
Plexi/Art-
=No default plexi
=Plexi options available via Tek Innovations
Bottom Padding/Feet-
=No padding
=Four rubber feet
Joystick-
+Seimtisu LS-32-01
Buttons-
+Seimitsu PS-14-G, PS-14-D
PCB-
=same as HRAP 3
Wiring-
+Buttons are quick disconnects
+5-pin Joystick Harness
USB Cable-
=USB 2.0
=No cord compartment
Unanswered Questions Due to Insufficient Testing-
=TO EDIT
![hrap3blazblue.jpg]()
Hori RAP 3 BlazBlue
=Hori Real Arcade Pro. 3 BlazBlue
SRKTT thread-
=Unknown
Case-
RAP Base
=Weight (2.6 kg)
=Sizes - Width = 412mm, Depth = 243mm, Height (including lever) = 135mm
=One main plastic base. Does not have individual plastic pieces
+Same design/production base by major company for multiple consoles made swapping parts and getting 3rd party support easier
=Interior of case has plenty of space for mounting PCBs
=Must open from bottom (Which voids the warranty)
+Exclusive BLUE case
Metal Panels-
+Both top and bottom metal panels
-Two-point Joystick Mount (Seimtisu VF/JLF Wings)
Plexi/Art-
=No default plexi
=Plexi options available via Tek Innovations
Bottom Padding/Feet-
=No padding
=Four rubber feet
Joystick-
+Sanwa JLF-TP-8Y-SK
Buttons-
-HORI stock buttons
PCB-
=same as HRAP 3
Wiring-
-Buttons are PCB Mounted
+5-pin Joystick Harness
USB Cable-
=USB 2.0
=No cord compartment
Unanswered Questions Due to Insufficient Testing-
=TO EDIT
![hrap3tekkenhybrid.jpg]()
Hori RAP 3 Tekken Tag 2 Prologue
=Hori Real Arcade Pro. 3 Tekken Tag 2 Prologue
+Last ever Original HRAP design produced
SRKTT thread-
=Unknown
Case-
RAP Base
=Weight (2.6 kg)
=Sizes - Width = 412mm, Depth = 243mm, Height (including lever) = 135mm
=One main plastic base. Does not have individual plastic pieces
+Same design/production base by major company for multiple consoles made swapping parts and getting 3rd party support easier
=Interior of case has plenty of space for mounting PCBs
=Must open from bottom (Which voids the warranty)
Metal Panels-
+Both top and bottom metal panels
-Two-point Joystick Mount (Seimtisu VF/JLF Wings), uses the JLF mounting plate points
+Namco NOIR Layout
Plexi/Art-
=No default plexi
Bottom Padding/Feet-
=No padding
=Four rubber feet
Joystick-
+Sanwa JLF-TP-8Y-SK
Buttons-
-HORI stock buttons
PCB-
=Same as HRAP 3
Wiring-
+Buttons are quick disconnects
+5-pin Joystick Harness
USB Cable-
=USB 2.0
=No cord compartment
Unanswered Questions Due to Insufficient Testing-
=TO EDIT
Playstation 4 / Playstation 3
to edit
XBox 360
![hrapexsa.jpg]()
Hori RAP EX-SA
=Hori Real Arcade Pro. EX-SA
SRKTT thread-
=Unknown
Case-
RAP Base
=Weight (2.6 kg)
=Sizes - Width = 412mm, Depth = 243mm, Height (including lever) = 135mm
=One main plastic base. Does not have individual plastic pieces
+Same design/production base by major company for multiple consoles made swapping parts and getting 3rd party support easier
=Interior of case has plenty of space for mounting PCBs
Metal Panels-
+Both top and bottom metal panels
+Universal Joystick mount
Plexi/Art-
=No default plexi
=Plexi options available via Tek Innovations
+Easy Top Panel access through Hex key
Bottom Padding/Feet-
=No padding
=Four rubber feet
Joystick-
+Sanwa JLF-TM-8T-SK-K
Buttons-
+Sanwa OBSF-30, OBSF-24
PCB-
=same as HRAP EX/EX-SE
Wiring-
=Buttons are quick disconnects, Joystick is individually soldered microswitches
USB Cable-
=USB 2.0
=No cord compartment
Unanswered Questions Due to Insufficient Testing-
=Do we have details on the PCBs? CommonG/SecondaryButtonPCB etc?
![hrapexdeathsmiles.jpg]()
Hori RAP Deathsmiles
=Hori Real Arcade Pro. Deathsmiles Stick
SRKTT thread-
=Unknown
Case-
RAP Base
=Weight (2.6 kg)
=Sizes - Width = 412mm, Depth = 243mm, Height (including lever) = 135mm
=One main plastic base. Does not have individual plastic pieces
+Same design/production base by major company for multiple consoles made swapping parts and getting 3rd party support easier
=Interior of case has plenty of space for mounting PCBs
=Must open from bottom (Which voids the warranty)
Metal Panels-
+Both top and bottom metal panels
+Universal Joystick mount
Plexi/Art-
=No default plexi
=Plexi options available via Tek Innovations
=Nuts and bolts for top metal panel are difficult to remove and assemble
=Top loaders available via Tek Innovations allowing removal and assembly of top metal panel easier
Bottom Padding/Feet-
=No padding
=Four rubber feet
Joystick-
+Sanwa JLF-TM-8T-SK-K
Buttons-
-HORI stock buttons
PCB-
=same as HRAP EX/EX-SE
Wiring-
+Buttons are quick disconnects
-Joystick is individually soldered microswitches
USB Cable-
=USB 2.0
=No cord compartment
Unanswered Questions Due to Insufficient Testing-
=TO EDIT
![hrapexdeath2x.jpg]()
Hori RAP Deathsmiles IIX
=Hori Real Arcade Pro. Deathsmiles IIX Stick
SRKTT thread-
=Unknown
Case-
RAP Base
=Weight (2.6 kg)
=Sizes - Width = 412mm, Depth = 243mm, Height (including lever) = 135mm
=One main plastic base. Does not have individual plastic pieces
+Same design/production base by major company for multiple consoles made swapping parts and getting 3rd party support easier
=Interior of case has plenty of space for mounting PCBs
=Must open from bottom (Which voids the warranty)
Metal Panels-
+Both top and bottom metal panels
+Namco NOIR Layout
- Two-point Joystick Mount (Seimtisu VF/JLF Wings)
Plexi/Art-
=No default plexi
=Plexi options available NOT AVAILABLE at Tek Innovations
=Nuts and bolts for top metal panel are difficult to remove and assemble
=Top loaders available via Tek Innovations allowing removal and assembly of top metal panel easier
Bottom Padding/Feet-
=No padding
=Four rubber feet
Joystick-
+Sanwa JLF-TM-8T-SK-K
Buttons-
-HORI stock buttons
PCB-
=same as HRAP EX/EX-SE
Wiring-
+Buttons are quick disconnects
-Joystick is individually soldered microswitches
USB Cable-
=USB 2.0
=No cord compartment
Unanswered Questions Due to Insufficient Testing-
=TO EDIT
![hrapexmushi.jpg]()
Hori RAP Mushihimesama Futari
=Hori Real Arcade Pro. Mushihimesama Futari Stick
SRKTT thread-
=Unknown
Case-
RAP Base
=Weight (2.6 kg)
=Sizes - Width = 412mm, Depth = 243mm, Height (including lever) = 135mm
=One main plastic base. Does not have individual plastic pieces
+Same design/production base by major company for multiple consoles made swapping parts and getting 3rd party support easier
=Interior of case has plenty of space for mounting PCBs
=Must open from bottom (Which voids the warranty)
+Exclusive GREEN Case
Metal Panels-
+Both top and bottom metal panels
+Universal Joystick mount
Plexi/Art-
=No default plexi
=Plexi options available via Tek Innovations
=Nuts and bolts for top metal panel are difficult to remove and assemble
=Top loaders available via Tek Innovations allowing removal and assembly of top metal panel easier
Bottom Padding/Feet-
=No padding
=Four rubber feet
Joystick-
+Seimtisu LS-32-K-SS2
Buttons-
-HORI stock buttons
PCB-
=same as HRAP EX/EX-SE
Wiring-
+Buttons are quick disconnects
-Joystick is individually soldered microswitches
USB Cable-
=USB 2.0
=No cord compartment
Unanswered Questions Due to Insufficient Testing-
=TO EDIT
![Hori-OG-01.jpg]()
Hori OG
=Hyper Stick Pro Otomedius Gorgeous Ver. (Konamistyle Limited Edition)
SRKTT thread-
=Unknown
Case-
RAP Base
=Weight (_______________)
=One main plastic base. Does not have individual plastic pieces
+Same design/production base by major company for multiple consoles made swapping parts and getting 3rd party support easier
=Interior of case has plenty of space for mounting PCBs
=Must open from bottom (Which voids the warranty)
Metal Panels-
+Both top and bottom metal panels
Plexi/Art-
=No default plexi
=Nuts and bolts for top metal panel are difficult to remove and assemble
=Top loaders available via Tek Innovations allowing removal and assembly of top metal panel easier
Bottom Padding/Feet-
=No padding
=Four rubber feet
Joystick-
=Sanwa JLF-TM-8T-SK-GT-B (Octogate)
+Uses Yamatake MS-Y-3 microswitches (not Omron)
Buttons-
=Sanwa OBSF-30, HORI 24mm
PCB-
=Touch screen
=PCB must be unique from other versions of RAP due to touch screen
Wiring-
=Joystick has individually soldered microswitches
+Buttons are quick disconnects
USB Cable-
=PS2/PS1 connector exits plastic base
=No cord compartment
Unanswered Questions Due to Insufficient Testing-
=TO EDIT
XBox One
to edit
Uncategorized or detailed yet
to edit
![Hori-RAP3AA-01.jpg]()
![Hori-RAP3SA-01.jpg]()
![Hori-RAPEX-01.jpg]()
![Hori-RAPEX-SE-01.jpg]()
![Hori-SFIV-01.jpg]()
![Hori-Tekken6-01.jpg]()
BELOW SPOILER TAG IS FOR INFORMATION THAT I HAVE NOT YET BEEN ABLE TO SORT THROUGH OR UTILIZE IN FINDING INFORMATION


")


 (img credit
  (img credit
 (img credit