Quantcast
Channel: Tech Talk — shoryuken
Viewing all 8072 articles
Browse latest View live

Madcatz PS3/4 TE2 PCB Diagram?

$
0
0
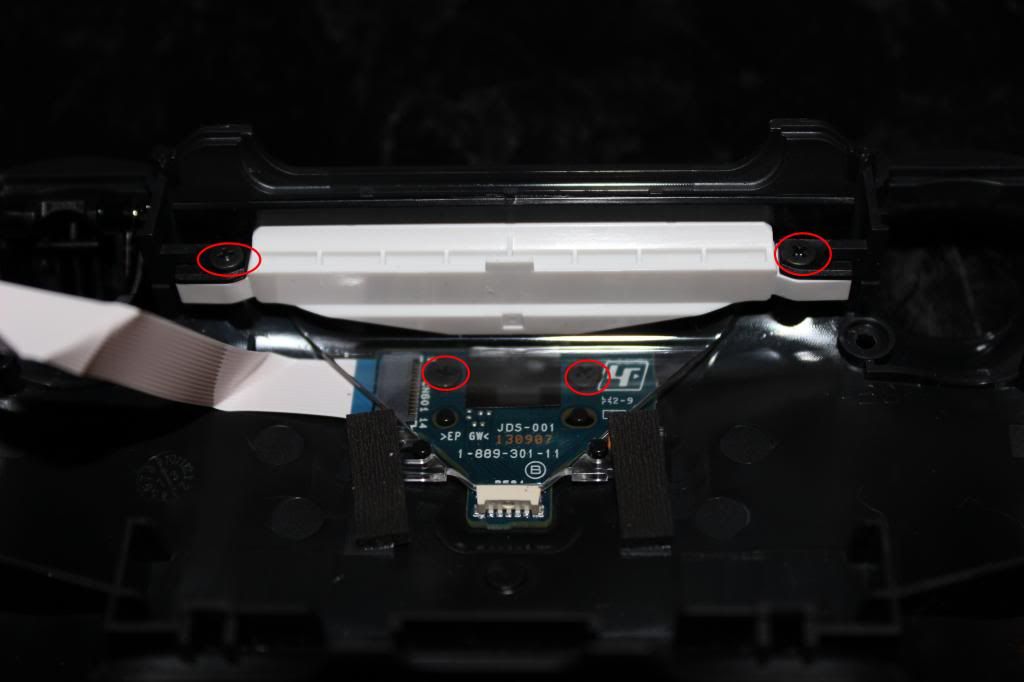
Hi there, i've got a spare PCB from a PS3/4 madcatz TE2, but i don't have the layout for the front panel, i just remember one of the ends is Ground and the other one is Home.

Can you help me figure out the other buttons + LEDS + VCC?

Thanks!

Art's Hobbies Big Update! 1/32" Acrylic, V.S., Pro, Qanba, HRAP V3/VX, Custom Art Dustwashers.

$
0
0
Website: Welcome to Art's Hobbies

Big Update 3/4/2012

Hey guys! It's been a while since I've had the chance to be more active around here, and provide the occasional updates and question sessions. Long story short, I picked up consulting on a software project for the County. So between working on that and taking care of orders, I've been pretty beat up, trying to balance everything. Even with some added help in the business, I'm still the only one to answer emails and work on the more customized orders, so I have been a bit overwhelmed, particularly over the winter season and tournament seasons.

Now that my county project is at a phase where I can take a break, and after I had a little opportunity to relax, I'm refreshed and back with updates! And what timing too... with the V.S., Pro, and other new things coming out! Here's some things on the plate.

1/32" Acrylic!
This is one of the biggest things for me. For a while, I've had people ask me about 1/32" options, and I always had to turn them down because the only material that is normally available in that thickness, is Polycarbonate (Lexan). I've mentioned before that laser cutting Lexan can emit potentially toxic fumes and tends to discolor and burn the edges. So for a while I've been searching for an acrylic option in 1/32" thickness. Some places could make normal acrylic in that thickness, but it becomes way too brittle. Regardless, I continued to look for options.

Now, finally I have found a source that carries 1/32" Impact Modified Acrylic. This material is 10x stronger than normal acrylic, and is perfect for a thin alternative to Polycarbonate. It's incredibly flexible and more than durable enough for fight stick purposes, even for those times of pushing down hard to snap in buttons. Also, Acrylic has the advantage over Polycarbonate in that it is crystal clear (more clarity), less prone to scratches and will not yellow over time when exposed to UV (sunlight). Here are some images for you to compare.

acry_1.jpg

Incredibly flexible and durable. (It can bend more than this)
acry_3.jpg

Superior clarity. And this is after it was bent.
acry_2.jpg

So I'm very excited to offer this new line of acrylics. This idea of 1/32" Impact Modified Acrylic is still so new, that most plastic businesses either haven't even heard of it, or still don't carry it in that thickness. Trust me, I've called like over 30 companies in California alone, and only one out of those 30 knew what I was talking about.

I'm aiming to make these available on my site in a few weeks. I just ordered a huge batch of them so I still need to wait for them to arrive, while also updating a lot of other products and the need to code in a lot of new options on my site.

Madcatz Street Fighter x Tekken V.S. Fightstick

As it's already mentioned in the V.S. thread, covers for the Top, Bottom, Sides and Corners have been worked on. The templates are currently available. That case is incredibly modifiable and easy to personalize. There's more that can be done and I'll continue looking at ways to offer more options to spice things up. More info and pictures in that thread:

V.S. Thread - Post 1
V.S. Thread - Post 2

Madcatz Street Fighter x Tekken Pro Fightstick

I've also got the Pro Top and Bottom covers. More info and pictures in the Pro thread here:

SFxT Pro Post

Qanba Plexi and Artwork

I've had a lot of requests for this but while working on my other projects, I really couldn't give an answer to working on a new stick. Now, I finally had a chance to complete the Qanba plexi. It also has Laser 3D engraved countersunk holes so you can use the existing screws. This method of countersinking can only be done on 1/8" or thicker material, otherwise it can cause thinner plexi to become too brittle and crack. So thank goodness Qanba plexi's are 1/8" thick.

I understand Qanba has their own plexis, but I was told it can some times be too large for some of the fightsticks and some sanded was necessary. Well, I modeled my template from the original Qanba plexi, and the person whom I've worked with (Motoyuki) has confirmed that everything fits perfectly without sanding (as he had to do with his replacement Qanba plexi from another source). Additionally, this will allow me to offer Artwork print and Cut services and other plexi color options for the many different colors Qanba has.

qanba.jpg


HRAP V3/VX and Artwork.

Finally, I get a chance to work on the V3/VX. It's been on my plate for a while, and I finally got to it. One of the things that stalled this project were the issues with the countersunk screw holes that could put a lot of stress on regular acrylic. But with the 1/32" Impact Modified acrylic, it is no longer an issue!

Notice, like the MadCatz Pro, I did not cut the middle screw hole as the screw there would very likely cause discomfort with game play, since it's so close to the lower button.

The necessary screws to install the plexi/artwork, as well as giving you top access for modifications, will also be included. Will be coming in another week or two along with all the other new additions =).

Here is the VX/V3 Template.

( Taokaka design by Stoogie )

vx.jpg


TE Soul Calibur V Covers. (In Madcatz TE Section, scroll down a little to see them)

te_scv_1.jpg

te_scv_2.jpg

HORI Soul Calibur V


hscv_2.jpg


Custom Artwork Dustwashers Return!

cdw_1.jpg

When I first introduced these, they were laminated by a clear acrylic laminate spray. Unfortunately, that spray produced some technical difficulties in its application and made it difficult to produce a consistent, good quality product. So for a while, I was trying to look for an alternative. It took some time because most laminates that were presented to me, usually had some type of vinyl, polycarbonate, or pvc element to it, all of which are bad for laser cutting.

Well, finally I found a great quality overlaminate that is safe for laser cutting. So now, I can bring back the custom artwork dustwashers that many have emailed me about, and with more consistent quality.

Here are some closeups of some SFxT Dustwasher samples.

cdw_6.jpg

cdw_5.jpg

cdw_2.jpgcdw_4.jpg

Custom Artwork dustwashers will be available again this upcoming week.

Alright, that was a ton of stuff. Time to get some rest. Hopefully I get to talk to some of you guys again, and get a chance to check out everyone's stick posts. Been seeing great things! Thanks again for everyone's support! Have a good one!

-Arthur

Also, Shoutout to JDM. Thanks for all your help to answer questions while I wasn't around on my threads. You rock!

Please check my website for more details : Welcome to Art's Hobbies

Obs mx silenced

$
0
0
Hey guys,

Long time no tech talk.....lulz... with the return of sfv and my wife not liking loud sticks I went for the silenced route again. I really wanted to try the obs mx from Bryan and pas but I noticed they didn't have foam like hbfs because of how they work. I love cherry reds and the rubber o rings on all my mech keyboards and I have used various cherries on the version 1 hbfs. They work good but just like all the silenced buttons that use foam they lose some of the hardness. I finally got some obs mx and threw some rubber o rings on them. They work great. They don't interfere with the adjusted sensitivity of the obs mx buttons but they do cut down on the bottoming out travel after the switch engages which is nice. I suggest the 50a .4mm hardness rings. They don't feel as squishy ad other silenced buttons and they are super quick and durable. You can buy them cheap on eBay. If this has already been posted sorry hehe
Ps I let Bryan know too.


987C1347-729E-4D83-B796-8047F8934852_zpsvxjc1txh.jpg

UD-CPS2: Fully Consolized Capcom Play System 2

$
0
0
Introduction -

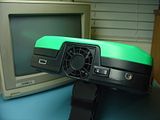
Alright, folks, here it is, a fully consolized CPS2. And when I say fully consolized I don't mean with some monstrous external power supply and DB 15 connectors that require custom joysticks or adapters. I'm talking about a setup where everything is "off the shelf."

The core elements of this project are: Power, Video, and Controls:

Power - Internal DC/DC converter. An off the shelf laptop charger supplies this board with power which is then converted to proper voltages necessary to run everything inside.

Video - [NTSC] Composite, S-Video, and low resolution RGB+S (no Component). Uses a standard off the shelf Playstation A/V port cable.

Controls - 2 Player XBOX 360 and PS3 controller support. Yes, you just plug and play.

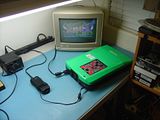
Photos of one of my prototypes:

th_DSC07928.jpgth_DSC07925.jpgth_DSC07923.jpg
th_DSC08337.jpg
th_DSC08335.jpg

Location Tests -

Devastation 2011 - Phoenix, AZ (early prototype, hard-wired controls)
th_DSC07913.jpg

EVO 2012 - Las Vegas, NV (prototype, XBOX 360 support)
th_DSC08205.jpg

AIAB This is It! 2012 - Tucson, AZ (prototype, PS3 & XBOX 360 support)
th_DSC08316.jpg

ST Games @ EVO 2013 - Las Vegas, NV (production, PS3 & XBOX 360 support)
th_DSCF0417_zpsb1535561.jpg

F.A.Q. -

Ordering:
Spoiler:
Q: What am I getting exactly?
A: You will receive a modified system (CPS2 A Board), power adapter (100-240V AC), video cable (Composite & S-Video), and USB cable for future firmware updates to the controller interface. You will still need a game (CPS2 B Board), TV (CRT with S-Video recommended), and controller (X360 or PS3).

Q: Can I pre-order one of these now?
A: Yes! I have not opened an official sales thread, but for the time being you can send me a PM or e-mail me: udgametech [AT] gmail.com

Q: So, how does ordering work, exactly?
A: Just let me know that you want to order a system and I will respond with an order number and an estimated time to complete it. When your order is being built, I will send you a payment request, after which you will have 2 weeks to make payment or forfeit your order position.

Q: How much does shipping cost?
A: It depends on which country you live in. USA is $20. Other countries vary.

Q: What forms of payment do you take?
A: This also depends on which country you live in. USA: PayPal (shipping only to verified address), money order, bank transfer, or personal check. Other countries: bank transfer or money order.

Q: I already have an A Board. Can I save money on my order and just send you mine?
A: Yes. You can receive $30 off of your order for each A-board sent (you can send multiple). However, you are not guaranteed to receive the exact board you sent (it is difficult to keep track of who sent what when they are disassembled in batches). Two other reasons to send me an A Board would be 1.) you would like an ASIA/Grey or SA/Orange compatible system, or 2.) you want an absolutely mint condition A Board and you happen to have one.

Q: I already have a laptop power supply. Can I save money on my order and just use mine?
A: No. I'd rather you start with a setup that has already been guaranteed to work than spend any time trying to figure out why power supply x isn't working properly.

General:
Spoiler:
Q: What region/color B Board (Game Cartridge) will run on the UD-CPS2?
A: The standard compatibility for the UD-CPS2 is US/Blue and JP/Green (and RENTAL/Yellow, as far as I know). If one desires to play ASIA/Grey or SA/Orange games, a custom order can be placed for a unit which is compatible with (only!) one of those.

Q: Will this still work on an arcade cabinet?
A: No. Even if the JAMMA connector were exposed, there are still technical reasons for it not being able to run both ways.

Video Related:
Spoiler:
Q: I'm tired of lugging around a heavy CRT TV to gatherings/tournaments. Being able to hook this up to a monitor would be a huge convenience. Is there any way to have Component Video available for this?
A: Not natively. You could run the UD-CPS2's RGBS output through an RGB to Component transcoder (like this) to output 240p Component Video, but any HD monitor (that actually supports 240p) must upscale that resolution in order to display it. Upscaling inevitably adds lag to your setup, therefore (non-HD) CRTs are the lag free display of choice for this system.

Q: I would like to stream/capture video from this unit. Do you have a recommended setup?
A: In the realm of standard resolution, the highest video quality for the least amount of hardware headache is certainly S-Video. By simply running S-Video and Stereo Audio to a distribution amplifier (like this or CE Labs AV 400SV) you can run both the player setup and stream/capture setup at excellent quality with fairly little extra hardware/cabling.

Q: Will this output PAL video?
A: No. There are no immediate plans to add PAL support.

Controller Related:
Spoiler:
Q: Will all PS3 and XBOX 360 controllers work with UD-CPS2?
A: This cannot be guaranteed, but based on location testing, it certainly works with the majority. Also, the controller interface firmware can be updated via USB, so future firmware updates may expand controller support as more data is gathered.

Q: Can USB controllers other than XBOX 360 & PS3 be used?
A: No. I'd like to add support for other controller types in the future, though.

Q: Can buttons be re-mapped?
A: Yes, all buttons except for START and SELECT are able to be mapped to any one of the 6 Punch/Kick buttons.

Q: Can directions be re-mapped?
A: No.

Spinoff Products -

For those of you looking to add XBOX 360 and PS3 controller support to your own superguns, I will be making discrete USB Decoders, soon. There's a dedicated thread for those here:

http://forums.shoryuken.com/discussion/186701/undamned-s-usb-decoders-usb-to-jamma-etc/p1

I will also be making available the internal DC/DC converter used in the UD-CPS2 so people can use those in their own consolization/supergun projects! When those are available, I will update this post with a link to a separate thread.

The rest of this thread is a work log from early in the project up to the present...

SFV PS4 legacy controller compatible sticks/PCBs (see first post)

$
0
0
Just to make things easier, we can post what works and what doesn't on the PS4 version. Will edit this as folks let us know what their results are.

Tested Working:

Sticks:
MadCatz SE (1stGen tested and brawl checked)
MadCatz TE (1st Gen, Soul Edition, TE: S, and MvC2 TE tested, pretty sure most of this line will work... just need confirm)
Hori Real Arcade Pro. 3 Premium VLX
Hori V3-SA
PDP Mortal Kombat Joystick (who knows, maybe someone is using the PCB in something else)
Qanba Q1
XBox360/PS3 eTokki Omni Rev. 3
PDP Injustice Stick
Mayflash (circa 2009)
PS3 Sega VSHG
Exar Exaprize USB Sanwa Edition
-Madcatz SFXT (pad)

PCB:
Phreakmods Cerberus
Toodles MC Cthulhu
Toodles PS3 Cthulhu
Toodles ChImp (classic)
Toodles ChImp (SMD)
Toodles TE Kitty
Zero Delay USB (pending version model)
PS360
PS360+
Paewang PCB (etokki Omni)

Tested NOT working:

Sticks:
PlayTech Pro Arcade
Qanba Q4 (some report working, others are not)
Qanba Q4RAF (some report working, others are not)
Eightarc Ivory (Qanba, non-fusion, wood version)
-iBuffalo SNES USB Gamepad
-Sony Dual Shock 3 (pad)
-Sony Six Axis (pad)

PCB:
ZD Rematch (some report working, others are not)

The worst sticks you've ever seen

$
0
0
I felt compelled to make this thread today as I encountered this abomination on a local auction site:

whatthehell.jpg

Has anyone seen anything worse than this? If so please feel free to post it.

Vewlix 2p Template

$
0
0
Looking for one of these so that I can lay down on my cabinet to get measurements close to correct. I know I can make them up with slagcoin, but with a template I can match artwork much easier to exact placement. Anything helps even if its just measurements. Not for the single player for the 2p cp.

Happ IndustriasLorenzo style 3D printed square gate stick.

$
0
0
Ok so I like American style arcade sticks but the thing that’s always bugged me is the lack of a square gate, so I decided to make it myself. At first I thought it would be easy enough just make the square gate print it out and call it a day, but after modeling the gate and testing it out I realized a little bit more designing should take place.

1_zpspfuuac6q.jpg
stick_zpsq0of13zv.jpg

So the problem with using the gate by itself is that the actuator doesn’t engage the gate rather the stick shaft engages the circle that holds the spring in place.

2016-03-05%2000.08.42_zpsacsjzrmu.jpg

What I did is enlarged the hole, but by enlarging the hole I also had to enlarge the shaft spacer. I also had to make a smaller diameter actuator shaft so it rides on the square adequately.

2016-03-05%2000.28.20_zpsroxholah.jpg
2016-03-05%2000.28.29_zps3ch8ugbs.jpg
2016-03-05%2000.28.47_zpsz8mm2lgv.jpg
12787484_10153998918658308_1527096985_o_zpsywzyxcmw.jpg
12823005_10153998918518308_2062771461_o_zpsasflk6py.jpg

I printed all the parts in PLA with .3 layer height and 3 perimeter walls. I’m going to print the shaft spacer in nylon next, to have a smoother feel. This is still a work in progress so I’ll be updating parts as I test it out. If you want to test it out and give me feedback you can download the parts in the following link.

https://www.youmagine.com/designs/american-style-square-gate-arcade-stick

Official USFIV/GGXrd/P4U TE2 Thread

$
0
0
New thread since the old "leak" thread didn't seem like it was off to a good start.

USFIV_TE2_622x320.jpg

http://madcatz.com/mad-catz-brings-the-fight-home-with-ultra-street-fighter-iv-products/

http://shoryuken.com/2014/06/04/mad-catz-announces-ultra-street-fighter-iv-arcade-fightstick-tournament-edition-2/

What we know:
-TE 2 case (most likely the updated case from the "unbranded" TE2)
-Sanwa parts
-USFIV art
-2 versions, XBox 360 and PlayStation 3/4 version
-360 version has red sides
-PS3/PS4 version has blue sides
-PS3/PS4 version has a toggle switch to select consoles, like the HRAP.V4
-Coming in August

Brook Universal Fighting Board into a Hori SCV stick. Help appreciated.

$
0
0
I recently picked up the version of the Brook Universal Fighting Board with all soldered headers (thanks, Paradise Arcade Shop). While I’m decent with wire strippers and a crimp tool, my soldering skills are surely not up to snuff. I’d like to avoid soldering if at all possible..

Here are the button functions that I’d really like to retain that are part of the sub pcb on the top button panel:
- PS
- Select
- L3
- R3

The following are nice-to-haves but really are not a priority:
- Port LEDs (1-4)

The rest I don’t care about at all (don’t use ‘em)
- Turbo
- Turbo LED
- Toggle switches

I’ve done my best to trace what’s what on the sub and main pcbs. Take a look and let me know if my guesses are correct.

Sub PCB
29c9bon.jpg

Main PCB
2j1jsjd.jpg

Now I see only one ground wire and one VCC wire on the sub pcb (well..at least feeding the right ribbon cable).

jq3r15.png

But the Brook Universal Fighting Board manual states that I’ll need the following:
1. Dedicated Ground for Start/Select/PS
2. Dedicated Ground L3/R3
3. Dedicated VCC for Port LEDs

2wmffdi.jpg

I could most likely daisy chain a ground wire feeding from the Start button (off in the corner of the case). If that’s the case, I could then use the ribbon cable Ground wire (for L3/R3) and VCC wire (for the Port LEDs)…right?

This is making my head hurt, so thanks in advance for your input.

Dual Shock 4 PadHack Thread - aka you should padhack the hfc4 pad instead.

$
0
0
UPDATE: Just padhack a hori fighting commander 4 instead.


So you want to add PS4 functionality to your arcade stick? Well too bad. Just wait until there is a third party pcb that is cheap and easy to wire up. Maybe we'll get lucky and there will be a firmware update to any of the
custom ps3 pcb's that are out in the market. Oh, you don't want to wait? You really want it now? Well the only option right now is to padhack a Dual Shock 4 controller. Luckily for us the pcb is common ground. Unluckily for us
the pcb is a pain in the ass to wire up and is quite unforgiving if you mess up. You thought the Xbox One pad hack was hard? This pad hack shits all over it. You accidentally burn off or rip off a contact pad on the ds4 and
you've just wasted $60. The only option after that is to find a via that traces to the contact pad that you've just destroyed. They are not easy to find nor solder to.

So if you think you have the skills or are looking for a challenge you have been warned. Don't hold me responsible if you damage your DS4.

With that being said, let the padhack begin! We will start out with preparing the ds4 pcb.

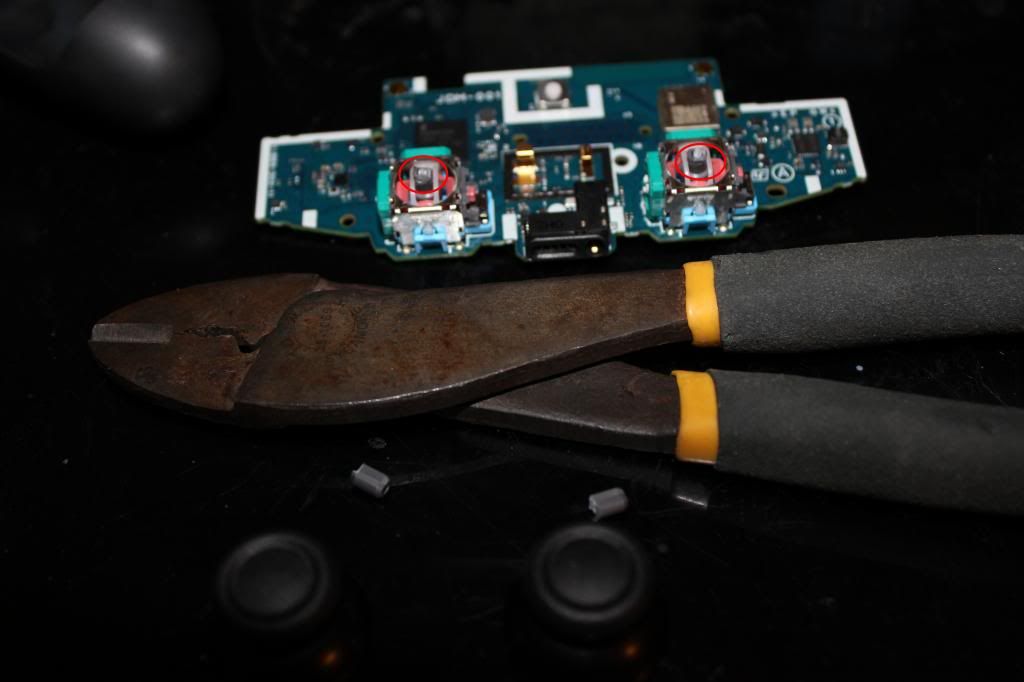
To begin opening up the DS4 you must unscrew the four screws on the back of the pad.
IMG_0336_zps442ab332.jpg

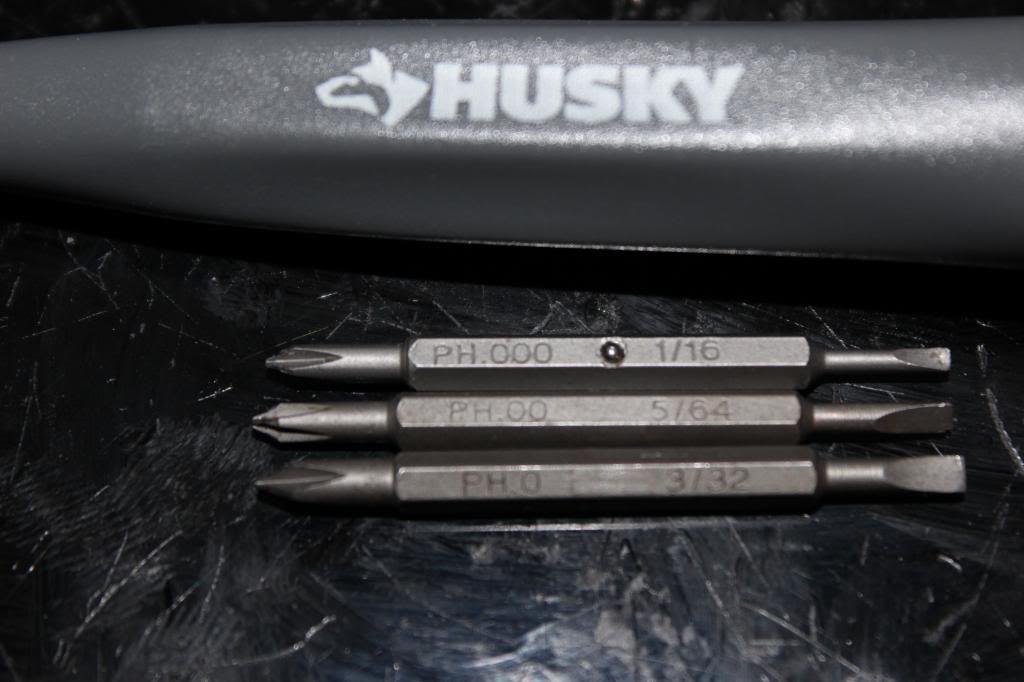
You'll need to use a size #0, #00, or #000 Phillips head screwdriver. If you don't own one then I suggest buying a Husky precision screwdriver set.
IMG_0337_zps65fe8af9.jpg

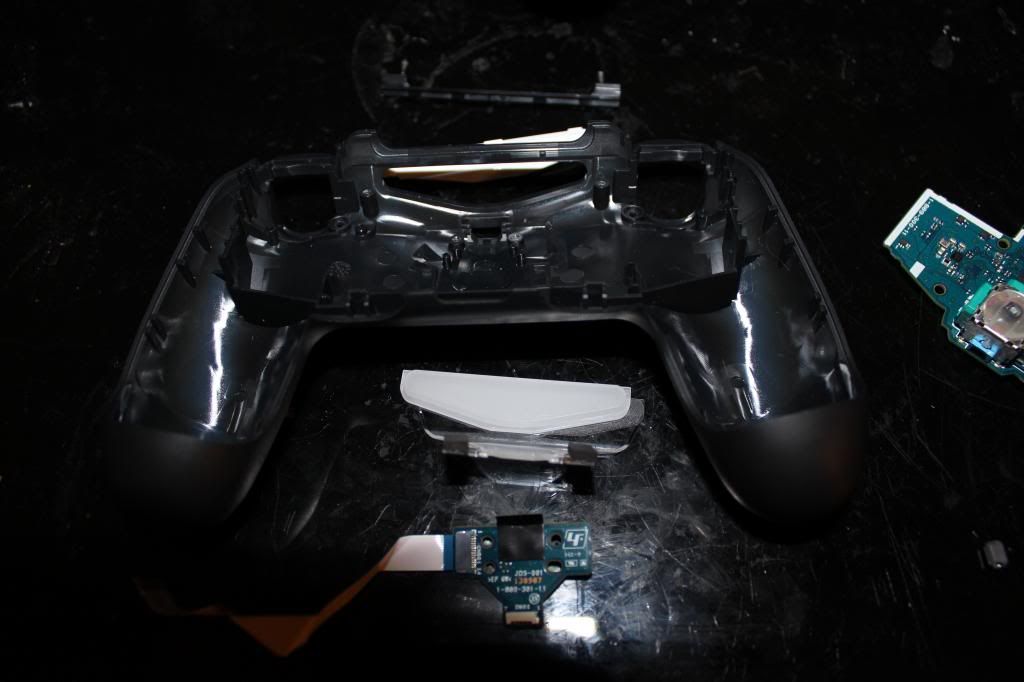
You'll need to use a little force to pull apart the shell, but don't pull the shells too far apart too fast. There is a ribbon cable connecting the usb jack to the ds4 pcb. Pull the ribbon cable out first. Then unplug the

lithium ion battery pack. Then cut off the rumble motor wires.
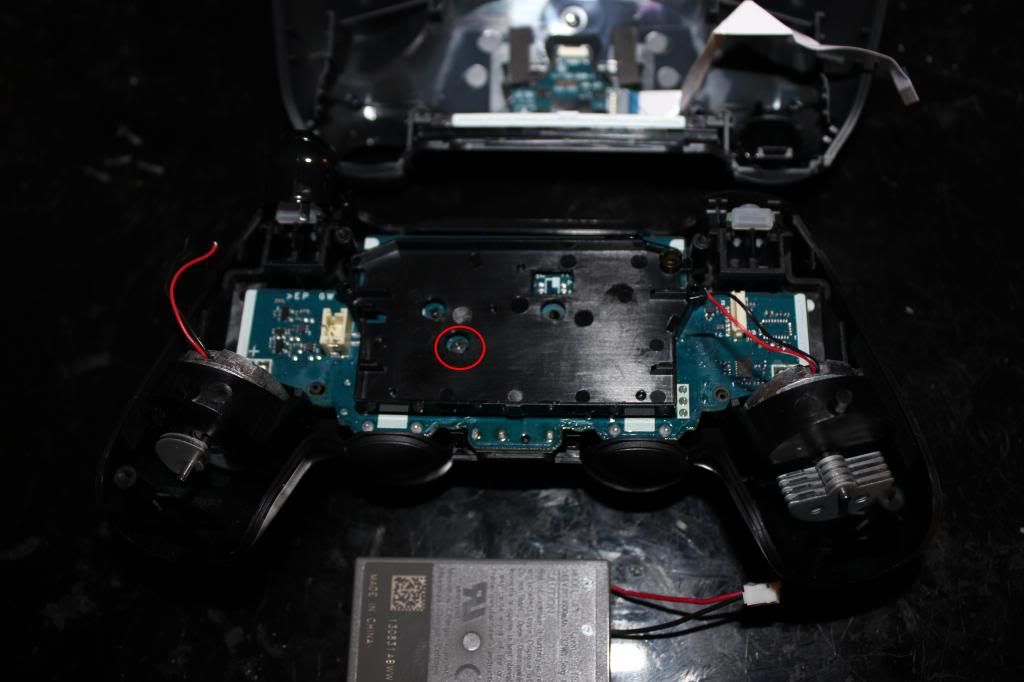
IMG_0338_zps823d7882.jpg

Circled is one more screw that holds the pcb to the shell.
IMG_0339_zpsced0a56e.jpg

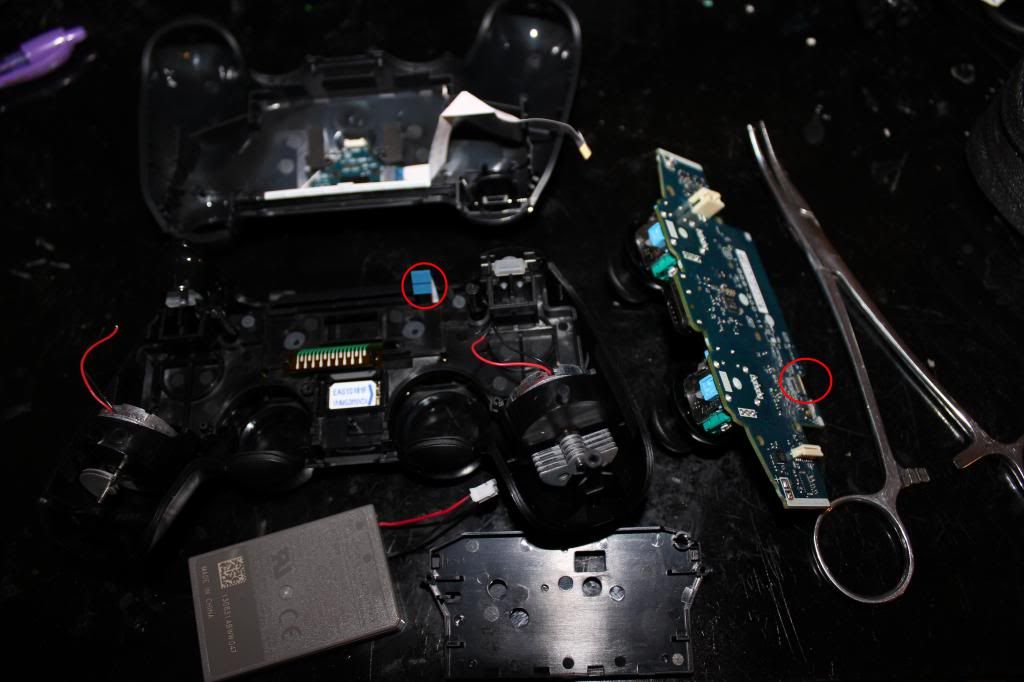
Be careful as you lift the pcb out. There is still one more ribbon cable left that needs to be unplugged. It might be a bit difficult to unplug with your finger so using tweezers or forceps will make things easier.
IMG_0340_zpsde1f7a4d.jpg

If you have very tight space limitations inside your case you'll probably will want to desolder the analog jacks and neutralize the axis with 10k ohm resistors. However, for most applications just cutting the stubs and gluing
the stick in place will suffice.
IMG_0341_zpsb1f0d7c5.jpg

If you want to use the micro usb jack, and I suggest you do, then you'll need to unscrew four screws that hold it in place. The top two have to be removed first. Then the led light thingy can be removed to gain access to the
bottom two screws.
IMG_0342_zps8f1dea6e.jpg

Remove and set aside the micro usb jack.
IMG_0343_zpsf0d6dec8.jpg

This is where you'll be wiring up the joystick and buttons to. Looks fun doesn't it?
IMG_0345_zps3e268abe.jpg

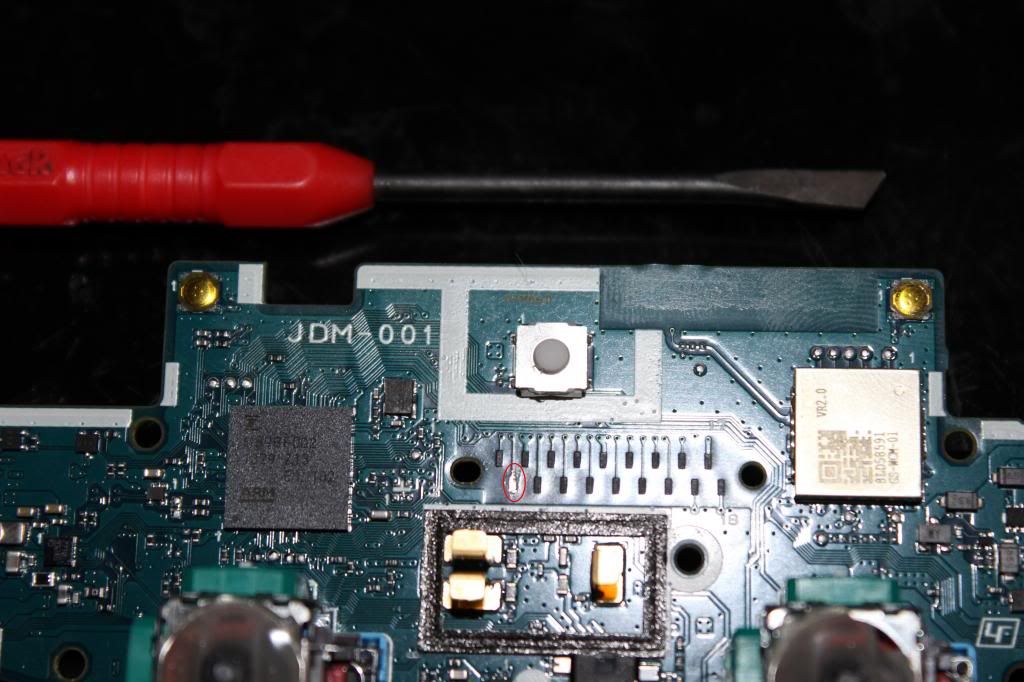
To gain access to the copper contact pads the carbon residue has to be scraped off.
IMG_0346_zpse7c0faea.jpg

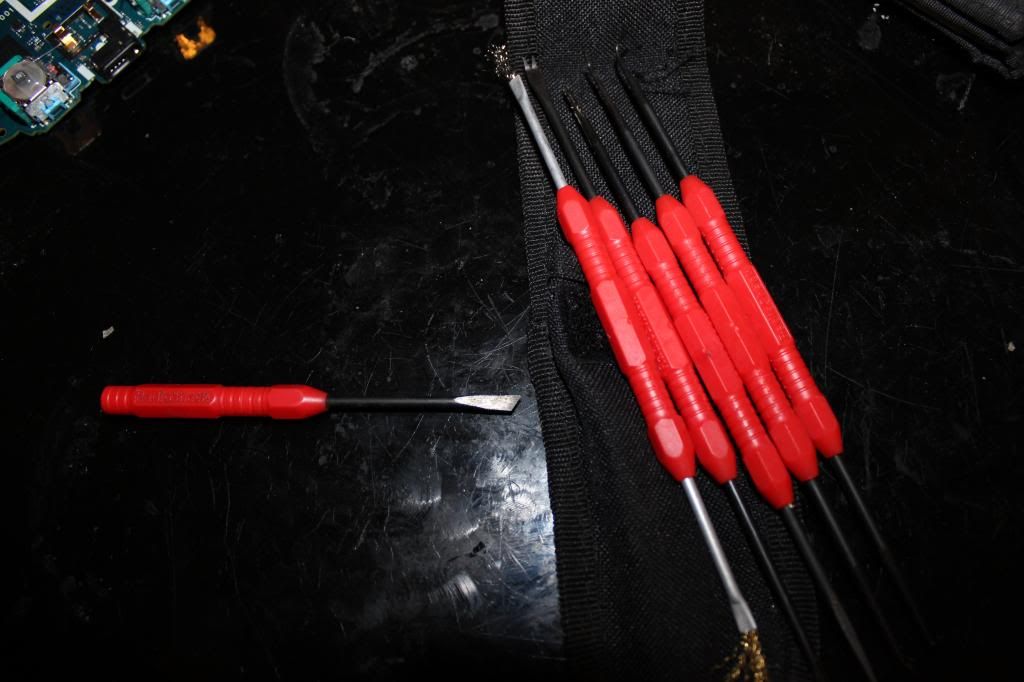
I have a pick set that I got from radio shack that I use to scrape off the carbon pads. The one on the left I accidentally broke in half from trying to pry something off. I suggest not using these picks to pry stuff off.
IMG_0348_zpsb592d658.jpg

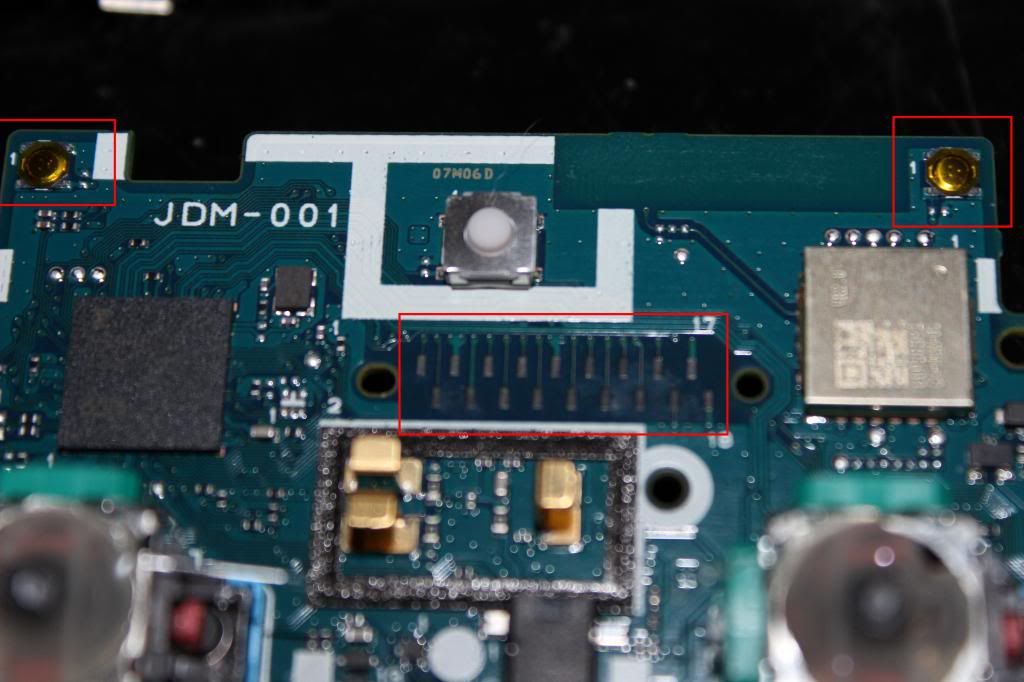
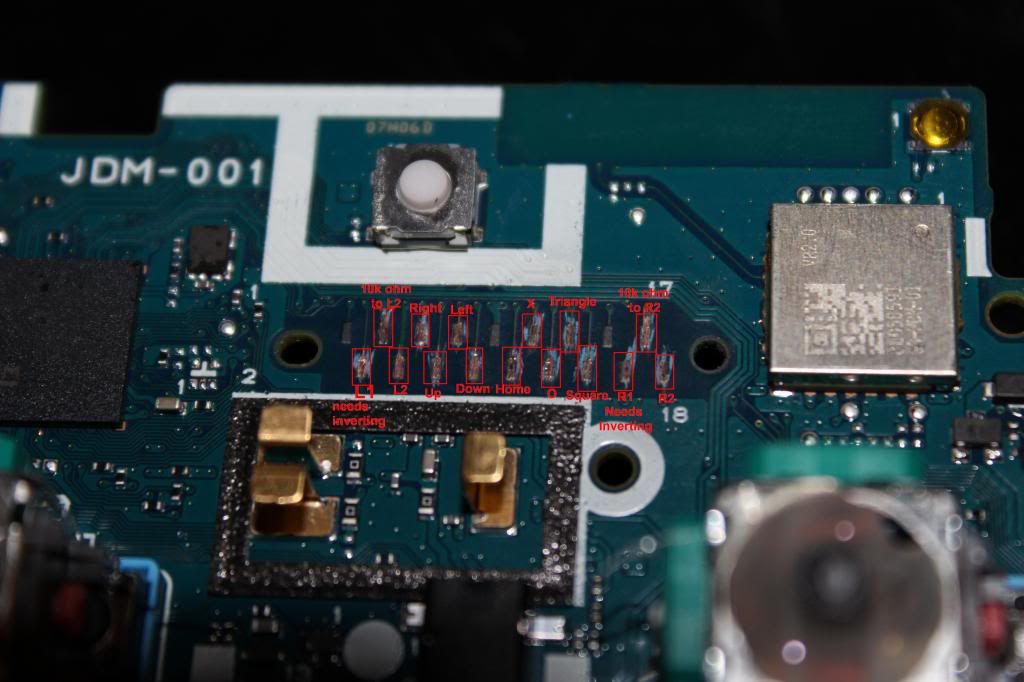
Here's the pinout for the 18 contact pads and which need to be scraped. It is the same for all the model revisions 001, 011, and 020.
1-(Don't worry about me)
2-L1 (needs inverting)
3-10k ohm to pad4
4-L2
5-right
6-up
7-left
8-down
9-ground (Don't worry about scraping me either)
10-home
11-x
12-circle
13-triangle
14-square
15-(Don't worry about me too)
16-R1 (needs inverting)
17-10k ohm to pad18
18-R2
IMG_0349_zps2f5337b0.jpg

Tin the contact pads. Use flux as necessary.
IMG_0350_zps46ac45f6.jpg

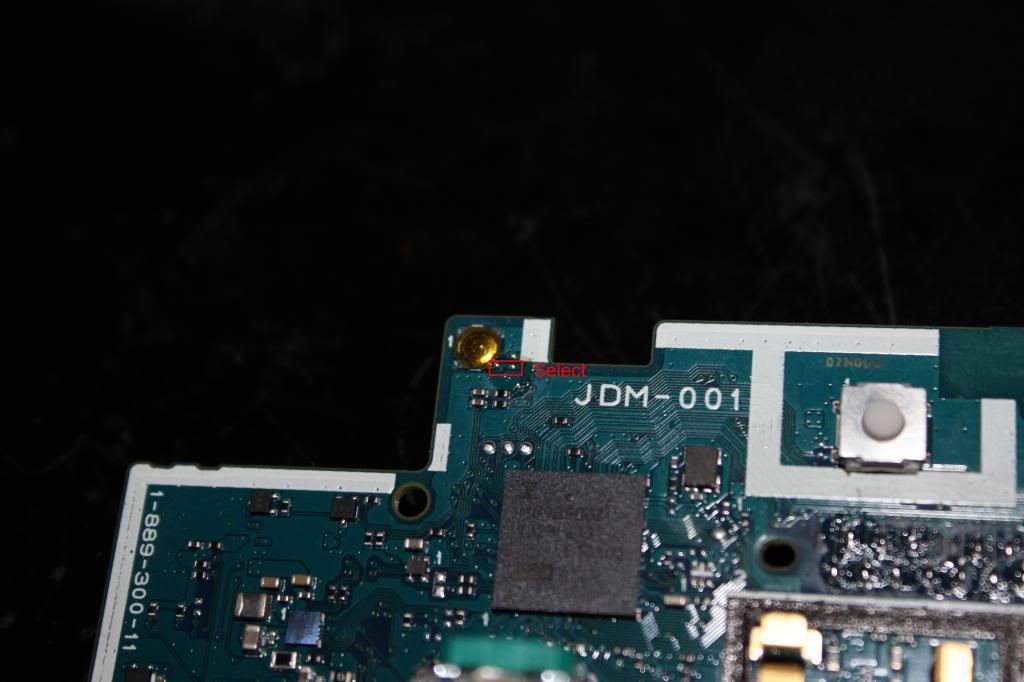
Tin the two very small contact spots in the rectangle for Select.
IMG_0351_zps5e8432e9.jpg

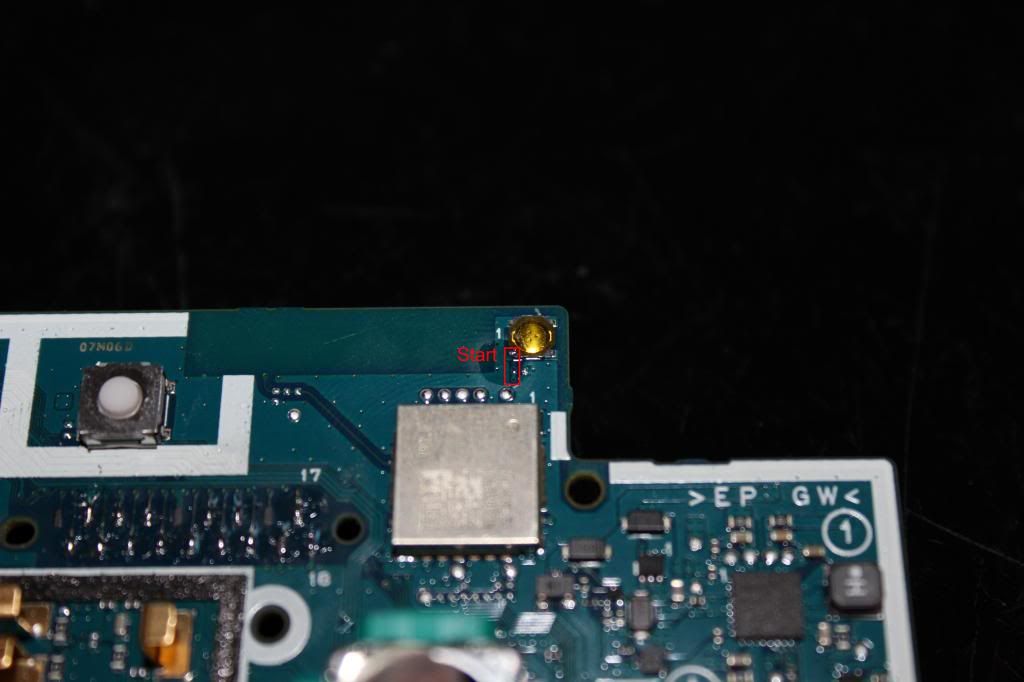
Tin the two very small contact spots in the rectangle for Start.
IMG_0352_zps4cd67d9f.jpg

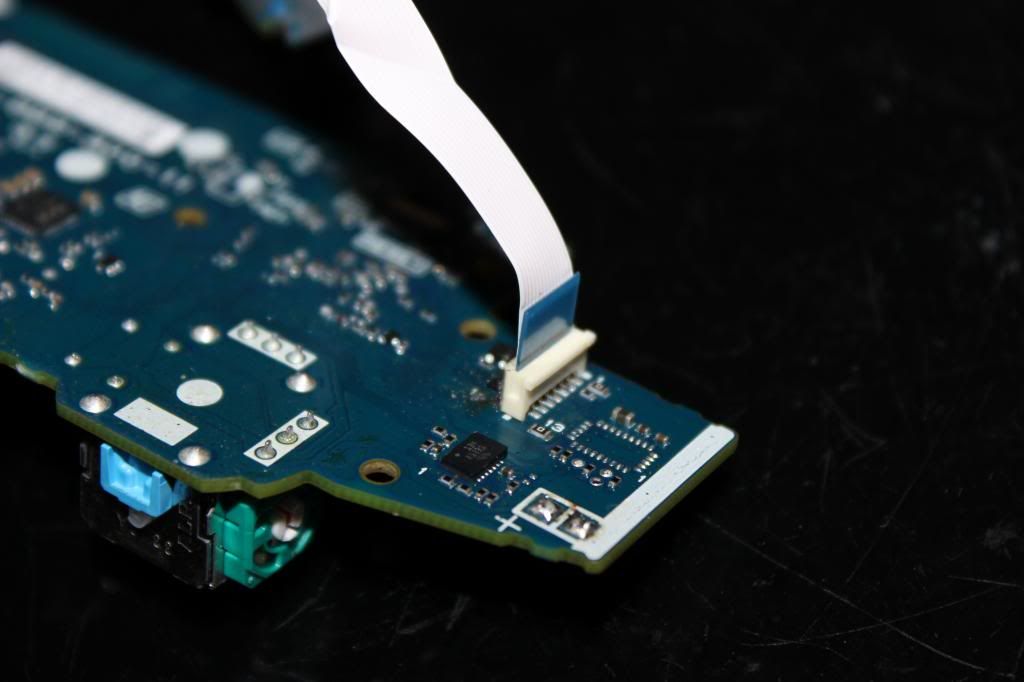
Look at this. This is the ribbon connector for the usb jack. See how simple this is? Want to see how hard your life will be if you don't use this? Just check out the next picture.
IMG_0354_zps133a474f.jpg

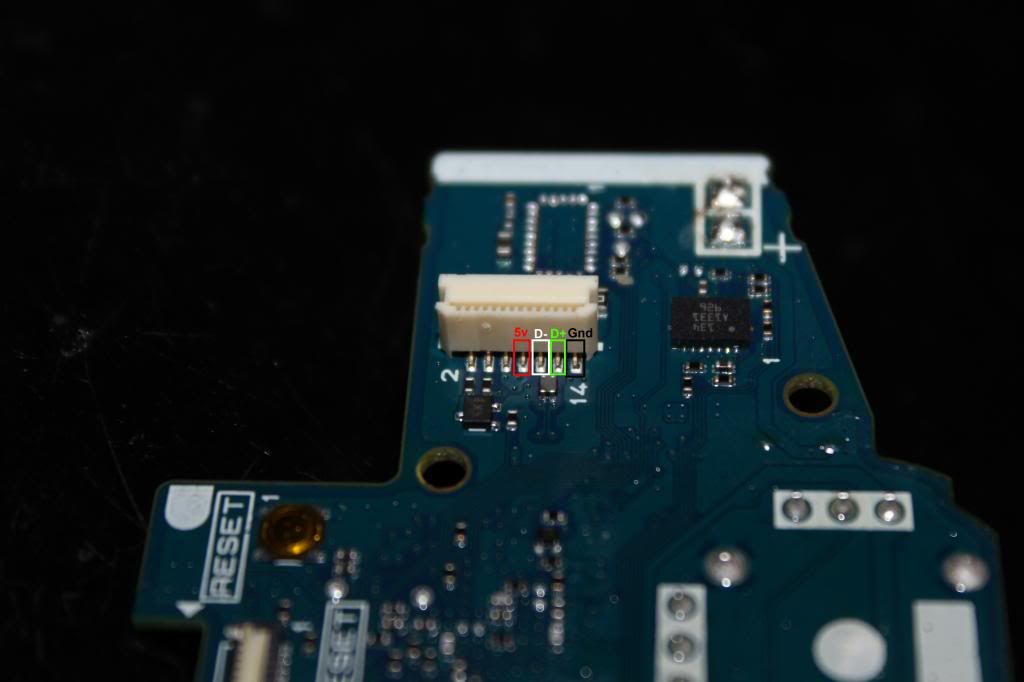
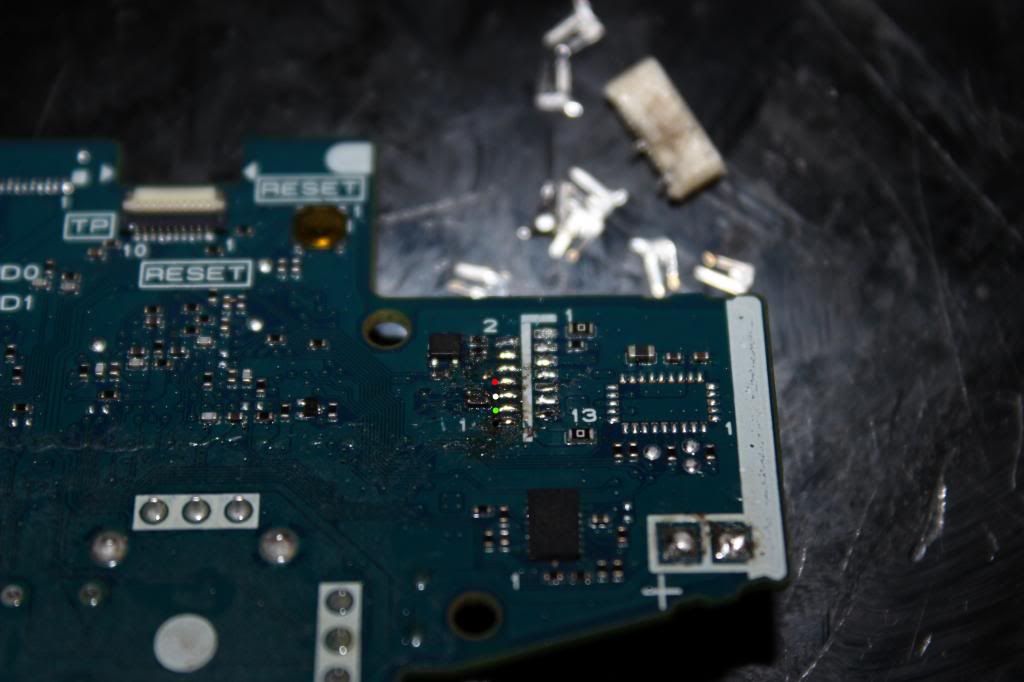
These are the four pins you will have to solder to if you don't want to use the micro usb jack. Pretty small and cramped there.
Note this pin out is for the JDM-001 model and the pictures will reference to that model.
8- Vcc
10- D-
12- D+
14- GND

Pin out for the 011 and 020:
7- Vcc
8- Vcc
9- Gnd
10- D-
11- D+
12- Gnd

IMG_0353_zpsdb05b9bc.jpg

Of coarse removing the ribbon connector will make soldering to the contact pads much easier. This route might be necessary if you are limited in case space. In which case you'd have to remove the battery jack too.
IMG_0355_zps79565b7c.jpg


Now the DS4 pcb is all prepared to begin the wiring!

[ARCADESHOCK.COM Store - BLACK FRIDAY - CYBER MONDAY Sale - Starts Now]

$
0
0
Hey guys, this will be the new Arcadeshock.com Official thread. There's some exciting new items coming out in the next few months as well as an even more exciting 2016.

OUR BIGGEST SALE in Arcadeshock History starts NOW!!

NO COUPON CODES NEEDED, just click on the product you want, add to cart and checkout. It's that easy.


SANWA DENSHI Products - 25% Off on the whole line - Below are some examples of the ridiculous deals offered.
  • Sanwa Denshi EVO Wooden Ball tops - Bat tops from $50.00 to $38.00
  • Sanwa Denshi Silent Joystick (2nd Generation) - from $60.00 to $39.99
  • Sanwa Denshi JLF-TP-8YT-SK (base / harness) - from $25.00 to $15.60
  • Sanwa Denshi OBSF30 (The most used pushbutton in the market) - from $2.25 to $1.75 each
  • Sanwa Denshi OBSF30 Silent Pushbuttons - from $3.00 to $2.10 each

SEIMITSU Products - 25% Off the whole line -
  • Joysticks from $22.00 down to $15.00
  • Pushbuttons from $3.00 down to $2.20 on most pushbuttons

HORI Fight Sticks
  • Lots of Fightsticks from $160.00 down to $99.98 (these prices have not gone this low since 2009)

QanBa Fight Sticks and Fight Stick Bags
  • Most Fight Sticks are down from $200 to $119.98 to 99.98
  • Fight Stick Bag that fits their Q4 and some smaller fight sticks from $55.00 to $35.00


A few updates.

Pre-Orders for the HRAP 4 Kai Silent is expected to arrive the week of December 7th. The exact day is unknown pending customs clearance.

Pre-Orders for the FS Mini 4 will arrive the same time as the HRAP 4 Kai Silent.

I just recieved my Mad Catz Arcade FightStick PRO for Xbox 360 and stumbled across an issue

$
0
0
Hey guys so I just recently got this fight stick so I could use it on the pc to play SFV. For awhile actually it was working perfectly and I was adjusting to this stick until the ''A'' button just randomly stopped working, I tried looking everywhere online for this issue but it seems peoples sticks flat out die out or they weren't compatible to begin with. But mine was working perfect and suddenly the button to use LK just...stopped working? I just need advice guys. I've tried reinstalling my drivers, restarting my computer, putting the usb in different slots but no cigar. If anyone knows what type of problem I have at least i'd really apprieciate it :(. Just sad that it stopped working the day I got it.

Looking to find someone to mod an arcade stick.

$
0
0
Hey all,

New to these forums, but I am not exactly new to arcade sticks. So I had a Madcatz TE stick for the PS3 and I got an octagonal gate for it. It was super easy to get put in and I had no issues with it. Flash forward to the release of Street Fighter V; I was told the older sticks would work, long story short, they don’t and it would constantly disconnect from the system to the point of it being unplayable. It was pretty much time to get a new stick. I went with a Hori RAP 4 Kai. I was under the impression that I can put in the gate as easily as it would be in the Madcatz….I am sure you more experienced guys are already laughing to yourselves after hearing me say that...

Yeah, to get an octagonal gate put in, I would need to drill holes into the gate itself. Not only am I all thumbs when it comes to stuff like that, I also have very bad vision…so…yeah. I would like to know if there are any folks for hire out there that would be able to put the gate in for me. If anyone could point me in the right direction of someone like that that offers services like that, I would be much obliged.

Madcatz SFV TE2+ with optical joystick???

$
0
0
Hello all. I just got the TE2+ for SFV and I have a happ p360 joystick I bought a while ago. Is it possible to put it into the madcatz stick?

And if not, what's the easiest way for me to get a stick I can use for SFV on PS4 with a perfect 360 joystick? Price not an issue. I'm an old school player and I need the p360 with the bat top. Please help your boy. Thanks!

Single color arcade stick pics?

$
0
0
I am about to start painting my TE all in sky blue, with sky blue buttons etc.

Does anyone have any pics of something similar? doesnt matter color, as long as its all single color (with matching buttons).

Seimitsu Button Types

$
0
0
I'm looking to swap out the buttons on my HRAP 4 Kai for Seimitsu ones, but I'm confused as to the types available. I'm looking on focus attack, and don't fully grasp what the differences are between the PS14-G, PS14-K, and PS15. Can anyone help me out with that? And I assume I'd need one of these as opposed to the screwbuttons.

Looking for someone to build me a hitbox for ps4/x1

$
0
0
Looking for someone here who is experienced in building me a hitbox. Looking to spend 200-250 on parts casing and labor. Trying to get it going and have it back asap. Please let me know.

Bag to carry two sticks?!

$
0
0
can you guys recommenced a bag which has enough space for two te fightsticks? one of em modified as a hitbox.

Kaimana RGB LED Board thread, RGB animations and more! SRK Tech Talk 2013 Product of the Year!

$
0
0
The Kaimana LED Controller is a powerful new tool for those looking to get the most out of their custom arcade stick or cabinet! This is the first board to used indexed LEDs in an arcade stick and allows for RGB control and animations. It is also the first fight stick RGB LED controller to provide full RGB control for joystick ball tops and hit box configurations.

image
image

The Kaimana can run conventional LEDs like the Pele's or Uila's with an adapter board or can be used to run the new Kaimana J's:
paradise-kaimana-j-rgb-led.jpg

Unlike previous LED boards, the Kaimana uses indexed LEDs so they can be connected in series and you don't have to have multiple wires running from the controller board to each LED
Diagram:
fetch.php?w=500&tok=633a2d&media=kaimana_led_chain_default.png
Example (jwyder's stick):
KaimanaInstaled_zpsdfcceb65.jpg

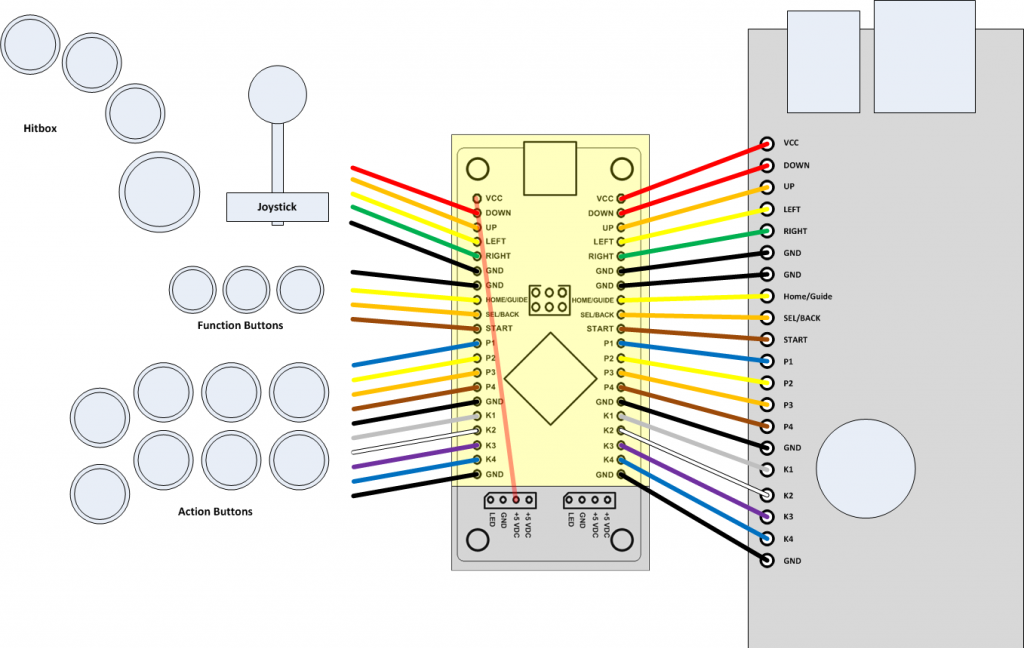
It is also designed for easy installation as a pass through board. The pinouts are the same as a PS360 so modding your dual mod stick could not get any easier!

Diagram:
KaimanaWiringDiagram_zps1cfc4cc6.png

I have installed three of these systems, and total install time, including installing all the buttons and joystick ahs been less than 1 hour each time using the Kaimana J's

Based on the infinitely flexible Arduino, this board can do just about anything you can imagine. Because it uses the extremely simple to learn Arduino programming language, this board opens the gate for anyone to create their own light patterns and shows.

As people invent there own animations series we will be adding them to the store for download and people who contribute programs will be able to earn store credit! As of right now the entire Ryu special move set for SFIV has been coded with animations. The best part is that all you need is a USB cable and any of the programs created can be loaded in seconds!

Boards and accessories can be purchased here:
paradise-kaimana-led-controller-pcb.jpg

Viewing all 8072 articles
Browse latest View live