Quantcast
Channel: Tech Talk — shoryuken
Viewing all 8072 articles
Browse latest View live

Updated 360 controller mac driver, Hori EX2, Mad Catz SFIV Sticks

$
0
0
Hi folks,

Following on from these two threads

http://forums.shoryuken.com/showthread.php?t=178075&page=2
http://forums.shoryuken.com/showthread.php?t=166197

I've updated the mac 360 controller driver to support the Hori EX2, and the two Mad Catz sticks, the SE and TE.

I've only tested the driver with the EX2 and Mad Catz SFIV SE, but if the info I recieved was right the TE stick should work fine too.

If anyone can pass on the info needed (as explained in the first post of the 2nd linked thread) for the HRAP EX stick, I'll place that in an updated driver.

The link to the updated driver is as follows.

Its gone :)

Any feedback on the status of the TE stick would be greatfull, and I hope you guys have as much fun with MAME as I do :looney:

Edit:

This driver should just install, quick restart and work, no playing around with .plist files or repairing permissions or messing with the terminal, enjoy!

Update:

I've included the MadCatz SFIV pad, their Retro Arcade Stick and their 4716 pad in new build, link is as folows.

http://www.megaupload.com/?d=D9G21G3S

Still waiting on the info for the HRAP EX and I'll include that in a new build.

Enjoy :)

Quick question: Datel Arcade Pro, 2/X/A Button not working!

$
0
0
I'm new here, hi all!

That being said, recently my Datel Arcade Pro started to become faulty by randomly ignoring button input from (especially) the lower-left buttons, sometimes the upper as well. After some looking around online, it became clear that stock buttons were garbage and that I was better off with quality Sanwa/Seimitsu parts.

So instead of buying a new stick, I bought a set of Sanwa buttons and the JFL joystick and followed a similar stick's guide (Mayflash) on YouTube to mod this one instead. After some hours of scraping, cutting, and soldering I got all parts in fine but for some reason the 2/X/A button doesn't work! All other buttons and the JFL joystick work fine (like a breeze of silk compared to the stock parts, as expected).

I checked all buttons/contacts of the PCB with a multimeter to see if inputs are received and none overlap, and they're all fine. Which probably means the problem lies somewhere further in the PCB circuit.

Could anyone with experience on this particular stick clarify if this means the PCB broke and I'd need a replacement?
Or could there be anything else causing this problem?

For reference, here's the modded stick I'm talking about:

moddeddatelarcadestick.jpg

Injustice: Gods Among Us Battle Edition Arcade Stick

$
0
0
EDIT: 4/15/13

Kaihong was nice enough to offer detailed pics & dissection starting with this post:

http://forums.shoryuken.com/discussion/comment/8091923/#Comment_8091923

Details:

Case material: Plastic with spray on (?!?) soft rubber matte black texture & thin foam bottom panel. Clear top panel is plastic. There are no metal panels. Also has a detachable 10+ feet USB cable.

Artwork: Heavy duty cardstock underneath the top panel.

Components: All Qanba-based (Omron microswitches for the joystick lever just like in a Sanwa JLF) with individual button & joystick lever LED's. Black bat-top & clear shaft cover.

Weight: ~3.5 - 4.0 pounds.

Modding: Hex screws on the top panel & Phillips screws on the bottom panel. Will fit both Sanwa & Seimitsu 30mm buttons & ball-tops.

Additional features: Two options for the LED's (on & pulse aka vibration as there are no vibrating motors). Lockout of Start, Select/Back & Home.

FWIW, the game developers are the same one's that did MKvDCU & the MK-series. Just like the previous PDP MK sticks (TE & Klassic) surprisingly, it has excellent fit & finish. This Gamestop exclusive bundle is for the PS3 & 360 but not for the WiiU (the mention of this in their PR is an error they retracted).

http://www.joystiq.com/2013/01/15/injustice-gods-among-us-hits-april-16-batte-edition-revealed/

PS3:

http://www.gamestop.com/ps3/games/injustice-gods-among-us-battle-edition/107664

360:

http://www.gamestop.com/xbox-360/games/injustice-gods-among-us-battle-edition/107663

2812301-igau_battle_edition_ps3.jpg

2812503-screen_shot_2013_01_15_at_9.44.03_am.png

Edit 2 (4-8-13): Credit goes to forum member, DirtyLary:

BHW_jisCIAAE2HC.jpg:large

From here: http://twitpic.com/ci0g1k

Credit goes to forum member, butteroj:

902171_401613656603479_1229438028_o_zps6c505346.jpg

Credit goes to forum member, LiQuiD[EViL]:

dcbfrb.jpg

Qanba Q1 Cut Question

$
0
0
Does anyone know how difficult it would be to replace the buttons and/or stick on this thing with quality parts? I don't mind soldering and wiring but I absolutely don't want to drill/route/grind/file etc.

Some might suggest I just get the Q4. The thing is it costs twice as much, I don't need Xbox, it doesn't look as nice IMO and it doesn't have the desk clamps.

Screw terminal blocks

$
0
0
I recently purchased a piiwee board from toodles and would like to put some 2 position screw terminals on it. I bought some 5mm spaced ones from RadioShack but the pins are a little bit to far apart to fit into the board. I measured the distance from the center of one hole to another and it was basically 1/8 in. Which is roughly 3.175mm but i can't seem to find any screw terminals that are that size. What size/spacing do I need to purchase?

Lack of Seimitsu products?

$
0
0
You know it seems pretty odd to me that it is almost unheard of for the mass market arcade sticks to be offered with Seimitsu parts. You would think Hori or MCZ would release modern versions of their arcade sticks with Seimitsu parts. I guess the same could be said for Korean parts such as Fanta/Crown. I know Hori once produced the EX-SE model for the X360 that was full Seimitsu but that is a non-common ground stick based on the older HRAP body. I do hope that a competitor in the market steps up with a fully Seimitsu or fully Fanta/Crown arcade stick. I guess the same can be said for Happ/iL albeit to a lesser extent.

I gave my cousin my old EX-SE a while back and I must say, people really sleep on Seimitsu, they produce very good parts. I was thinking of building a Seimitsu unit with a more mod friendly and modern design, I just find it weird that they are so completely ignored.

Mad Catz ECTV Sale! $80 FightSticks + Tons of Savings!

$
0
0
Mad Catz ECTV Sale! $80 FightSticks + Tons of Savings!

Mad Catz is a proud sponsor of this weekend's East Coast Throwdown V!

We also have some AMAZING deals just for this event! Make sure you check them out! You can see all the deals/coverage for this weekend here: http://www.madcatz.com/throw-down-with-mad-catz-at-ect-v/

DEAL NO. 1 – $20 OFF SELECT FIGHTSTICKS! USE CODE ‘ECT20′ ON…

MCZ-Video-Slide-1920x1080-A.png

MCZ-Video-Slide-1920x1080-E.png

For North America (US & Canada) customers! You can get the Major League Gaming or the SOULCALIBUR V FightSticks for just $80! That’s a 50% savings from the original price! Enter coupon code ‘ECT20′ at checkout to save $20 OFF the following:


Don’t forget! These are while supplies last and this promo ends on May 21!

DEAL NO. 2 – $60 OFF SELECT FIGHTSTICKS! USE CODE ‘ECT60′ ON…

MCZ-Video-Slide-1920x1080-C.png

MCZ-Video-Slide-1920x1080-B.png

MCZ-Video-Slide-1920x1080-F.png

Another great promo code for North America (US & Canada) customers! Massive savings of $60 OFF some of our best products! Enter coupon code ‘ECT60′ at checkout to save $60 OFF the following:

Don’t forget! These are while supplies last and this promo ends on May 21!

While you’re at it, be sure to check out our newly launched range of apparel, Mad Catz Game Hard Wear! As seen below…

MCZ-Video-Slide-1920x1080-D.png

Thanks for checking out the deals!

Is there anyone making plexy or wooden cases for IL parts?

$
0
0
Everything I can find is only for japanese parts. I'm not really an skilled person and I'm having a serious sortage of free time, so I would love to have something like those tek-innovations cases for IL parts.

** Akihabarashop.jp is now OPEN **

$
0
0
Akihabarashop.jp is now OPEN!

Now, some prices seem high and some low but what you get when you buy is 100% fresh parts from Sanwa/Seimitsu and not "old" stuff from secondhand dealers. All orders are shipped from Japan directly to the customer.
If you have any questions then feel free to post them in this thread and I try my best to answer them.

Arigato :).
AkihabaraShop.jp


***Disclaimer***

Akihabara Shop is not responsible for packages lost or damaged during transit. We will always take a photograph of your order before shipping out, but when it is shipped it is out of our hands. We cannot be held responsible for customs or other local taxes imposed when a parcel reaches its destination, please find out what applies to your country before ordering.

*Other*
Sanwa and Seimitsu Catalogs:
http://www.akihabarashop.jp/catalogs/Sanwa1011.pdf
http://www.akihabarashop.jp/catalogs/Seimitsu2010.pdf

The Beginners guide to planning a Mod like a Pro

$
0
0
The Beginners guide to planning a Mod like a Pro

I decide to make a quick guide to help potential modders build their projects.
Veterans feel free to add any info or correct my own. Please note I will go back and edit the content of this guide as time goes by.

To you beginners, before starting ANY project their are 3 things you need to consider.

*Your Goal to Accomplish
*Your Budget
* Your Skill Level

Skills:

Find out what you need to know. shoryuken.com forums has a wealth of guides, FAQ and tutorials, use them. Use the Search function here, and find the guide you need and read though all of it. Read though all of slagcoin a few times (its recommended reading here on the tech talk board). Search the web for any additional info, including how other people did their builds. And if you still lacking information do not be afraid to ask.

Reference links
There are many others, but I think I hit up the main topics for "how-to". (Under Revision)

After this point you might want to practice what you learn till you feel confidant enough to go ahead with your project. Example for soldering find a scrap preff board or old PCB to practice on.

Goal(s):

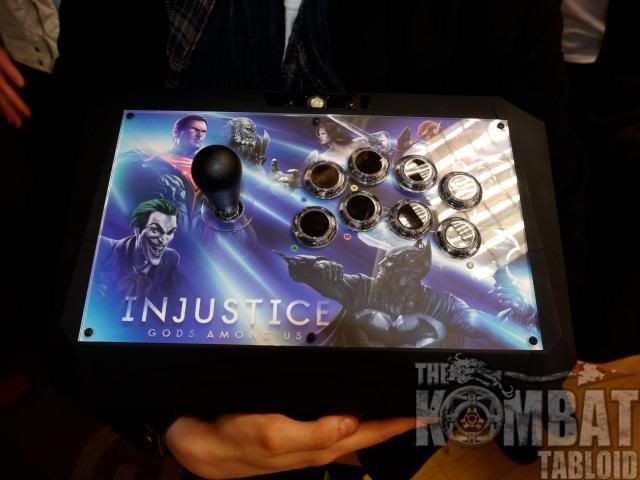
What is your goal, usually with SRK members its to build/ mod a arcade controller or related item. If your goal is to just have a arcade stick you can accomplish that with buying a commercial stick. But if you have any plans of customization, repair or to teach your self/ challenge/ fun of doing so you first need to set some goals and what you want out of your stick.

Step 1:Identify your final goal. Lets say making a 6-8 button arcade stick.

Step 2: plan out how your going to make this stick and what parts, materials and skills this will require and how you acquire these things. Make a list of what you need.

Example list ..
Joystick
*6 to 13 buttons depending on your design remember to include buttons for Start. select, home and if required a synch button (for wireless Xbox 360 builds)
*case and any case materials
*required disconnects, wiring harnesses, header connectors, pin connectors, barrier strips and the like.
*Wire (buy at least 1 foot more than what you will need)
*Your Printed Circuit boards
*system cable(s) and any connectors and passthoughs you need for the disconnects
**Your written/ drawn plans on what your doing (including a pattern for your button stick layout)
*Solder
*Electrical tape
Any tools you need that you do not already have.

If you are not Modding a existing stick , but building one from scratch make sure you have a lay out planed and drawn out. You later want to print an extra at full size as a template to where to drill/ cut for the case. I assume if your going with a pre-made case such as Art Hong's tek case or Foe Hammer case the layout is already provided.

Break your long tern goal into smaller short tern goals you can accomplish.
Example
1. get all materials and parts.
2. build case
3. Paint case
4. solder Xbox 360 pad to wires.
5. wire xbox 360 pad to 2nd PCB board (like a cthulhu, chimp , Dual Strike or what have you)
ect ect...

Budget:

Find out how much this will all cost (plus any shipping and tax) take that value and add 10% to the total cost, this will be your budget. Taking in consideration how much money you got already to spend. You be usually looking at $75 to $200 for your budget.

Tip 1: only buy the tools you need, when you need them, Don't buy RJ 45 crimmpers if you have no plans of using RJ45 connectors. Do not get a power saw and router if your not going to use them.

Tip 2: Do not order additional extra parts. You do not need 4 JFLs 3 PCBs and 56 push buttons. Order just what you need. What you can go extra on is consumable materials, wire, solder, crimp connectors, things that can be consumes easily especially if you make mistakes.

If you lack the money, you might have to buy a few pieces at a time, once a week or 2 till you have what you need. If this is still too much for you to afford, go back to your plans and see where you can scale back, this might mean skipping out on Kino's printed insert art and printing the image at home or going with a stock gate and springs for a joystick or removing extras like LED lighting.

Beginner Tips:

Take Notes. Like the Pros, always take notes. Have a piece of paper and a pencil or pen handy at all times.

Never ever trust someone else's identification for wire color in system cables. On various extension cords and system cords from various manufacturers, never trust the wire colors to identify pins on the cable connector. The colors of the wires change from product to product and manufacture to manufacture. Use a multi-meter or other continuity tester to test out each wire for its correct pin number. As you test, write down your findings. I once had a USB cable that did not use "standard colors", the colors were red for VCC (+5 V), brown for data -, yellow for data + and blue for ground.

If possible use multiple colors of wire. This is to color code your wires for your work.
if multiple color wire isn't possible use bits of different color shirk wrap, tape or some other indicator.

Alternatively use small labels on your parts/ wires. If you do not have any parts that are see-though go ahead and write on the inside of your case or use post-it notes to label what goes where.

Always make you Projects where you can dissemble your work if you need to go back a step or repair. This means using screws (or other fasteners such as latches) instead of gluing a case shut. Use quick disconnects, barrier strips, pin connectors headers and the such on your wiring so you can undo your work with out unsoldering or cutting anything. Leave the the LETS SOLDER EVERYTHING mentality for the few elites who "know" they can get away with this. Terminal strips and disconnects are our friends.

If you have to hack a pad, cable or connector, always go 1 wire at a time.
1. so that you keep track of what wire/ component your on.
2. if you got to back track, you only have to undo 1 wire instead of possible dozens
If you modding a cable or ribbon cable, cut, and mod only 1 wire at a time and test to see if the cable still works. Sometimes the different properties in a wire can effect how the cable works.
3. Do not leave the soldering iron for too long on a button pad or a trace of your controller PCB. Too much heat can lift pads, solder points and traces right off the board.

Always test your game pads you going to hack before you disassemble. Nothing is worst than having a broken pad PCB and not knowing till too late. Do the same for PCB kits such as the PS360, Cthulhu and other devices to see if they work.

Before cutting at or soldering to a Controller PCB, test for common ground if you are going for a common ground project. I already have 2 extra PCBs I can't use because this over sight.

If you have a digital camera, take pictures. This is not just for later to show off, but also to document what you are doing and how pieces fit together.

And remember, take you time. if you get too frustrated, take a break and come back when once your head cools off.

HBFS-30 All New Arcade Button~Update: 12/11/2012

$
0
0
Hi! Game geeks! I am Pei, a FTG Gamer. I would be honored to introduce you the ALL NEW BUTTON of Arcade Stick----"HBFS-30".
onepice.gif

I play FTG about 20 years.
So recently I play SSF4AE.
In fact, I prefer non-mainstream fighting game. (^_^)
Although my fighting skills are not the best,but I have been very interested in the custom Arcade Stick.

The reason for the development of "HBFS-30".
Because I played Street Fighter one night last year, and play too excited.
One thing people would be aware , beat the button(SANWA OBFS-30) in the excitement, the sound is very loud.
The noise by beat the button, completely disturb the sleep quality of the finance minister of my home.
Immediately condemned by my wife !
After that, I know if I do not solve this problem, one day my Arcade Stick will be blocked.
Therefore, I started looking for ways to get the button to be quiet.

After several experiments; Finally, I get the two methods.

1.Replace the micro switch:
I found Cherry MX micro-switch(redstem) is more sensitive than the the SANWA micro-switch, only 45g operations force. And longer life. In the specification, like the high-end the SANWA RG button.
With Cherry MX has many different characteristics of the micro switch, like the keyboard replaced in accordance with customary.
4switch-002.jpg
ComparisonChart.jpg

2.Add the cushion:
I redesigned the internal structure of the button, eliminating the impact of beat button parts, to avoid the noise.
and HBFS-30 with a high specification sound-absorbing pad, further reducing the noise generated.
showGIF01.gif
[media=youtube]D2VddzbzSvo[/media]

Please refer some posts of my research process.( in Chinese ^_^)
Cherry MX in OBSF-30, beyond the RG?
Silencer button R & D experience
CherryMX button Part II ---- test for the prototype Beta V1.0

If HBFS-30 makes you feel excited, I sincerely invite you to finance HBFS-30 production plan.
The HBFS-30 has developed and made using in, which shows its well function and stable performance.
Now, we are raising amount of funding for HBFS-30's production plan on Indiegogo.

To thank you for your full support and funding, we will provide you the highest priority and the most favorable commodity pre-order in accordance with the amount of your funding. When the funding plan is completed you will be the first to get our first batch of production HBFS-30.

HBFS-30 THE ALL NEW ARCADE BUTTON WITH CHERRY MX KEYSWITCH
Vewlixclose600.jpg

Our goal is $ 8,000.

This project is "All or Nothing" - if we don't meet our Goal, we can't produce and send out the HBFS-30 (your contribution will be refunded). So, please get your friends involved!

Thank you for your funding!!

If you have any questions,ask your questions here.^_^


2012/08/07 Update
Hey Guys!
We got HBFS-30 actual test from Taiwan players.
and sound comparison with OBSF-30.
Check it !
[media=youtube]BYw8twGxjv8[/media]

2012/08/11 Update

Hi, guys.
We have an important update.
You must check it!

We canceled QUICK CONNECT WIRE.
And We try to do something better.
HBFS30_socket.gif
Therefore, we design a new Adapter socket for the Cherry MX a switch.
Through Adapter socket will be easier to install and to replace HBFS-30.
It is compatible with existing female terminal.
You do not have to change your wiring system.
Replace HBFS-30 just like replace a new OBSF-30.

If you have to participate HBFS-30 fund-raising, or you are planning to join.
We will not charge you any extra fees.

But Adapter socket has really raised our production costs.
So we will raise the MSRP of HBFS-30, after the fund-raising.

Now join the funded Campaign is most favorable.
Please share it to your friends!

Finally,
Because an Adapter socket is equal to 2 Quick Connect Wires.
Therefore, we adjusted the contents of Perks.

The Novice:
15 Quick Connect Wires > 8 Adapter sockets

The Professional:
20 Quick Connect Wires > 10 Adapter sockets

The Master:
30 Quick Connect Wires > 15 Adapter sockets

The Monster:
120 Quick Connect Wires > 60 Adapter sockets

You Akuma !!:
250 Quick Connect Wires > 125 Adapter sockets

socket01.jpg
socket02.jpg

Thanks for your attention!
I hop you will like it !! ^_^
If you want to change anything, please send me a message.

Painting the Fightstick (With Krylon or Vinyl Dye)

$
0
0
Edit: Feel free to post your painted SE/TE or whatever project in this thread. Provide tips on your experience or any questions. If ya mess up, it's cool cuz then maybe someone can learn from your mistakes like I hope others learned from mine. Let us know what you did, what paint you used and anything you learned from it. :tup:

Krylon Guide
http://pages.videotron.com/thief/

Vinyl Dye Guide
http://www.gideontech.com/content/articles/202/1


Spraying my Madcatz Fightstick SE down now. 90% of the entire thing perfect. Looks beautiful, except for three drips side by side on the front of the case. All the guides say they will eventually vanish, these pooled up and dried like that. Now the drips themselves are darker than the rest of the work, and are very noticeable. I do not think they are going to vanish on their own.

Sanded it down with 800, then 600 grit as I would with regular spray paint and respraying does nothing. It's so much darker than the rest of the work that it's totally visible. Kind of dissapointed in this stuff. (Krylon Fusion)

Spray paint, when sanded down, at least covers up when resprayed. This stuff won't. Not as "simple" as everyone raves about it. The stuff is so thin I can still see the lettering on the plastic. I thought it'd be a little more effective at painting than this. 4 coats of it and it's as if the last one wasn't there.

What can I do?

Edit: Apparently Krylon Fusion is NOT Vinyl Dye. Like 3 different places on this forum set you up to think so, but it's not. I just ruined the damn case. All Krylon is is a Vinyl Dye wannabe. Regular paint that adheres to plastics better. No wonder the damn drip didn't "seep" into the plastic.

Let it be known here, that Krylon Fusion, regardless of what the guy at the damn auto parts store tells you, is NOT vinyl dye. Why is this topic so unheard of with people? I went to three different auto parts stores, and did searches on many forums and everyone reccomended Krylon as Vinyl Dye, when it's not. Now I can't use Vinyl Dyde ever, ever, ever on my case cuz it's been painted on.

Maybe this thread will be of use to someone. I got sanding to do. -_-

General Troubleshooting & Repair Guide

$
0
0
The purpose of this guide is to cover common and basic issues with Arcade sticks, how to find and spot the issue and repair the arcade stick. This guide doesn't cover all situations or pacific brands or PCBs.

For a particular board I would direct you to that board's thread and read there.

Okay your Stick do not work as it should, what will you do?

Step 1: First off calm down and approach the issue rationally. Being angry and flustered helps no one.

Step 2: Identify the issue. What is wrong with your stick? Not responding, broken button, direction on the joystick not registering?

Step 2B: Is your stick NEW or OLD. If you have a new retail/ commercial stick this would be the time to take advantage of the manufacturer's Warranty. If this is a Custom stick please contact your stick builder. Please note individual custom stick builders (usually)do not offer warranties and have no obligation to help, especially if you get angry with them. Please give stick builders a few days (aprox 7 days) to contact you to sort the issue out.

Step 3: This is if you are repairing the stick your self, once you identify the issue you need to go and trouble shoot the problem.

Step 4: Repair

Step 5: Recover. This includes reasembily and any finishing touches. If you working on a Computer you be uninstalling programs and apps you installed to make a fix (like mal-ware removal tools, cleaner apps ect).


Also All repairs can be broken down in 4 steps so, this applies to anything including PCs, Cars, Medicine, air craft ect...

1. Diagnose the device
2. Assets the problem
3. Repair
4. Recover


Tools Needed:
  • Screw drivers Both Phillips and flat head, depending on the stick you need multiple sizes.
  • The correct bit to open the top and/or bottom panels of your stick, this might include hex keys or some security bit to loosen these screws.
  • Paper and Pencil, you will be taking notes
  • Multi-meter or continuity tester. Preferably a Multi-meter, although for some test a continuity tester works too.
  • Needle nose pliers
  • Wire cutters, Wire Strippers and Crimpers. These can be separate tools or a all-in-one tool
  • A Digital camera. To take images of your stick, use this prior to disassembly.
  • Soldering iron, solder and soldering accessories.
  • Electric tape (not masking tape, gift wrap tape or duct tape) or shrink wrap tubing.
List of known malfunctions and possible causes.

Non working Arcade stick
  • Is the stick plunged into your game system and the game system turned on?
  • Is your stick set to the correct player? Player 1, Player 2 and so on.
  • Is the stick the correct controller for that system? For Dual Mods is the stick set to the correct mode? This applies to Automatic, Button presses mode changes as well as DPDT switch Dual-Mods.
  • Are you using your Arcade Stick with a PC? What Chip set you have on your mother board? Are the Drivers Installed?
  • The controller cable is damage or disconnected (on most modern sticks this is a USB cable)
  • The Printed Circuit board is disconnected or damaged.
Non working push buttons.
  • With the stick plugged into the CORRECT system and the system is on?
  • Is your stick set to the correct player? Player 1, Player 2 and so on.
  • is the wires to the push button/ push button micro switch are connected properly to the wiring and that wiring to the PCB?
  • Remove the push button, using the 2 exposed wire ends or quick disconnects, will the button signal respond when the 2 wire ends touch?
  • Does the button show Continuity when the button is pushed?
  • Comparing to a working push button do you see a High or Low change in the voltage on that button's line?
Non-Working Joystick.
  • With the stick plugged into the CORRECT system and the system is on?
  • Is your stick set to the correct player? Player 1, Player 2 and so on.
  • Is the stick selector set to "LS", "DP" or "RS", Set it to the correct setting, usually this is DP on consoles.
  • Is each of the four cardinal directions, Up, down , left and Right responds?
  • Do the four corner directions respond?
  • If you have a 4/8 way gate (usually square) is the gate set to 4 way or 8 way play.
  • Do you have a 2 way gate?
  • Is your wiring harness is plugged in correctly and in the correct orientation. its common for the stock wire harness for some sticks (specially the TE) to be installed upside down.
  • Does the Microswitches show continuity?
  • is the wires/ wire harness to the joystick/ joystick micro switches are connected properly
  • Is the wires/ wire harness is connected to the correct way? No backwards wire harnesses or wires connected to the wrong switch?
jdm714 wrote:
Darksakul, when people say that their Directionals lag, it is usually because LS.
When people say the Joystick one day just die, it is usually RS.

Building my first custom Arcade Stick, Hoping to get some advice

$
0
0
So I decided to go ahead and build my first custom arcade stick. I found a nice tut here with tons of info that I've been reading up on: http://www.slagcoin.com/joystick/example2.html
I'll be going for that basic design.

So it looks like my ingredients will be:

1 SANWA JLF-TP-8YT JOYSTICK from focusattack.com
1 SANWA LB-35 MESH BALLTOP from canadian joysticks
10 30mm face buttons (8 face + start and select)
8 UILA RGB 5VDC LED LAMP
1 Cthulu MC PCB from focusattack.com
1 SPARKY PWM SMD LED CONTROLLER PCB from focusattack.com

~15' 20(?) AWG Insulated Wire
~30 Various Connectors
Probably will be using screws on the butt joints
The basic measurements for the materials:

(planning on making all wood MDF)
1 12" x 8" x 3/4" Wood
2 12" x 8" x .093" Acrylic Glass
2 8" x 1-1/2" x 3/4" Wood
2 8" x 2-1/2" x 3/4" Wood
1 10-1/2" x 1-1/2" x 3/4" Wood
2 13-1/2" x 2-1/2" x 3/4" Wood

SO...
My big questions are:

1. Where can I get some buttons that will look good with the Uila installed in them? I need the buttons to be screw-in I assume to work with the tutorial I am basing my stick off of. (I'm really uncertain if I even need screw-in) I have been having a lot of issues trying to find buttons that are clear(or at least similarto something like the seimitsu-ps14-k) and screw in; any suggestions?

2. Does it matter what gauge the wire is or is it safe to stay between 20-26 AWG?

3. Does anyone know of a good controller converter from PS3 to 360? I saw the chronus usb solution and was wondering if anyone had tested using it instead of going with the imp and 360 controller pcb.

4. Do you have any comments about the materials I am using, from the wood to the stick or any other comments or advise? Do not know much about different joysticks so I went with the standard looking one from focusattack... T_T such a noob...

This is my first post guys, thanks for the help in advance!

Fixing the street fighter 4 standard edition fightstick

$
0
0
So I've had this problem for a while. My sf fightstick has issues with the corners. Every time I try to jump by using one of the corners sometimes ill jump others ill do nothing and its been bugging me. So I know my options are basically get a new fightstick entirely and replacing the part but just trying to see if there was maybe a remedy for this. If not ismit better to sell it and buy a different one or just replace the stick

Hori and mad cats soul calibur 5 fightsticks. Which is better?

$
0
0
So my friend and I are looking to invest in fightsticks. We are both fairly new players but ready to learn/ love to waste money. We are trying to between the hori and mad catz soul calibur 5 fightsticks and just trying to see which is better in the long run. Is the hori worth the extra price or should we just stick with the $100 mad catz ? Any help deciding would be appreciated. If you need any more info just ask

Help Needed! TE Stick on Mac OS X

$
0
0
Hello

I am trying to get my TE fightstick to work on Mac OS X and have tried the .kext at http://tattiebogle.net/index.php/ProjectRoot/Xbox360Controller/OsxDriver but nothing is happening.

I have researched and read that the plist may need updating but when I go into System/Library/Extensions there is nothing there but apparently it should have a folder titled 360controller/etc etc.

I have installed it many times for the different versions but have come up with no solution. Any advice would be greatly appreciated.

Cheers

First time psx padhack! Quick question

$
0
0
So I am making a padhacked stick using a ps1 pad- the shell and wiring are from a Madcatz TvC stick-

my question is whether or not i can just solder to the pcb directly from the ribbon cable from the punchdown or if I have to use a daisy chained ground and solder that to the pcb in addition to button connections.

Also if anyone knows the wiring for the ribbon from the punchdown itd be a huge help!

If anyone has any insight i would really appreciate it! can provide pics if necessary!

Building my first arcade controller - some questions

$
0
0
I'm going to make a hitbox-like controller (keyboard player for a long time myself).
I will build case myself out of wood.
I'm going to buy these http://www.aliexpress.com/item/20PCS-of-Copy-Sanwa-OBSF-30-Push-Button-for-Arcade-Game-Machine-game-machine-parts/718536634.html OBSF-30, are they even legit Sanwas?
What PCB can you recommend? Cthulhu is kinda pricy (almost 50 pounds), with shipping Dual Strike will be almost the same (I'm im UK now). I have Saitek pad compatible with PC and PS3, it can be plundered for PCB, and I don't mind soldering, but I have no idea where to solder. This one should http://www.aliexpress.com/item/Arcade-Game-Controller-USB-Interface-PCB-Kit-for-PC-MAME-PS3-to-Mame/891924080.html work for PS3 / PC games, right?
Besides this and some wires, do I need anything else to make a controller? Like some special housings or whatever?

Street Fighter X Tekken Arcade Fightstick V.S.

$
0
0
88387_SXT.jpg

it can also be connected to a 2nd one

VS_connector_kit.02.jpg

like that


it looks really good but the $200 price tag kinda scares me.
Viewing all 8072 articles
Browse latest View live